
Waiting for Spring
For a Portuguese, Danish, Italian, German and French translation, click on the flags.


For this tutorial you will need the materials in the zip file below.

You will need Animation Shop and SqirlzReflect programs for this tutorial.
You can find a free Animation Shop program HERE
You can find a free Sqirlz Water Reflection program in the Materials or download it from HERE
I would like to thank and give credit to the wonderful work of tubers Irene for the birds tube and Marif for the trees tube
Use the bookmark below to mark your place along the way.

This tutorial was written using PSPX2 and it is assumed you have a working knowledge of PSP. Let's get started and have some fun!
1. In PSP open the trees tube, the birds tube and make copies and close originals.
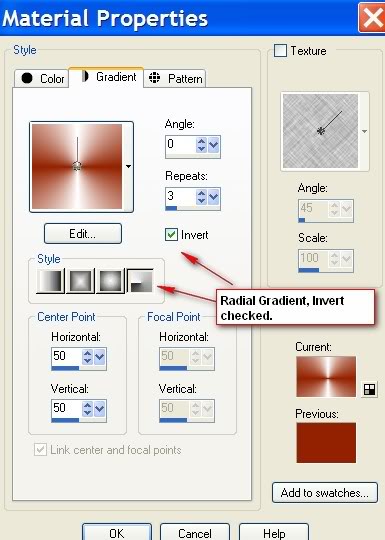
2. In your Materials palette, set your foreground color to #932200 and your background color to #ffffff. Set to Gradient, Radial, Angle on 0, Repeat on 3. Invert checked.
3. Open new transparent image 762px Width X 562px Height. Flood fill with Gradient.
4. Effects/Graphics Plus/Cross Shadow, set all at 50 except the bottom one at 128.
5. Adjust/Blur/Gaussian Blur set at 12.
6. Open trees tube Marif_2007_10Ocotbre_misted_pasages078, copy/paste as new layer. Pull toward the top a little.
7. Open bird tube DI_1300. Copy/paste as new layer. Image/Resize by 95%, All layers unchecked. Duplicate, merge down. Move down toward bottom a bit.
8. Close off all layers except bottom layer. Highlight the bottom layer.
9. Effects/Filters Unlimited/Buttons&frames/3-D Glass frames2, settings of Frame size at 12 and Contrast at 128.
10. Selections/Select All. Selections/Modify/Contract by 12px. Selections/Invert.
11. Effects/3-D Effects/Drop Shadow Vertical 2, Horizontal 2, Opacity 100, Blur 4, set at color #31251f. Right click top of image and Copy. Paste in PSP workspace as New Layer Image (Border Image). Selections/Select None on main image/minimize.
12. Open your newly created Border Image. Open BrockScript and minimize it. On Tool Bar choose Text tool. Using background color #ffffff, BrockScript set at Size 48, sign your work using Vector Layer. Convert to Raster Layer. Using same Drop Shadow effects as #11, put a drop shadow on your signature. Merge/Merge Visible.

13. File/Save As Animation Shop.psp file, name it Border in your Waiting for Spring folder.
14. Highlight your main image, open all layers and Merge/Merge Visible.
15. Tool bar/text Tool, BrockScript, change setting to 72, Create as Vector, write Waiting for Spring at the top of your image. Convert to Raster Layer.
16. Effects/3-D Effects/Drop Shadow of Vertical 2, Horizontal 2, Opacity 100, Blur 4 and color #31251f. Merge/Merge Visible. File/Save As .jpg file in working folder.
ANIMATION OF RAIN AND PUDDLING
17. Open Sqirlz program. File/Open your main.jpg file you saved in working folder.
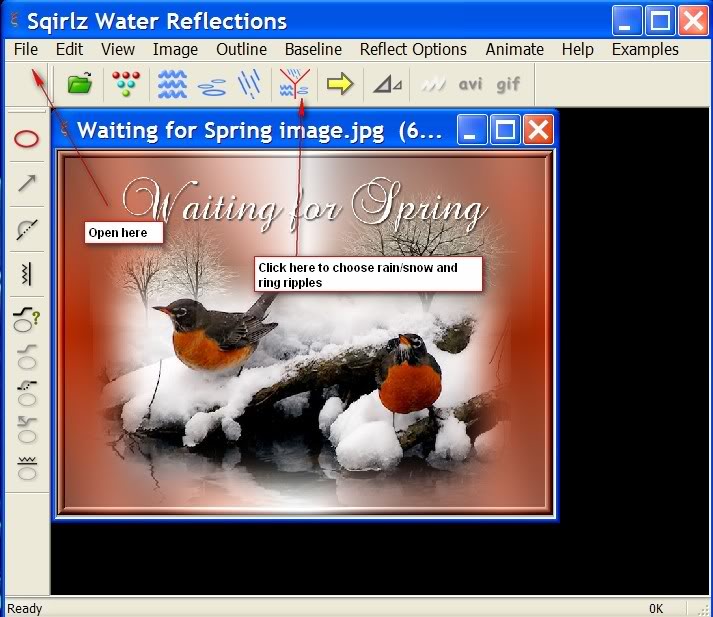
18. Choose depiction of water/rain/ripples from Sqirlz toolbar by checking the big Y.
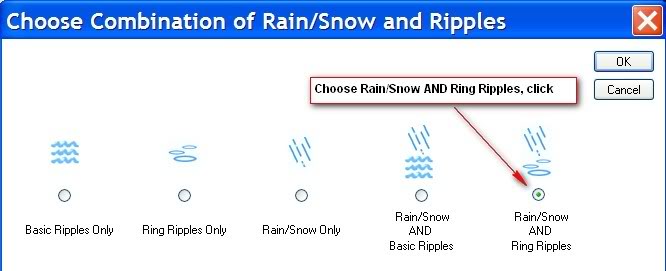
19. Next, when the appropriate box opens, choose the rain/snow and ring ripples by ticking the small circle (far right side).
20. From Sqirlz toolbar, choose Outline and in the dropdown, click Begin. Using your mouse, left click all around the area at the bottom where you would like to see ripples. Keep clicking to go around corners. Get close to the sides but not into borders. When you reach the point of where you started, right click and you will be ready to check your animation.

21. From the Sqirlz tool bar, click the Yellow Arrow to view your animation. If it is not pleasing to you, go to Outline/Edit and try animation again. Note: Click on the Reflect Options/Customize Ring ripples to set your transparency to 100 for a nicer look to the water. Play around with the settings if you like till you are satisfied with how your rain and puddling look.
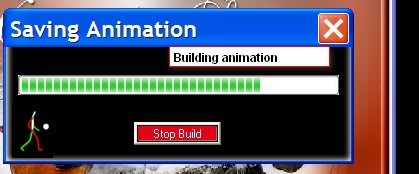
22. When you are satisfied with it, Click on the Gif option to save it. When the first box comes up, click OK. Choose where you want to save it (your working folder) and name it. You will see it saving like the examples below.
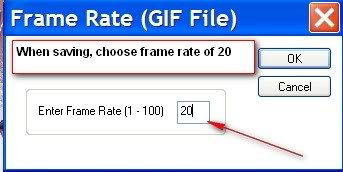
23. When a box shows up that gives you the option of a frame rate, set it to 20
ANIMATION SHOP DIRECTIONS
24. Open Animation Shop. File/Open your saved Main.gif image. Notice it has 20 frames to it. Scroll it smaller if need be to view it. Highlight the first frame by clicking on it, Edit/Select All.
25. Edit/Propagate Paste (VERY IMPORTANT!)
26. File/Open your Border frame. MAKE SURE YOU ARE WORKING ON THE BORDER IMAGE.
27. Go to top on blue bar of Border and right click/Copy. It will stay copied till you need it.
28. On your main image, INSIDE the FIRST frame, right click Paste/Paste into Selected Frame. Being careful not to let go of your mouse, place the Copied Border exactly over the border of the main frame, then left click mouse when in position. All of your 20 frames should have the Border on them.
29. Go up to the top of the Animation Shop tool bar and click the Animation and watch your rain come down and puddle inside the Border!
30. Click on Animation/Frame Properties and set the frame rate at 15 to slow the rain. Run the Animation again to see if you are happy with the results. You can change the frame rate to get the speed of rain you want.
31. You are now ready to save your animation. Go to File/Save As. When the box comes up, name your animation, and direct it where to save it and click Next, Next, Next, and finish.
CONGRATULATIONS! YOU HAVE JUST COMPLETED A COMPLICATED ANIMATED TUTORIAL.
Thank you to my testers, Evatexas (now deceased) and PamelaD.
If you are going to use this tutorial for stationery, cards or place the tutorial/tag on another site, I would appreciate you contacting me for permission, giving Arasimages credit for the original tutorial and if possible, a link back to my site. Thank you.
Copyright © Arasimages All Rights Reserved