

I Love Red
For Portuguese, Italian, French and Danish translation, click on the flags.


For this tutorial you will need the materials in the zip file below.

You will need Plugins Sinedots II and Graphics Plus for this tutorial.
Unzip materials into a folder you have named I Love Red. Place Presets in your PSP Files/Presets and the GD-Wire.cfg in Sinedots II.
A big thank you to JHanna and Gerry for their beautiful tubes used in this tutorial. Please visit their sites listed on my Links page.
Use the bookmark below to mark your place along the way.

Open the tubes in PSP, duplicate and close originals.
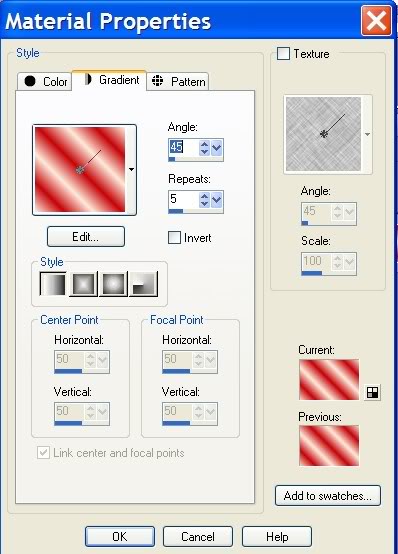
1. In Materials Palette, set foreground color to #fdeabd, background color to #c60408. Set to Gradient to Style Linear, Angle 45, Repeats 5, Invert unchecked.
2. New/New Image 762px by 562px. Flood fill with Gradient.
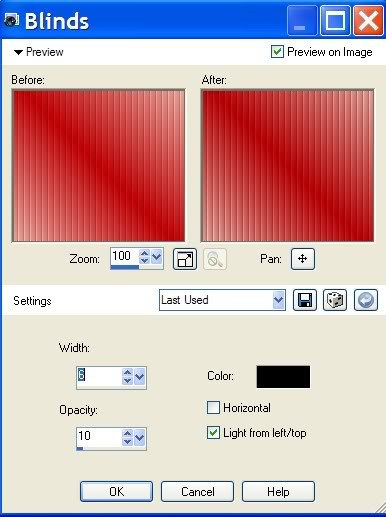
3. Effects/Texture Effect/Blinds settings as in example.
4. Effects/Edge Effects/Enhance.
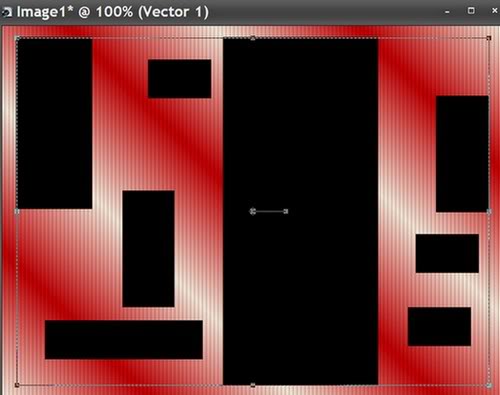
5. From Tool bar, select Preset Shape/all25 with settings as in example. From upper left hand corner, draw a rectangle similar to that which is shown below.

6. Convert to Raster Layer.
7. Effects/3-D Effects/Drop Shadow of Vertical 3, Horizontal -17, Opacity 50, Blur 21, color #000000.
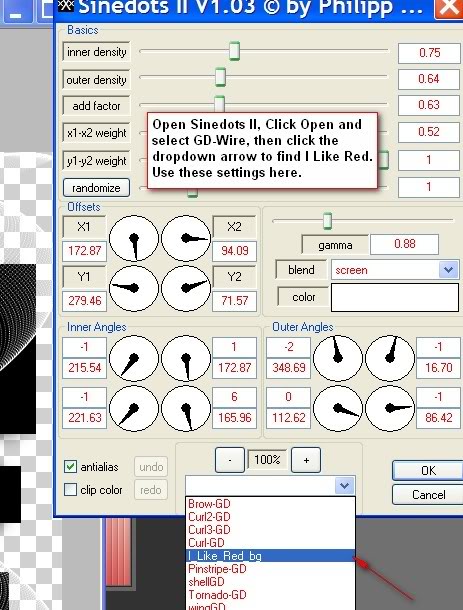
8. Effects/Dragonfly/Sinedots II/GD-Wire.cfg/I Like Red. Apply on image with a white Sinedot set at Screen.
9. Open pre-colored Gerry-bloemen18-fucia-16 tube. Copy/Paste as new layer.
10. Image/Resize/Resize by 80%, Resize all layers unchecked. Place in upper left corner.
11. Effects/3-D Effects/Drop Shadow, Vertical 3, Horizontal -17, Opacity 50, Blur 15, color #000000. Apply Drop Shadow again using Vertical of -3, Horizontal 17, all others the same.
12. Open Hanne-Girl 28 tube. Copy/Paste as new layer.
13. Image/Resize/Resize by 90%, Resize all layers unchecked. Pull to bottom.
14. Effects/3-D Effects/Drop Shadow, Vertical 3, Horizontal -17, Opacity 50, Blur 15, color #000000. Apply Drop Shadow again using Vertical of -3, Horizontal 17, all others the same.
15. Image/Add Borders/3px, Symmetric checked, color #000000.
16. Image/Add Borders/33px, Symmetric checked, color #c60408.
17. From Tool bar, select Magic Wand and click inside the 33px border.
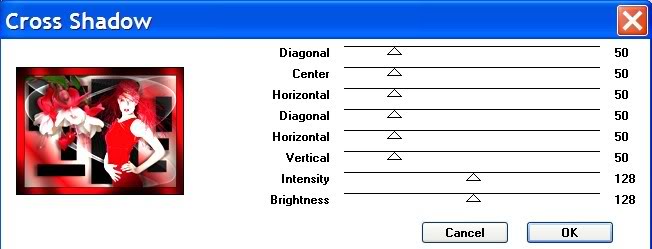
18. Effects/Graphics Plus/Cross Shadow, settings as in example below.
19. Selections/Select None.
20. Images/Add Borders/3px, Symmetric checked, color #000000.
21. From the Tool bar, select Text tool, choose font and size, Vector. (Mine is Scriptina, Size 60). Type I Love Red. Convert to raster layer.
22. Effects/3-D Effects/Drop Shadow, Vertical 3, Horizontal -17, Opacity 75, Blur 3, color #000000.
23. Sign your name in font of your choice or place your watermark.
24. Merge/Merge Visible. Save as .jpg.
A big thank you to my testers, Evatexas and PamelaD...love you dear ladies!
If you are going to use this tutorial for stationery, cards or place the tutorial/tag on another site, I would appreciate you contacting me for permission, giving Arasimages credit for the original tutorial and if possible, a link back to my site. Thank you.
Copyright © Arasimages All Rights Reserved