
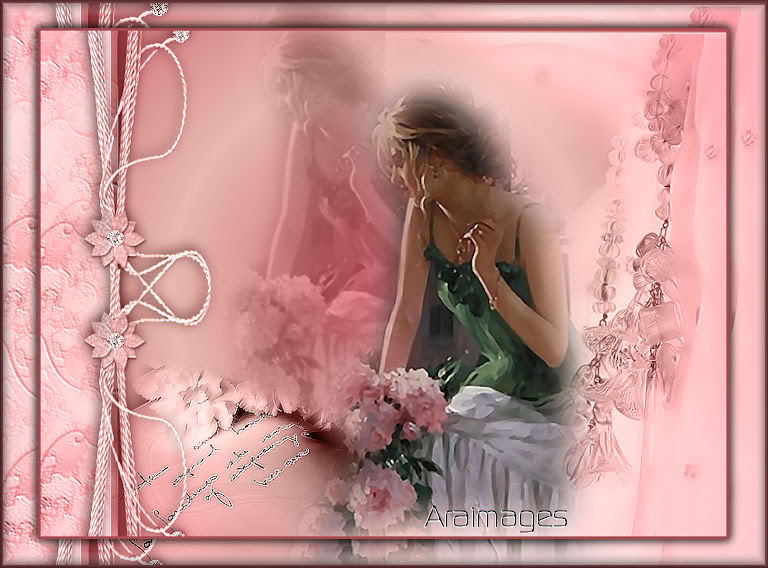
Love Letter
For Danish and German translation, click on the flags.


For this tutorial you will need the materials in the zip file below.

Unzip your materials into a folder you have named Love Letters.
I would like to give credit to the tubers who provide us with a wealth of beautiful tubes to work with. Their links can be found on my Links page. Please visit their sites. If any of the tubes in the materials are yours and have no identification, please let me know and I will be happy to link back to you. Thank you.
This tutorial was written using PSPX2 and it is assumed you have a working knowledge of PSP. I hope you enjoy this tutorial as I have enjoyed creating it for you.
Use the bookmark below to mark your place along the way.

1. In Materials Palette, set the Foreground to #e8b8b0, the Background to #c75e68. Select Gradient, Style Sunburst, Angle 0, Repeats 1, Invert checked.
2. New/New Image 762px by 562px. Flood fill with Gradient.
3. Open Marif_2006_October_Misted tube of curtain. Copy/Paste as New Layer. Move to right side of image. Set Blend Mode to Luminance (Legacy), Opacity to 80.
4. Open Sorensen_Designs_Mist_Feb105-10 tube of lady. Copy/Paste as New Layer. Move slightly to right and down.
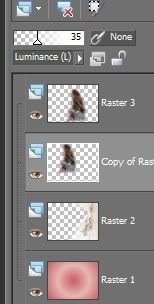
5. Right click on Raster 3/Duplicate. Close off Raster3.
6. On Copy of Raster 3, Set Blend Mode to Luminance (Legacy), lower Opacity to 35. Image/Resize by 90%, Resize All Layers unchecked. Move her upward and to left.
7. Pull Copy of Raster 3 below Raster 3. Open and highlight Raster 3.
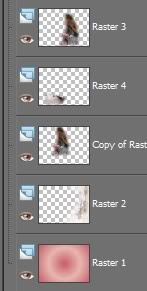
8. Open lettre_02 tube. Copy/Paste as New Raster Layer on main image. Place at bottom left, close to flowers of lady so they blend together.
9. Set Blend Mode to Luminance (Legacy). Pull lettre tube between Raster 3 and Copy of Raster 3. Highlight Raster 3.
10. Open Soliel_19_12_06_ruban_brisa lace tube. Copy/Paste as New Raster Layer. Pull over to far left, leaving only part of the lace showing. Set Blend Mode to Luminance (Legacy).
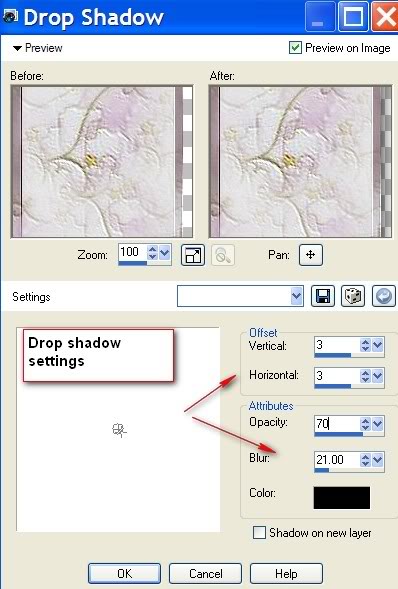
11. Effects/3-D Effects/Drop Shadow of Vertical 3, Horizontal 3, Opacity 70, Blur 21, color #000000.
12. Open Corde_diamont_tube_Colombe tube. Image/Rotate Left. Copy/Paste as New Raster Layer. Pull to left, overlapping lace a little. Set Blend Mode to Luminance (Legacy).
13. Effects/3-D Effects/Drop Shadow of Vertical 3, Horizonal 3, Opacity 70, Blur 21, color #000000.
14. Image/Add Border of 3px, using Background color #c75e68, Symmetric checked. Layers/Promote Background layer.
15. Right click on Layers/Duplicate. On Copy of Raster 1, Image/Resize by 90%, Resize All Layers unchecked.
16. On Copy of Raster 1, Effects/3-D Effects/Drop Shadow of Vertical 1, Horizontal 1, Opacity 84, Blur 12, color #000000. Repeat Effects of Drop Shadow using Vertical -1, Horizonal -1, Opacity 84, Blur 12, color #000000.
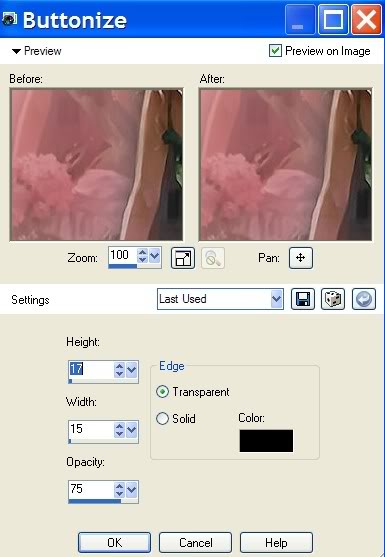
17. Still on Copy of Raster 1, Effects/Buttonize with settings of Height 17, Width 15, Opacity 75, transparent, color #000000.
18. Merge/Merge Visible.
Don't forget to sign your work with your name or watermark.
Save your work as .jpg file as Love Letter.
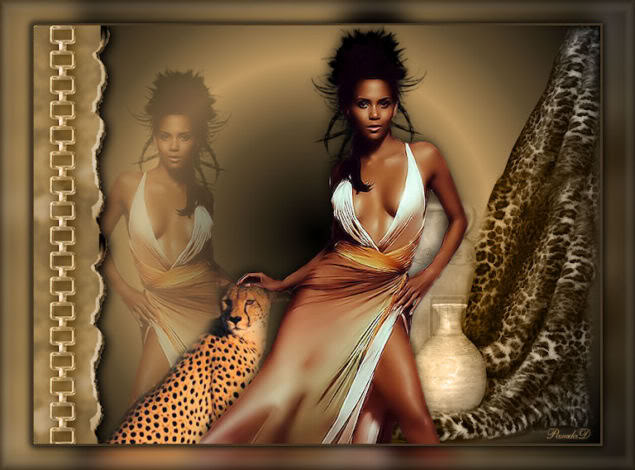
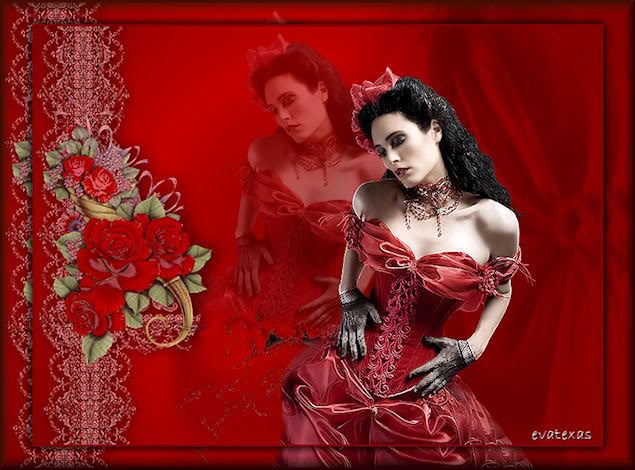
Thank you to my testers, Evatexas and PamelaD. Below are their versions of the tutorial using tubes and colors of their choice.
If you are going to use this tutorial for stationery, cards or place the tutorial/tag on another site, I would appreciate you contacting me for permission, giving Arasimages credit for the original tutorial and if possible, a link back to my site. Thank you.
Copyright © Arasimages All Rights Reserved