
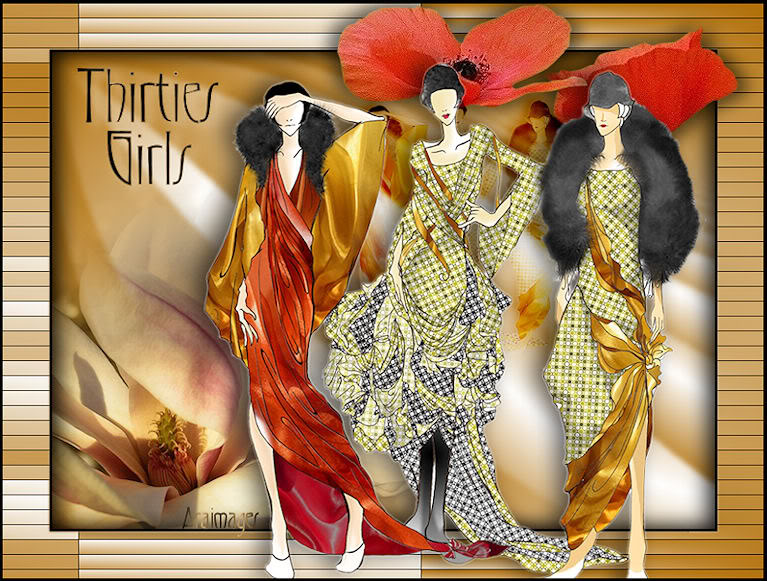
Thirties Girls
For Italian and Danish translation, click on the flags.


For this tutorial you will need the materials in the zip file below.

You will need the Plugins Filters Unlimited2, Andrews 6 and It@lian Editors Effects.
Unzip your materials into a folder you have named Thirties Girls.
I would like to give credit to the tubers who provide us with such beautiful tubes to work with. Their links can be found on my Links page. I encourage you to visit their sites. If any tubes I use in materials are yours and are not identified, please let me know and I will be happy to link back to you.
This tutorial was written using PSPX2 and it is assumed you have a working knowledge of PSP. Let's get started and have some PSP enjoyment!
Use the bookmark below to mark your place along the way.

1. In PSP open the tubes, make copies and close originals.
2. In Materials palette, set your foreground color to #ffffff, background color to #b2710b. Create a Gradient using Style Sunburst, Angle 0, Repeats 1, Invert checked.
3. Create a New Image of 712px height by 512px width. Flood fill new image with Gradient.
4. Plugin Filters Unlimited2/Andrews6/Bits Over The Place/default settings. (See example below).

5. Adjust/Blur/Gaussian Blur, Radius of 3.
6. Open e&eSoleil flower tube. Image/Resize by 70%, Resize all layers checked.
7. Right click on flower tube, Copy/Paste as New Layer. Pull down to bottom left.
8. Image/Add Borders 3px black, Symmetric checked.
9. Image/Add Borders 50px white, Symmetric checked.
10. From Tool bar, select Magic Wand and click inside white 50px border.
11. In Materials palette, using same Gradient settings as before, flood fill the 50px border with the Gradient.
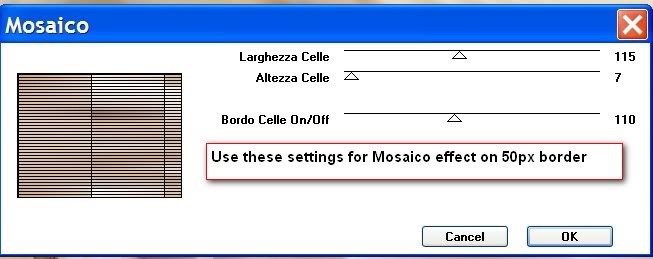
12. Effects/It@lian Editors Effect/Mosaico. (Use settings in example below).
13. Image/Mirror. In Layers Palette, right click on Background Layer and Promote Background Layer. Border is still selected.
14. Effects/3-D Effects/Drop Shadow of Vertical 3, Horizontal 11, Opacity 84, Blur 35, color black. Repeat same Drop Shadow, only changing Vertical to -3 and Horizontal -11, leaving other settings the same. Selections/Select None.
15. Open Gerry-Bloemen17 flower tube. Highlight the bottom layer, Copy/Paste as New Layer. Move up to right top corner. From Tool bar, use Eraser tool and erase stem.
16. Effects/3-D Effects/Drop Shadow. Vertical -3, Horizontal -11, Opacity 50, Blur 25, color black. Effects/3-D Effects/Drop Shadow of Vertical 3, Horizontal 11, Opacity 50, Blur 25, color black.
17. Still using Gerry-Bloemen17 flower tube, highlight the middle layer, Copy/Paste as New Layer. Move to top of frame overlapping other flower. From Tool bar, use Eraser tool and erase stem.
18. Effects/3-D Effects/Drop Shadow. Vertical -3, Horizontal -11, Opacity 50, Blur 25, color black. Effects/3-D Effects/Drop Shadow of Vertical 3, Horizontal 11, Opacity 50, Blur 25, color black.
19. Open c2 ladies tube. Right click in Layers Palette on ladies Background layer and Promote Background Layer.
20. Remove white background by doing the following: From Tool bar, select the Magic Wand. Set tolerance to 4, Feather to 3 (see example of settings below). Click on white sections of background with Magic Wand and press Delete key on keyboard.

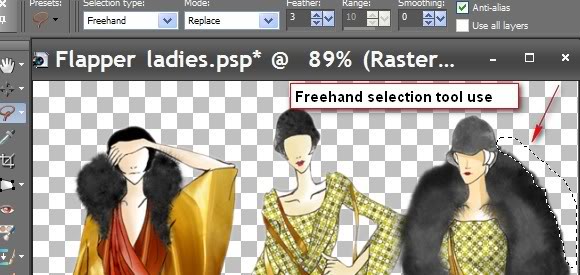
21. To get in closer to an area, you may want to activate the Freehand Selection tool from Tool bar and draw closely to the desired areas, press Delete key and it will remove extra white around that area. (See example below) Or...you can use the Eraser tool set to about size 9 and simply erase excess white. Check the ladies tube carefully as there are sections of white here and there that must be removed separately from the largest background portion. Selections/Select None.
22. When you have the c2 ladies tube clear of the white background to suit you, right click, Copy/Paste as New Layer on main image. Pull slightly to right. Image/Resize by 90%, Resize all layers unchecked.
23. Effects/3-D Effects/Drop Shadow Vertical -3, Horizontal -11, Opacity 60, Blur 35, color black.
24. Right click and duplicate Raster 4 in Layers Palette. Close off Raster 4 for the time being.
25. On Copy of Raster 4, Image/Resize by 50%, Resize all layers unchecked. Move upwards behind foreground ladies. Set Blend Mode to Burn, Opacity at 68. Pull Copy of Raster 4 beneath Raster 4.
26. Highlight and uncheck Raster 4.
27. In Materials Palette, set Background color to #000000. Foreground color to #dab274, Gradient to Angle 0, Repeat 1, Style Sunburst, Invert checked.
28. From Tool bar, select Text tool. (See example below) Using Font Gradl set at Size 95, Stroke 1, Vector, type THIRTIES. Convert to Raster Layer.
29. Effects/3-D Effects/Drop Shadow Vertical 3, Horizontal 8, Opacity 50, Blur 16, color white.
30. From Tool bar, select Text tool. Using Font Gradl set at Size 95, Stroke 1, Vector, type GIRLS. Convert to Raster Layer. Move GIRLS to beneath THIRTIES. Repeat the above Drop Shadow on this layer.

31. Image/Add Borders of 3px, Symmetric checked, color black.
Sign your work with your name or watermark. Save your work as a .jpg file.
You are finished! I hope you have enjoyed doing this tutorial as much as I have enjoyed creating it for you!
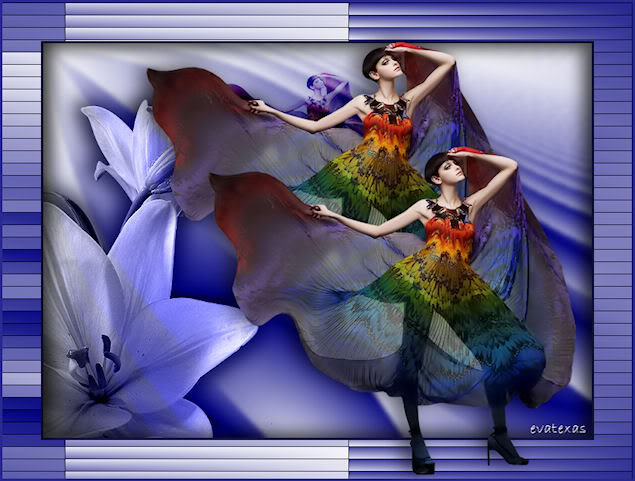
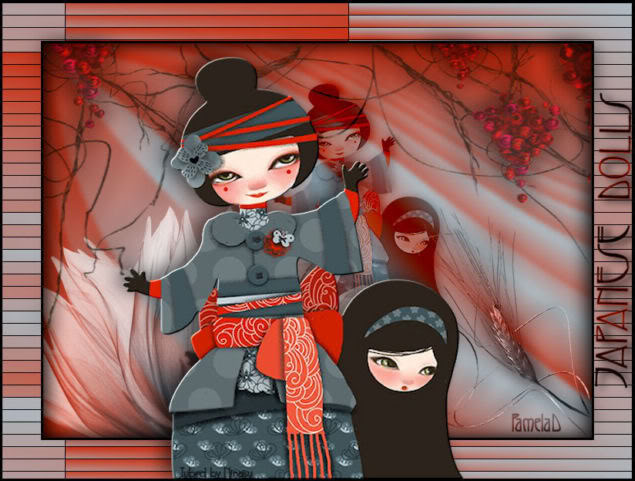
Thank you to my testers, Evatexas and PamelaD. Below are their versions of the tutorial using tubes and colors of their choice.
If you are going to use this tutorial for stationery, cards or place the tutorial/tag on another site, I would appreciate you contacting me for permission, giving Arasimages credit for the original tutorial and if possible, a link back to my site. Thank you.
Copyright © Arasimages All Rights Reserved