
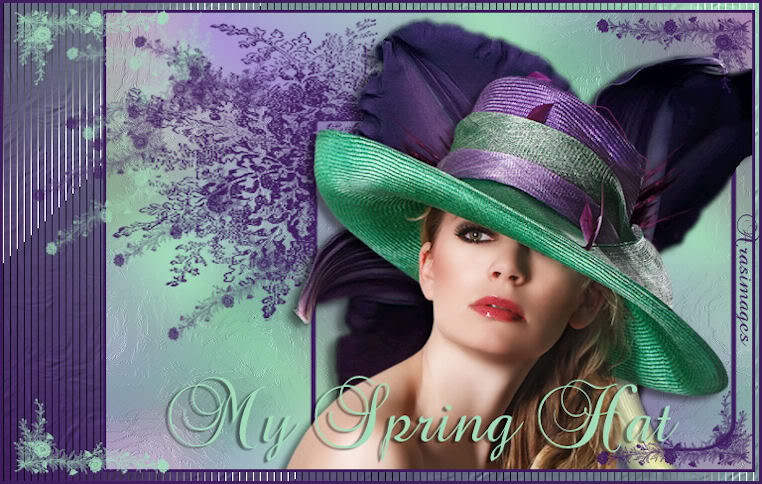
My Spring Hat
For Italian, French and Danish translation, click on the flags.


For this tutorial you will need the materials in the zip file below.

Unzip materials into a folder you have named My Spring Hat. Put the mask in Mask folder and texture in Texture folder in PSP Files, open the brush in PSP and import it to your PSP brushes.
You will need the Plugins Filters Unlimited 2 and Andrew's Filters 8/Tow the Line.
A big thank you to the tubers Marcio C and Jet for their beautiful tubes used in this tutorial. Please visit the tuber sites listed on my Links page.
Use the bookmark below to mark your place along the way.

Open the tubes in PSP, duplicate and close originals.
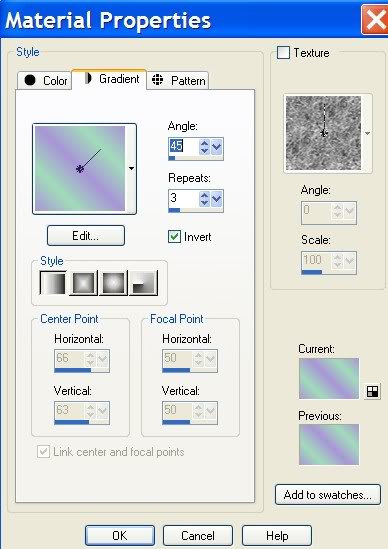
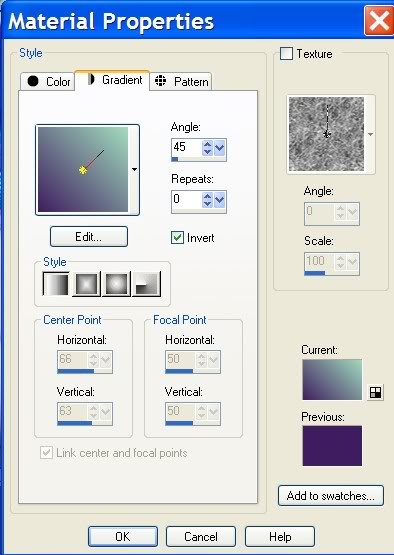
1. In Materials Palette, set foreground color to #a1dcba, background color to #9895d7. Set to Gradient, Style Linear, Angle 45, Repeats 3, Invert checked.
2. New/New Image 651px by 460px. Flood fill with Gradient.
3. Open Jet-woman18-maart-2008 tube. Copy/Paste as new layer.
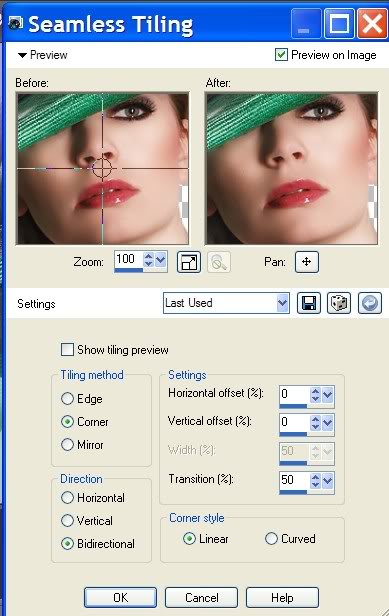
4. Effects/Image Effects/Seamless Tiling/(use the example settings below).
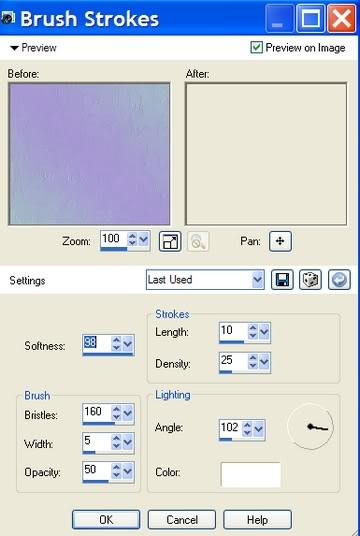
5. Effects/Art Media Effects/Brush Strokes/(use the example settings below).
6. Layers Palette/lower Opacity to 30.
7. Open mc_809 flower tube. Copy/Paste as New Raster Layer.
8. Image/Mirror. Move into position on right.
9. Effects/3-D Effects/Drop Shadow, Vertical 5, Horizontal -8, Opacity 45, Blur 8, color #000000 black.
10. In Materials Palette, change the background (bottom) color to #3f1d5f.
11. Layers/New Raster Layer. Flood fill with background color.
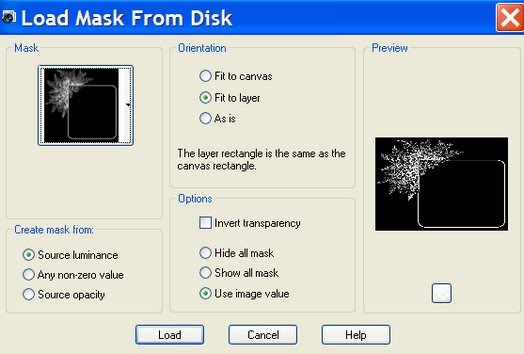
12. Layers/Load Save Mask/Load Mask from disk/jd_Mask33, Load.
13. Layers Palette/Merge/Merge Group.
14. Open Jet_woman18-maart-2008 tube. Copy/Paste as new layer.
15. Image/Mirror. Image/Resize/Resize by 90%, Resize all layers unchecked.
16. Effects/3-D Effects/Drop Shadow, Vertical 5, Horizontal -8, Opacity 45, Blur 8, color #000000, black.
17. Image/Add Borders 3x, Symmetric checked, Color #3f1d5f.
18. Minimize this image to Task Bar for use later on.
19. New/New Image 762px x 482px. Using existing colors in Materials Palette, change to Gradient, Style Linear, Angle 45, Repeats 0, Invert checked.
20. Flood fill new image with Gradient.
21. Effects/Texture Effects/Texture/jd_texture38. Click OK to apply to gradient.
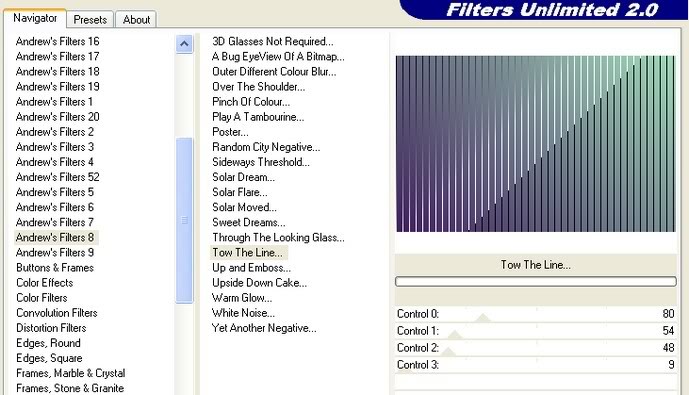
22. Effects/I.C.Net/Filters Unlimited 2/Andrew's Filters 8/Tow the Line. Apply.
23. Activate the image you minimized to Task Bar. Copy/Paste as new layer on the larger new image. Move to right side as in image, leaving equal distance on top, bottom and right side from edges.
24. In Materials Palette, change Foreground color to #91dcbe, (light green). Background remains the same, (#3f1d5f, dark purple)
25. Layers/New Raster Layer. From Tool bar, open Brush tool. Find Cornerbrushes4_001.
26. Set Brush Size to 159, Rotation 0. Stamp upper left corner with foreground color. (see example below for brush settings).

27. Change Rotation to 180 and stamp bottom right corner with background color. Duplicate/Flip.
28. Duplicate Raster 3 and Copy of Raster 3.
29. Set the Size to 150 and leave it for remainder of steps. You will change the Rotation only in the rest of the steps and stamp as in example below, stamping flowers into mask flowers. Do not try to be too exact or it will spoil your fun. Be creative and stamp differently than I have if you wish. Take "artistic license".
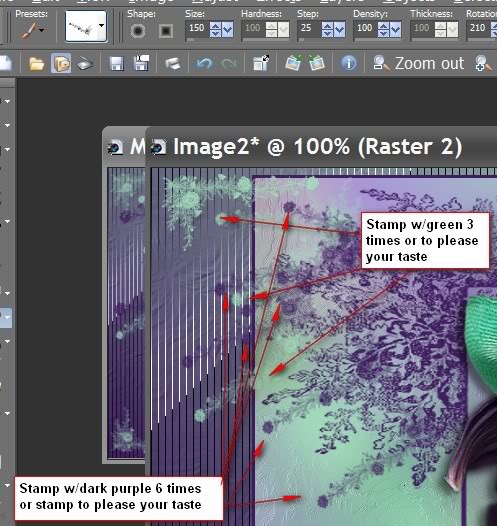
30. Set Rotation to 170, stamp using foreground color for a green flower.
31. Set Rotation to 150, stamp using foreground color for a green flower, twice.
32. Set Rotation to 170, stamp using background color for a purple flower.
33. Set Rotation to 155, stamp using background color for a purple flower.
34. Set Rotation to 160, stamp using background color for a purple flower.
35. Set Rotation to 170, stamp using background color for a purple flower, twice.
36. Set Rotation to 210, stamp using background color for a purple flower.
37. In Materials Palette, switch background and foreground colors so purple is on top and green is on bottom.
38. From Tool bar, select Text tool/BrockScript, Size 72, Vector. Write My Spring Hat on the bottom of image.
39. Convert to Raster Layer.
40. Effects/3-D Effects/Drop Shadow, Vertical 2, Horizontal -4, Opacity 45, Blur 2, color #000000, black.
41. Sign your name or place your watermark. You may choose to use any font, size and color you wish for steps #38 through #41.
42. Image/Add Borders 3px, Symetric checked, color #3f1d5f.
You are finished! I hope you enjoyed doing this tutorial.
A big thank you to my testers, Evatexas and PamelaD whose time and input I so appreciate!
If you are going to use this tutorial for stationery, cards or place the tutorial/tag on another site, I would appreciate you contacting me for permission, giving Arasimages credit for the original tutorial and if possible, a link back to my site. Thank you.
Copyright © Arasimages All Rights Reserved