
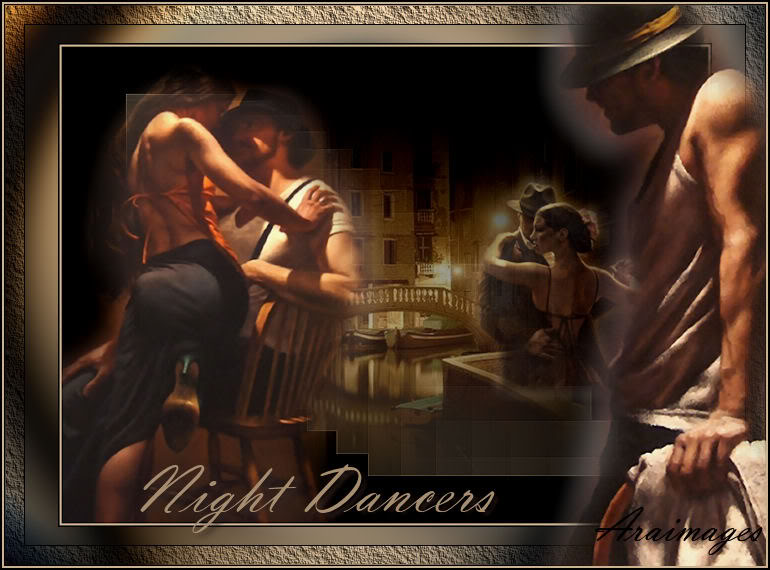
Night Dancers
For Danish translation, click on the flag.

For this tutorial you will need the materials in the zip file below.

You will need the plugins Funhouse and AAA Frames to do this tutorial. I have used PSPX3 to create this tutorial but you may use an earlier version. It is assumed you have a working knowledge of PSP.
A big thank you to the tubers Sarah and Sorensen_Designs for their beautiful tubes used in this tutorial. Please visit the tuber sites listed on my Links page.
Use the arrow below to mark your place along the way.

Open the tubes in PSP, Save As .psp files in your working folder and close originals.
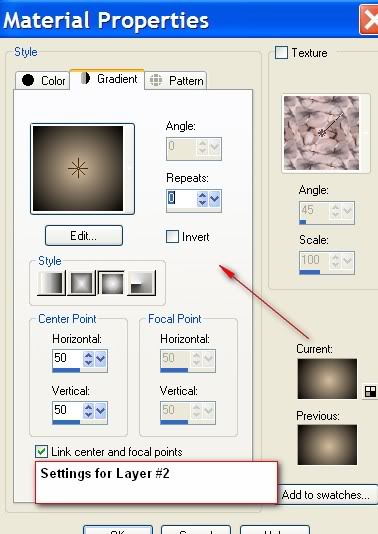
In Materials Palette, set the foreground to #d5bd9d, background to #000000. Create a Gradient using Foreground/Background and the stated colors, Style Sunburst, Angle 0, Repeats 0 and Invert unchecked.
1. New/New Image 762px by 562px, transparent. Flood fill with Background color #000000.
2. Layers/New Raster Layer. Flood fill with Gradient.
3. Image/Resize/Resize by 80%, Resize all layers unchecked.
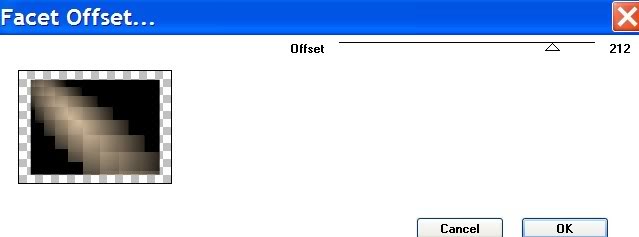
4. Effects/Funhouse/Facet Offset, Offset by 212.
5. Effects/Edge Effects/Enhance. Lower Opacity to 56.
6. Open VENETI+ tube. Copy/Paste as New Layer.
7. Layers/Lower Opacity to 59.
8. Open Sorensen_Designs H. Blakely Mist-Apr 133-10 tube. Copy/Paste as New Layer.
9. Image/Resize/Resize by 40%, Resize all layers unchecked.
10. Layers/Lower Opacity to 84%. Move tube over toward right side, leaving street light exposed.
11. Open Sorensen_Designs H. Blakely Mist Apr 152-10 tube. Copy/Paste as New Layer. Move into position toward the left as in my image.
12. Image/Add Borders, 2px #d5bd9d, Symmetric checked.
13. Image/Add Borders, 2px #000000, Symmetric checked.
14. Image/Resize/Resize by 85%, Resize all layers checked! Minimize for use later.
15. In Materials Palette, change Gradient Repeats to 3.

16. New/New Image, 762px by 562px, transparent. Flood fill with Gradient.
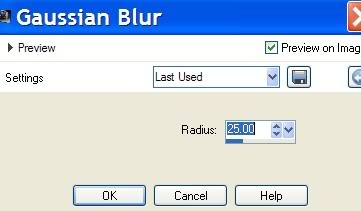
17. Adjust/Blur/Gaussian Blur/Radius 25.
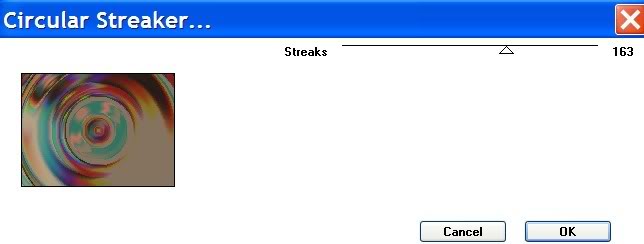
18. Effects/Funhouse/Circular Streaker, Streaks 163.
19. Effects/AAA Frames/Texture Frame. Apply two (2) times.

20. Activate minimized image. Copy/Paste as New Layer on working image.
21. Open Sorensen_Designs H. Blakely Mist Apr 146-10 tube. Copy/Paste as New Layer.
22. Move man tube to right side as in my image.
23. Image/Add Borders, 2px #d5bd9d, Symmetric checked.
24. Image/Add Borders, 2px #000000, Symmetric checked.
25. In Materials Palette, change Background color to #b1997c.
26. Activate Text tool from Tool Bar. Choose Vladimir Script font, size 60, Vector. Type Night Dancers and Convert to Raster Layer.

27. Place at bottom of image.
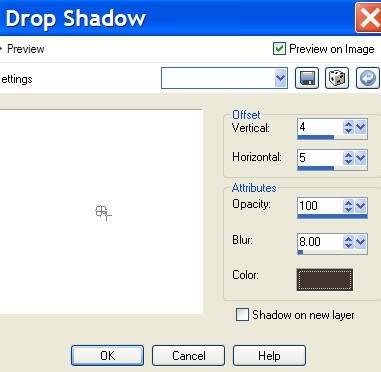
28. Effects/3-D Effects/Drop Shadow, Vertical 4, Horizontal 5, Opacity 100, Blur 8, color #43342f.
29. Place your name or watermark in the font, size and color you wish, Vector. Convert to Raster Layer and put into place.
30. Merge/Merge Visible.
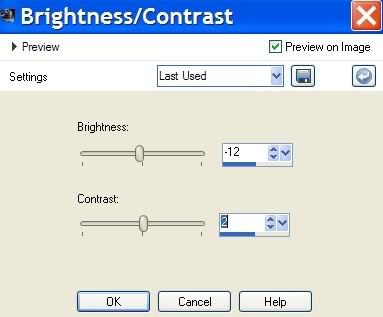
31. Adjust/Brightness and Contrast/Brightness/Contrast. Brightness set at -12, Contrast set to 2.
You are finished!
Thank you Evatexas and PamelaD for testing my tutorials. Your time and help are very much appreciated!
If you are going to use this tutorial for stationery, cards or place the tutorial/tag on another site, I would appreciate you contacting me for permission, giving Arasimages credit for the original tutorial and if possible, a link back to my site. Thank you.
Copyright © Arasimages All Rights Reserved