
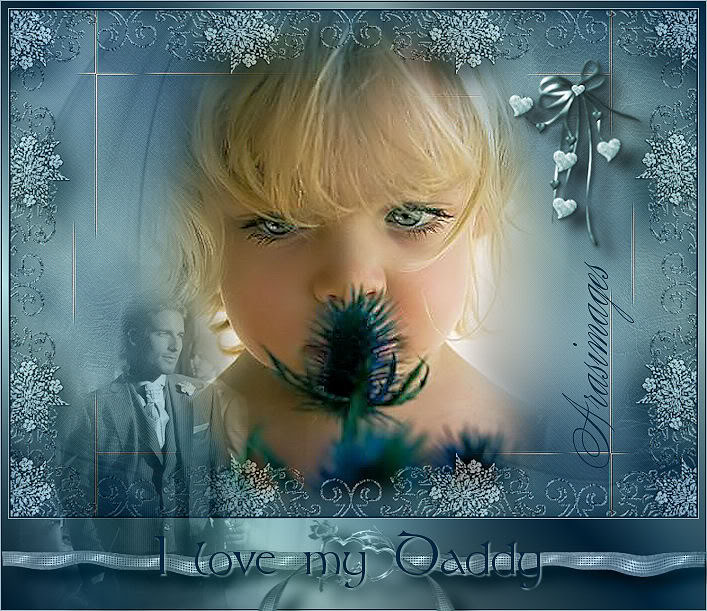
I love my Daddy
For Danish and French translation, click on the flags.


For this tutorial you will need the materials in the zip file below.

Unzip the materials into a working folder. Open the materials in PSP, copy and close originals. You will need plugins Graphics Plus and FM Tile Tools. I have used PSPX3 to create this tutorial but you may use an earlier version. It is assumed you have a working knowledge of PSP.
Thanks go to plaatjesmakers, JHanna and Soleil for the beautiful tubes used. Please visit the tuber sites listed on my Links page.
Use the heart below to mark your place along the way.

1. In Materials Palette set Foreground to #8eb3b4, Background to #002842. Under the Gradient tab, set the Style to Linear, Angle 45, Repeats 3, Invert checked.
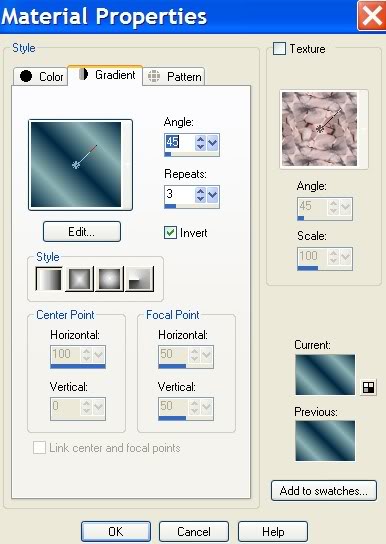
2. New/New Image 762px by 562px. Flood fill with Gradient.
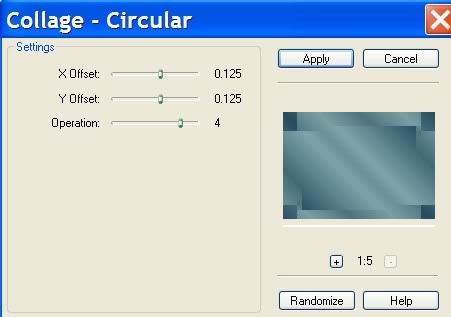
3. Effects/FM Tile Tools/Collage-Circular, with settings as seen below.
4. Effects/Edge Effects/Enhance. Effects/Edge Effects/Enhance More.
5. Layers/New Layer. Selections/Select All.
6. Open JHanna_268 background. Copy/Paste into Selection.
7. Selections/Select None.
8. Blend Mode/Luminance (L). Lower Opacity to 46.
9. Open JHanna_268MistedTube (little girl). Copy/Paste as New Layer.
10. Open Soleil_19_12_06_papier_brisa03 tube. Copy/Paste as New Layer.
11. Blend Mode/Luminance (L).
12. Resize/Resize by 85%, Resize All Layers Unchecked. Pull papier over to left side of image so only the lace is showing.
13. Effects/3-D Effects/Drop Shadow, Vertical 12, Horizontal 17, Opacity 65, Blur 31, color #000000.
14. Layers/Duplicate. Image/Mirror.
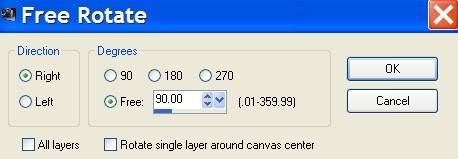
15. Layers/Duplicate. Free Rotate Right by 90 degrees, (as shown in example below). Pull to bottom so only lace is showing.
16. Layers/Duplicate. Image/Flip. Arrange lace borders so all are evenly lined up on all sides.
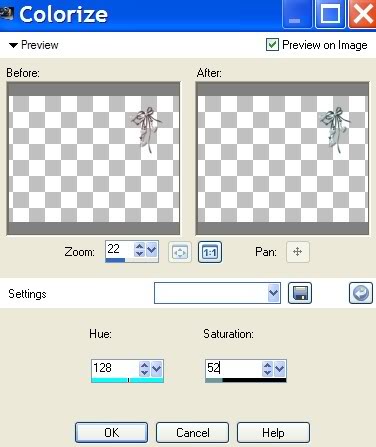
17. Open schleife.pspimage (bow and hearts). Copy/Paste as New Layer. Move to upper right corner.
18. Adjust/Hue and Saturation/Colorize. (Use settings below).
19. Effects/3-D Effects/Drop Shadow, Vertical 12, Horizonal 17, Opacity 65, Blur 21, color #000000.
20. Image/Add Borders 2px, Symmetric checked, color #002842.
21. Image/Add Borders 1px, Symmetric checked, color #8eb3b4.
22. Resize/Resize by 90%, Resize All Layers checked.
23. Image/Add Borders, Symmetric Unchecked. Top and sides are set to 6px, bottom at 90px, color #ffffff.
24. From Tool bar, activate Magic Wand. Click inside the 6px by 90px border to select it.
25. Flood fill with Gradient.
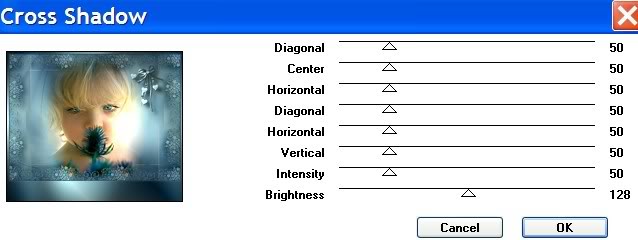
26. Effects/Graphics Plus/Cross Shadow, using settings as shown below.
27. Selections/Select None.
28. Image/Add Borders, 1px border, color #002842.
29. Image/Add Borders, 1px border, color #8eb3b4.
30. Open plm-les-astime-man-pspimage. Copy/Paste as New Layer.
31. Image/Resize/Resize by 50%, Resize all layers unchecked.
32. Blend Mode/Luminance (L). Move to lower left corner. Drop Opacity to 78.
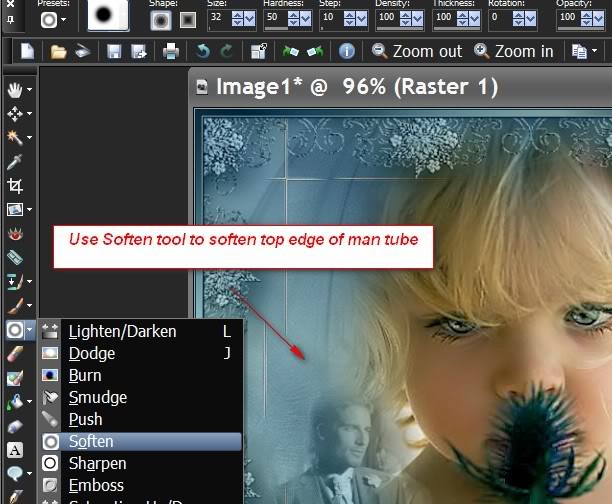
33. From Tool bar, select Soften tool and go over top of man tube several times to get rid of the sharp line. (See example below)
34. Open M_S_Blue_Elements_39.pspimage. Copy/Paste as New Layer.
35. Image/Resize/Resize by 80%, Resize all layers unchecked.
36. Move Elements tube to large border at bottom.
37. Blend Mode/Luminance (L).
38. From Tool bar, select the Pick Tool and stretch the ribbon out on each side to touch the borders.
39. Effects/3-D Effects/Drop Shadow, Vertical 12, Horizonal 17, Opacity 65, Blur 21, color #000000.
40. From Tool bar, activate Text tool. Choose Font Stonehenge, Size 55, Vector.

41. Using Background color of #002842, write I love my Daddy in large border over ribbon.
42. Layers/Convert to Raster Layer.
43. Effects/3-D Effects/Drop Shadow, Vertical 2, Horizontal 2, Opacity 65, Blur 2, color #8eb3b4.
44. Sign your name in font and size of your choice. Convert to Raster Layer.
45. Merge/Merge Visible.
46. Adjust/Sharpness/Sharpen. Save as .jpg file.
I leave a huge thank you and hug to both Evatexas and PamelaD who so faithfully test my tutorials for me.
If you are going to use this tutorial for stationery, cards or place the tutorial/tag on another site, I would appreciate you contacting me for permission, giving Arasimages credit for the original tutorial and if possible, a link back to my site. Thank you.
Copyright © Arasimages All Rights Reserved