
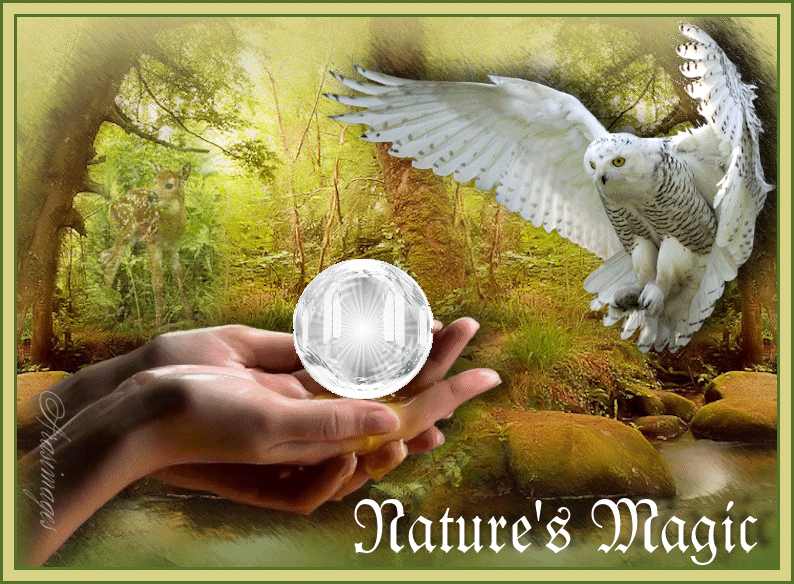
Nature's Magic
For Italian, Danish and French translation, click on the flags.


For this tutorial you will need the materials in the zip file below.

Unzip the materials into a working folder. Open the materials in PSP, copy and close originals. Place the Mask in your Masks folder. You will need the plugin Brush Strokes for this tutorial. I have used PSPX3 to create this tutorial but you may use an earlier version. It is assumed you have a working knowledge of PSP.
Thanks go to Nikita of reveries.fr, DieterundMarion_online_.de and MtM (Bridette) at Top_design tubes for the beautiful tubes used. Please visit the tuber sites listed on my Links page.
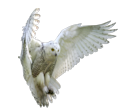
Use the little owl below to mark your place along the way.
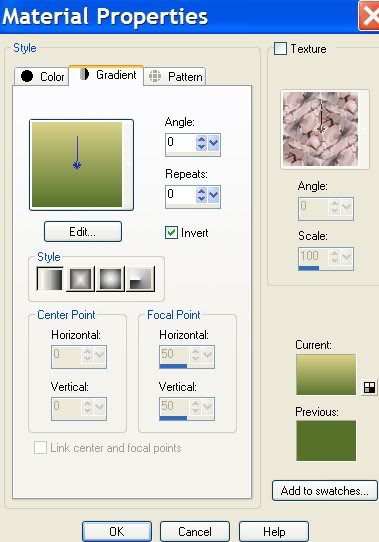
1. In Materials Palette, set the Foreground color to #dad188, Background to #56722a.
2. Click Gradient tab and set Gradient to Linear, Angle 0, Repeats 0, Invert checked.
3. New/New Image 760px by 560px. Flood fill with Gradient.
4. Open 1250147529_paysages.pspimage. Copy/Paste middle layer as New Layer.
5. Image/Resize/Resize by 105%, Resize all layers unchecked. Move to right side of image.
6. Layers/Duplicate. Image/Mirror.
7. Open 12479954820_femmes.pspimage hand layer. Copy/Paste as New Layer.
8. Image/Mirror. Pull over to left bottom corner.
9. From Tool bar, select the Eraser tool. Erase long lines above and below hands.
10. Effects/3-D Effects/Drop Shadow. Vertical -5, Horizontal 17, Opacity 76, Blur 34, color #000000 (black).
11. Open MTM_Birds 35_small_8 Nov2007.pspimage. Copy/Paste as New Layer.
12. Image/Resize/Resize by 70%, Resize all layers unchecked.
13. Move owl to right side of image as I have done.
14. Effects/3-D Effects/Drop Shadow. Vertical -5, Horizontal 17, Opacity 76, Blur 34, color #000000 (black).
15. Open mds 8310 Fawn.pspimage. Copy/Paste as New Layer.
16. Image/Resize/Resize by 50%, Resize all layers unchecked.
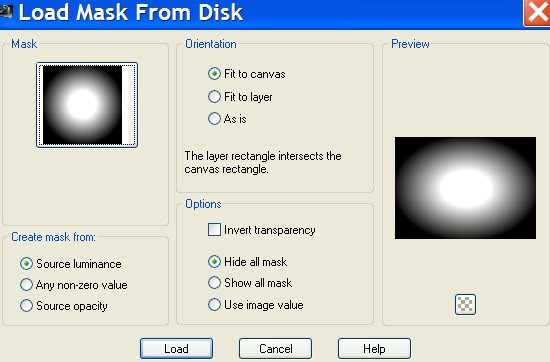
17. Layers/Load/Save Mask/Load Mask from Disk. Load. See example below.
18. Layers/Merge/Merge Group.
19. Move fawn to right side of tree on left side of image. Lower Opacity to 56.
20. Merge/Merge Visible.
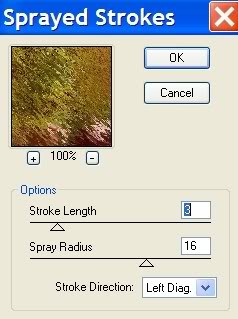
21. Effects/Brush Srokes/Sprayed Strokes. See example below.
22. Copy image. It will remain in memory for use in a minute.
23. Click the Undo Last Command arrow in top tool bar 2 times. (This is undoing Brush Strokes and Merge).
24. In Layers Palette, highlight Raster 1. Paste as New Layer. (This is the image you just copied).
25. In Layers Palette, highlight Raster 4 (Top layer) to continue with steps of tutorial.
26. In Materials Palette, change background color to #ffffff (white).
27. Select Text tool from Tool bar, select Font Fraktur BT, (Included in materials), size 72.

28. Using the settings above, write the words "Nature's Magic". Convert to Raster Layer.
29. Effects/3-D Effects/Drop Shadow. Vertical -5, Horizontal 17, Opacity 76, Blur 12, color #000000 (black).
30. Sign your name or leave watermark in color and size of your choice.
31. In Materials Palette, change background color back to #56722a.
32. Image/Add Borders, 3px Symmetric checked, color #56722a.
33. Image/Add Borders, 11px Symmetric checked, color #dad188.
34. Image/Add Borders, 3px Symmetric checked, color #56722a.
35. Save as .jpg file in working folder.
36. Open Animation Shop. File/Open .jpg image you just saved.
37. Edit/Duplicate Selected 2 times.
38. Edit/Open Spinning ball.gif file. Click inside first frame. Edit/Select All.
39. Click on the top bar of the Spinning ball image and Copy.
40. Go back to the .jpg image. Click the first frame to highlight it. Edit/Select All.
41. Right click INSIDE the first frame of image and Paste/into Selected Frame.
42. Using your mouse, move the Spinning ball where you want it to be and left click.
43. Click on the Animation button in the top tool bar to check your animation. If it is what you want it to look like, then continue. If it isn't seated properly in the hands, then Undo and repeat Steps 41 and 42 till you get it right.
44. File/SaveAs. Save in (name where you want to save it), give it a file name (Nature's Magic), click Save.
45. Click Next 3 more times as boxes appear and then click Finish.
Congratulations! You have just finished an animated tutorial!
Big hugs and thanks to my lovely testers, Evatexas and PamelaD who so faithfully test my tutorials for me.
If you are going to use this tutorial for stationery, cards or place the tutorial/tag on another site, I would appreciate you contacting me for permission, giving Arasimages credit for the original tutorial and if possible, a link back to my site. Thank you.
Copyright © Arasimages All Rights Reserved