

Wrap Me
For Danish and German translation, click on the flags.


For this tutorial you will need the materials in the zip file below.

Unzip the materials into a working folder. Open the materials in PSP, copy and close originals. Place the Fonts in your Fonts folder. You will need the plugin Graphics Plus for this tutorial. I have used PSPX3 to create this tutorial but you may use an earlier version. It is assumed you have a working knowledge of PSP.
Thanks go to Nikita of reveries.fr, Mariel of Yahoo Groups for the beautiful tubes used. Please visit the tuber sites listed on my Links page.
Use the little heart charm below to mark your place along the way.

1. In Materials Palette, set the Foreground color to #ffc0ff, Background to #6a567e.
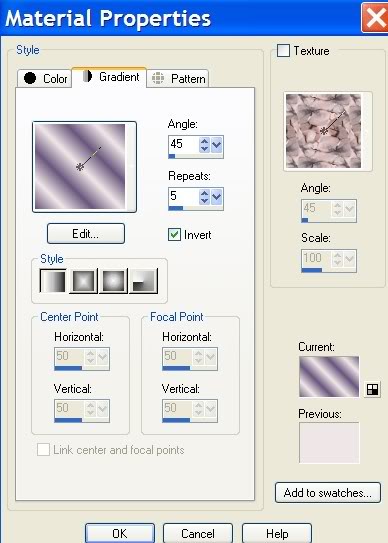
2. Click Gradient tab and set Gradient to Linear, Angle 45, Repeats 5, Invert checked.
3. New/New Image 760px by 560px. Flood fill with Gradient.
4. Adjust/Blur/Gaussian Blur set Radius to 26.
5. Open fondo.pspimage. Copy/Paste as New Layer.
6. In Layers Palette, set Blend Mode to Luminance (Legacy), Opacity to 76.
7. Open Mariel2006juin_smokebluet.pspimage. Copy/Paste as New Layer. Move to left.
8. Layers Palette/Blend Mode to Luminance (Legacy), Opacity set to 42.
9. Using Pick tool from Tool Bar (it is with the Move tool), pull smoke upward and downward so it meets frame of image. Change back to Move tool.
10. Open 122072410963_couples.pspimage. Copy/Paste as New Layer. Move to right side of image.
11. Layers/New Raster Layer.
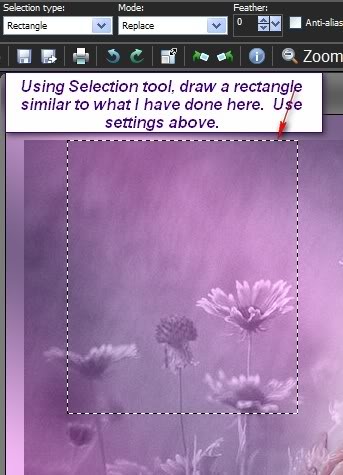
12. From Freehand Selections Tool, choose Selections. Draw a rectangle similar to what I have done in example below.
13. Paste 122072410963_couples.psp image into Selection. Selections/Select None.
14. Layers Palette/Drop Opacity to 40.
15. Image/Add Borders/2px, Symmetric, color #6a567e.
16. Image/Add Borders/13px, Symmetric, color #000000.
17. From Tool bar, select Magic wand. Click black border to activate it.
18. Flood fill black border with Gradient.
19. Effects/Graphics Plus/Cross Shadow set to default setting.
20. Selections/Select None.
21. Image/Add Borders/2px, Symmetric, color #6a567e.
22. Image/Add Borders/13px, Symmetric, color #000000.
23. From Tool bar, select Magic wand. Click black border to activate it.
24. Flood fill black border with Gradient.
25. Selections/Select None.
26. Open oeillets.pspimage. Copy/Paste as New Layer.
27. Image/Resize/Resize by 89%, Resize all layers unchecked.
28. Move oeillets (eyelets) to the left over middle border stripe. Eliminate the three oeillets (eyelets) on the right by surrounding each one with Freehand Selection tool, press Delete key using settings as in example below. If you wish, you may use your Eraser tool to accomplish the same results.

29. Adjust/Hue and Saturation/Colorize/Hue 192, Saturation 48.
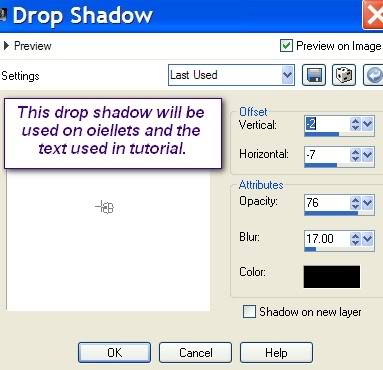
30. Effects/3-D Effects/Drop Shadow, Vertical -2, Horizontal -7, Opacity 76, Blur 17, color #000000.
31. In Materials Palette, change the Background color to #efe7e7.
32. From Tool bar, select the Text tool (A). Find the font Kunstler Script, set to Size to 150. (see example).

33. Write the letter "W". Change the size to 100 and write "rap me". Move into position. SEE MY TAG FOR POSITIONS OF ALL TEXT.
34. Layers Palette/Convert to Raster Layer.
35. Using the font New Zurica, Size 28, write "in your arms". Move into position.
36. Layers Palette/Convert to Raster Layer.
37. Merge/Merge Down.
38. Effects/3-D Effects/Drop Shadow, Vertical -2, Horizontal -7, Opacity 76, Blur 17, color #000000.
39. Using Kunstler Script set to Size 100, write "hold me". Move into position.
40. Layers Palette/Convert to Raster Layer.
41. Using New Zurica, Size 28, write "forever". Move into position.
42. Layers Palette/Convert to Raster Layer.
43. Merge/Merge Down.
44. Effects/3-D Effects/Drop Shadow, Vertical -2, Horizontal -7, Opacity 76, Blur 17, color #000000.
45. Sign your name or leave watermark. Merge/Merge Visible.
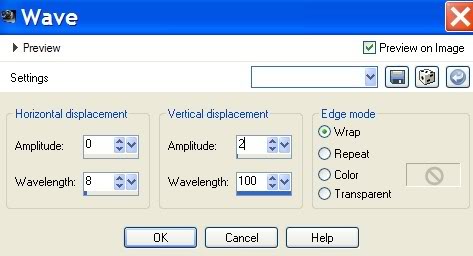
46. Effects/Distortion Effects/Wave. Use settings in Example below.
47. Image/Add Borders/2px, Symmetric, color #6e567e.
48. Adjust/Sharpness/Sharpen. Save as .jpg file.
Big hugs and thanks to my lovely testers, Evatexas and PamelaD who so faithfully test my tutorials for me.
If you are going to use this tutorial for stationery, cards or place the tutorial/tag on another site, I would appreciate you contacting me for permission, giving Arasimages credit for the original tutorial and if possible, a link back to my site. Thank you.
Copyright © Arasimages All Rights Reserved