
Diamonds are Forever
For Danish translation, click on the flags.

For this tutorial you will need the materials in the zip file below.

Unzip the materials into a working folder. Put the Pattern in your Patterns folder. In PSP/File/Import/Custom Brush, browse to the working folder, choose the brush and import it into your Brush folder. Open the H Sparkle_White tube in PSP and Export it to your Tubes folder. Open the materials in PSP, copy and close originals. You will need the plugin Filters Unlimited/Sandflower Specials for this tutorial. I have used PSPX3 to create this tutorial but you may use an earlier version. It is assumed you have a working knowledge of PSP.
Thanks go to S Janie and Enne for the beautiful tubes used. Please visit the tuber sites listed on my Links page.
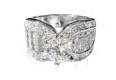
Use the ring below to mark your place along the way.
1. In Materials Palette, set the Foreground color to #f1d9e8, Background to #000000.
2. New/New Image, 762px by 562px, transparent. Flood fill with #f1d9e8.
3. Open Rose Single. Copy/Paste as New Layer. Lower opacity to 35.
4. Open Rose by Arasimages.pspimage. Copy/Paste as New Layer.
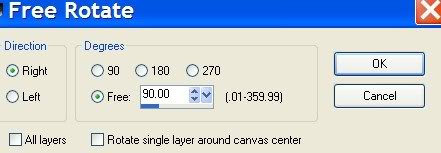
5. Image/Free Rotate, Right by 90 Degrees. (See example below). Move into position in bottom left corner.
6. Effects/3-D Effects/Drop Shadow, Vertical -6, Horizontal 6, Opacity 40, Blur 17, color #735353.
7. Layers/Duplicate Rose by Arasimages.pspimage.
8. Resize/Resize by 60%, Resize all Layers unchecked.
9. Image/Free Rotate, Left by 90 degrees 2 times.
10. Image/Flip. Lower Opacity to 80. Move into upper right corner.
11. Open evp_misted_bride.psp image. Copy/Paste as New Layer.
12. Move bride to right side by rose. Lower opacity to 80.
13. Open diamond_necklace.pspimage. Copy/Paste as New Layer.
14. Move necklace over woman, positioning as I have in my finished tag.
15. Open armband1.psp (ring). Copy/Paste as New Layer.
16. Image/Resize/Resize by 80%, Resize all layers unchecked.
17. Move ring toward bottom right corner.
18. Effects/3-D Effects/Drop Shadow, Vertical 7, Horizontal 8, Opacity 60, Blur 15, color #735353.
19. Layers/New Raster Layer.
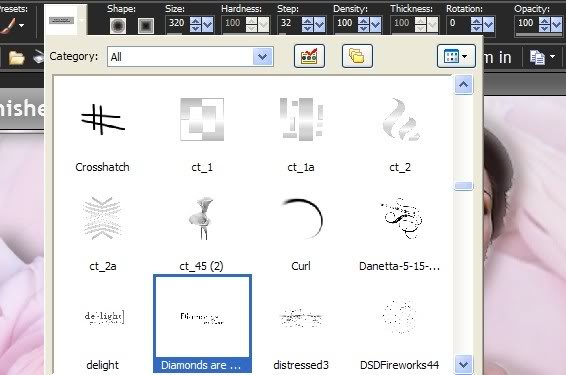
20. From Tool bar, locate your Diamonds are Forever.psp brush. Using the background color of #000000, stamp once between ring and necklace. See example below for settings.
21. Merge/Merge Visible.
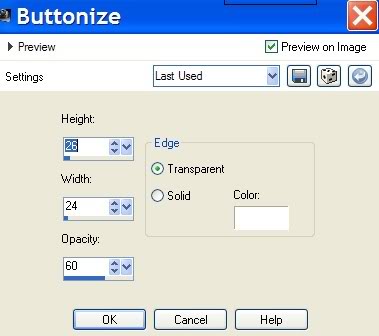
22. Effects/3-D Effects/Buttonize using settings in example below.
23. Image/Add Borders, 3px, Symmetric, color #000000 black.
24. In Materials Palette, change the foreground color to the Pattern supplied in Materials (Silverpunk.pspimage). See example below for settings.

25. Using the Magic Wand, click on 3px border to activitate it. Flood fill the 3px border with the silver bead pattern. Selections/Select None.
26. Minimize image as it will be used in a short while for sparkle placement.
27. New/New Image size 493px by 551px.
28. Open lady_jean_klein.pspimage. Copy/Paste as New Layer. Using Eraser tool with Size set to 22, erase a little of the left outer sleeve to clean it up a bit.
29. Image/Resize/Resize by 120%, Resize all layers unchecked. Move a little to right.
30. Effects/3-D Effects/Drop Shadow, Vertical -6, Horizontal 6, Opacity 40, Blur 17, color #735353.
31. Write your name or place watermark in bottom left corner, using Size and Font of your own choosing. I used color #000000 black for mine.
32. From Tool bar, use the Selection tool and select a small portion of the bottom of image so it will not be "misted" but a straight line at bottom. See example below.
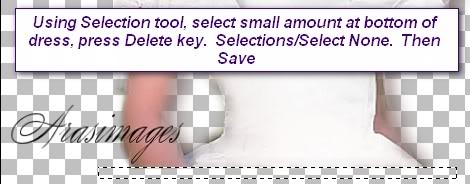
33. Press the Delete key to eliminate the portion of the dress you do not wish to have showing. Selections/Select/None.
34. Save As PSP Animation Shop (*psp) image in your working folder, name it Woman/Name. You will use this in Animation Shop later.
35. Activate the main image which you minimized. Promote Background layer. Duplicate twice, three layers in all in layers palette.
36. Close off bottom and middle layer, highlight top layer.
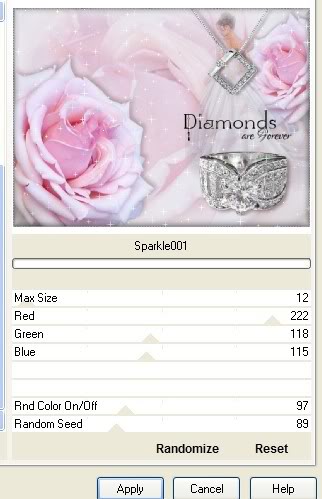
37. Effects/Filters Unlimited/Sandflower Specials/Sparkle001. Use settings in example below for sparkles on top layer.
38. Close off top layer, open middle layer and highlight it.
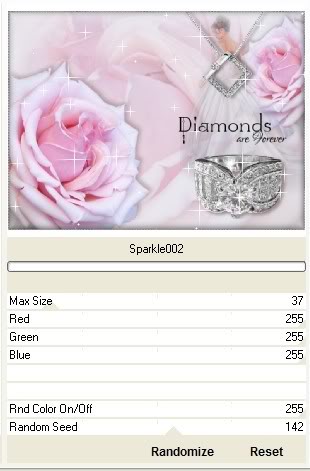
39. Effects/Filters Unlimited/Sandflower Specials/Sparkle002. Use settings in example below for sparkles on middle layer.
40. Close off middle layer, move to bottom layer and highlight it.
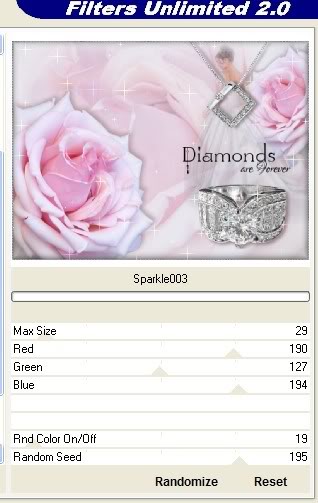
41. Effects/Filters Unlimited/Sandflower Specials/Sparkle003. Use settings in example below for sparkles on bottom layer.
42. Now we will add sparkles on the necklace and ring using the H_Sparkle white tube.
43. From Tool bar, locate the H_Sparkle white tube from the Picture Tube tools. Set the Scale to 35 as in example below.

44. Close off bottom and middle layer, have top layer open and highlighted.
45. Left click the mouse randomly on the diamonds of the ring and necklace. Remember not to do too many as you will be adding more on other layers.
46. Close off top layer, open middle layer and highlight it.
47. Change the Scale of the star to 25. Left click randomly on the ring and necklace again.
48. Close off middle layer and highlight bottom layer.
49. Change the Scale of the star to 15. Left click randomly on the ring and necklace again.
50. Open all layers. Save As PSP Animation Shop (*psp) file in your working folder as Main Image.
51. Open Animation Shop. Open the Main Image. Click the Animation to make sure it is sparkling the way you wish it to be.
52. Open the Woman/Name image. Click Copy.
53. Edit/Propagate Paste.
54. Go to the Main Image. Click on the first frame. Edit/Select All.
55. Right click inside the first frame, place the Woman/Name on the left bottom, having her skirt right at the bead border.
56. Click on Animation button to check the animation. If you are satisfied with the way it looks, then save as directed next.
57. File/Save As. Give your finished work a file name "Diamonds are Forever", Save as (*gif). Click Save.
58. Click Next three times, then Finish and you are done! Congratulations on doing a complicated animated tutorial.
My tutorials are checked by Evatexas and PamelaD and for their work and friendship, I am always grateful. Hugs Ladies!
If you are going to use this tutorial for stationery, cards or place the tutorial/tag on another site, I would appreciate you contacting me for permission, giving Arasimages credit for the original tutorial and if possible, a link back to my site. Thank you.
Copyright © Arasimages All Rights Reserved