

Tender Feelings
For Italian, Danish and German translation, click on the flags.


For this tutorial you will need the materials in the zip file below.

Unzip the materials into a working folder. In PSP/File/Import/Custom Brush, browse to the working folder, choose the brush and import it into your Brush folder. Open the materials in PSP, copy and close originals. You will need no special filters for this tutorial. I have used PSPX3 to create this tutorial but you may use an earlier version. It is assumed you have a working knowledge of PSP.
Thanks go to Irene from Denhutsepot.de and Nikita from reveries.fr for the beautiful tubes used. Please visit the tuber sites listed on my Links page.
Use the arrow below to mark your place along the way.

1. In Materials Palette, set the Foreground color to #e6cd9c, Background to #000000.
2. New/New Image, 752px by 552px, transparent. Flood fill with black Background color #000000.
3. Select All.
4. Open 12206401748_fleurs. Highlight second layer from bottom called Calque. Copy/Paste into Selection.
5. Selections/Select None.
6. Open DI_Tube1720 of woman. Copy/Paste as New Layer.
7. Move woman to left side of image and to bottom along edges of the tube.
8. Open 12206401748_fleurs. Highlight third layer from bottom called Calque. Copy/Paste as New Layer.
9. Move flower near woman and flower she is holding. See my finished image for position.
10. Drop opacity of fleurs to 76. Using Selections tool, Freehand Selection, select around the arm area, up over her face and along flower. Connect selection so it becomes active. See both examples below.

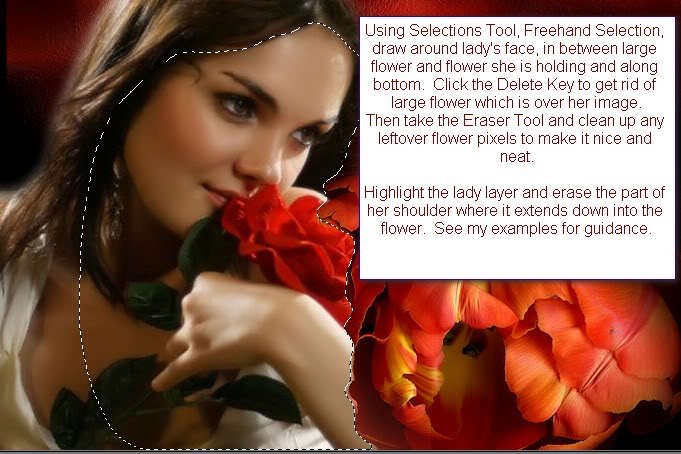
11. Press Delete Key once to eliminate excess fleur.
12. Selections/Select None. Set opacity back to 100.
13. Use Eraser tool to clean up around edges of flower if you need to, using the eraser tool settings as in example below.

14. Highlight the woman and erase the shoulder part that extends down into the flower.
15. Highlight the flower image to continue.
16. From the Tool bar, select the brush Tender Feelings.
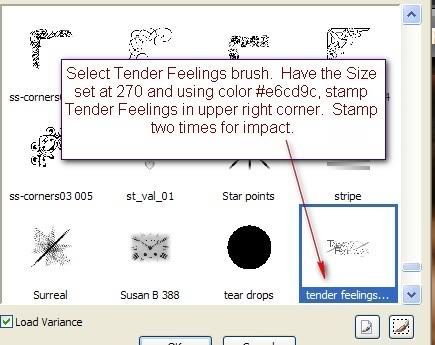
17. Use these settings below and stamp the brush in upper right corner two (2) times, using color #e6cd9c.

18. Image/Add Borders, 2px Symmetric checked, color #e6cd9c.
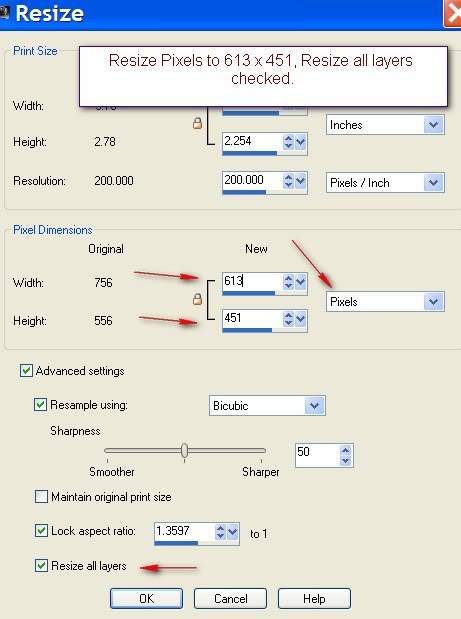
19. Image/Resize. Resize using Pixels 613px by 451px, Resize all layers checked. See example below.
20. In Layers Palette, Promote Background Layer. Copy and minimize.
21. Image/New Image 752px by 552px, transparent.
22. Flood fill transparent image with black, #000000.
23. Paste resized image as New Layer.
24. Image/Add Borders, 2px, color #e6cd9c, Symmetric checked.
25. Open heart corner. Copy/Paste as New Layer.
26. Move heart corner into position at upper left corner of black border.
27. Duplicate heart corner.
28. Image/Mirror. Image/Flip.
29. Sign your name or leave watermark.
30. Merge/Merge Visible. Save as .jpg file.
Thank you Evatexas for working/proofing this tutorial.
If you are going to use this tutorial for stationery, cards or place the tutorial/tag on another site, I would appreciate you contacting me for permission, giving Arasimages credit for the original tutorial and if possible, a link back to my site. Thank you.
Copyright © Arasimages All Rights Reserved