
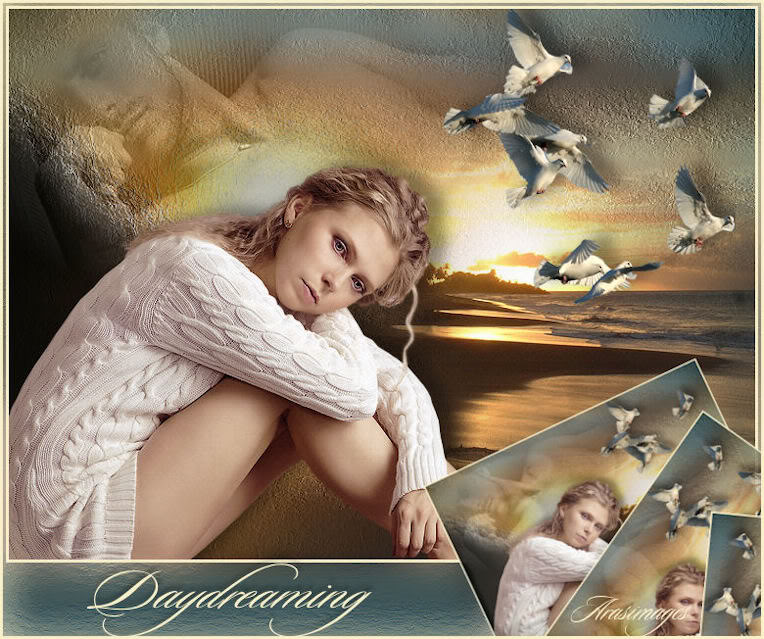
Daydreaming
For Danish translation, click on the flags.

For this tutorial you will need the materials in the zip file below.

Unzip the materials into a working folder. Open the materials in PSP, copy and close originals. Place the Font in your Fonts folder. You will need the plugin Mura's Meister for this tutorial. I have used PSPX3 to create this tutorial but you may use an earlier version. It is assumed you have a working knowledge of PSP.
Thanks go to anna.br, Monique and Nikita of Reveries for the beautiful tubes used. For more lovely tubes, please visit the tuber sites listed on my Links page, and be sure to visit the Tubes section of Arasimages.com.
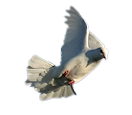
Use the dove below to mark your place along the way.
1. In Materials Palette, set the Foreground color to #f9efc9, Background to #3d5456.
2. New/New Image 762px by 562px. Selections/Select All.
3. Open 1250147530_paysages.pspimage of seascape.
4. Highlight bottom layer (Raster 1).
5. Using Selections tool set to Rectangle, select inside the white borders. Copy/Paste into Selection.
6. Selections/Select None.
7. Open Tubed-by-Monique42_3736.pspimage of man. Copy/Paste as New Layer.
8. Drop Opacity to 56. Set Blend Mode to Luminance (Legacy).
9. Move image of man to top left corner.
10. Open paysages seascape image again. Highlight middle layer (calque).
11. Copy/Paste as New Layer. Move to middle right side area of image.
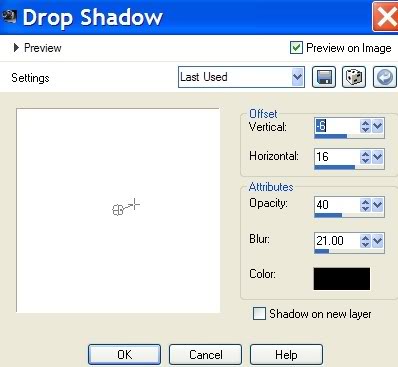
12. Open nikita_reveries_a.13.0308.pspimage of birds.
13. Copy/Paste as New Layer.
14. Image/Mirror.
15. Image/Resize/Resize by 50%, Resize all layers unchecked.
16. Move birds to upper right corner.
17. Effects/3-D Effects/Drop Shadow Vertical -6, Horizontal 16, Opacity 40, Blur 21, color #000000.
18. Open anna.br_cafe-de-outono_20-09-10.pspimage of woman.
19. Copy/Paste as New Layer.
20. Move down to bottom left corner just to edge of her finger tips, hiding the leaves and cup.
21. Effects/3-D Effects/Drop Shadow Vertical -6, Horizontal 16, Opacity 40, Blur 21, color #000000.
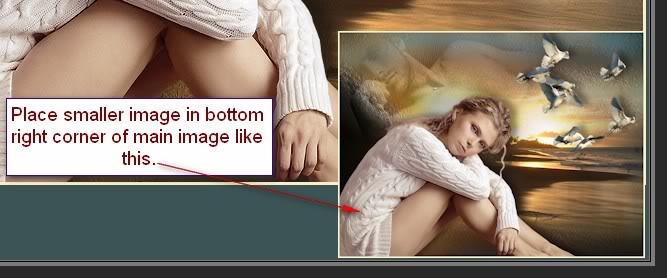
22. Image/Add Borders 3px, Symmetric checked, color #f9efc9.
23. Image/Resize/Resize by 40%, Resize all Layers checked.
24. Copy/Paste as New Image. Leave smaller image in working space.
25. Undo Resize of main image.
26. Image/Add Borders, Symmetric not checked. Have Top, Left and Right sides all at 3px, Bottom at 75Px, color #3d5456.
27. Activitate your resized smaller image, Copy/Paste as New Layer on your main image.
28. Move down to bottom right corner as in example:
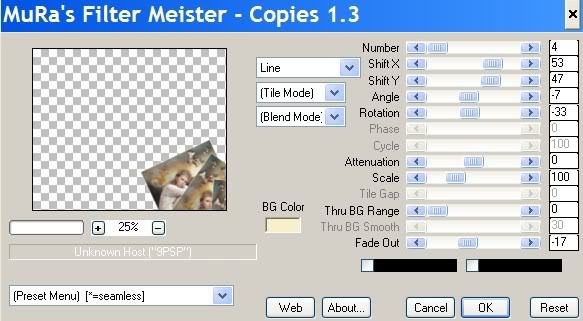
29. Effects/Mura's Meister/Copies. Use settings as shown in example:
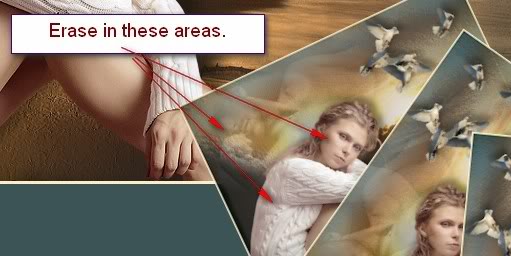
30. Highlight main image. Using Eraser tool set to example below, erase over woman in largest box to eliminate border line, the leg of woman image behind her and to brighten her face.

31. Using Magic Wand, activitate the large 3/3/3/75px border.
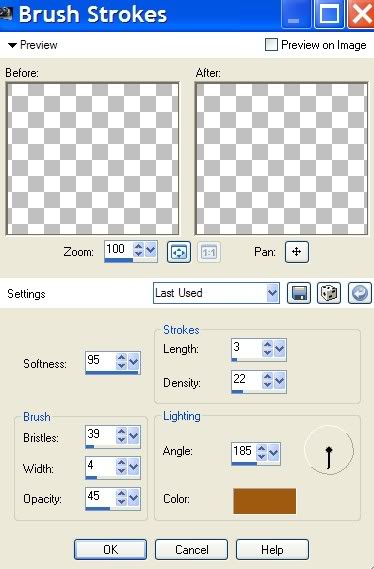
32. Effects/Art Media Effects/Brush Strokes, use settings as shown below with color #9f5a11.
33. Selections/Select None.
34. Image/Add Borders 3px, Symmetric checked, color #f9efc9.
35. Using Text tool, choose Font Sloop-Script Three, Size 72, color #f9efc9.

36. Write Daydreaming in the 75px area. If size 72 font is too large for your area, use the nodes of Vector Scale to pull it to fit or use a smaller font size.
37. Effects/3-D Effects/Drop Shadow of Vertical -6, Horizontal 2, Opacity 40, Blur 7, color #000000.
38. Convert to Raster Layer. Add your name or place watermark.
39. Merge/Merge visible.
Thank you for working this tutorial I have written for you. I hope you have enjoyed it.
A loving thanks to my testers, Evatexas and PamelaD who so faithfully test my tutorials for me.
If you are going to use this tutorial for stationery, cards or place the tutorial/tag on another site, I would appreciate you contacting me for permission, giving Arasimages credit for the original tutorial and if possible, a link back to my site. Thank you.
Copyright © Arasimages All Rights Reserved