

Mother Nature
For Danish translation, click on the flags.

For this tutorial you will need the materials in the zip file below.

Unzip the materials into a working folder. Open the materials in PSP, copy and close originals. You will need the plugins Artistic, Filters Unlimited and Alf's Border FX (Optional) for this tutorial. I have used PSPX3 to create this tutorial but you may use an earlier version. It is assumed you have a working knowledge of PSP.
Thanks go to anna.br, Karine_Dreams , HJR Designs, Margit and Arasimages for the beautiful tubes used. For more lovely tubes, please visit the tuber sites listed on my Links page, and be sure to visit the Tubes section of Arasimages.com.
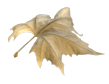
Use the leaf below to mark your place along the way.
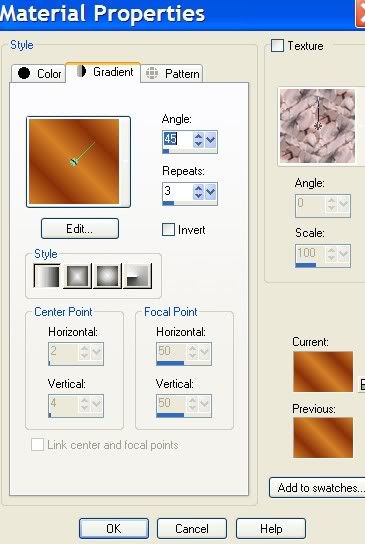
1. In Materials Palette, set the Foreground color to #d58128, Background to #89310b.
2. Set Materials Palette to Gradient Linear, Angle 45, Repeats 3 and Invert unchecked.
3. New/New Image 762px by 562px. Flood fill with Gradient.
4. Adjust/Blur/Gaussian Blur, Radius 23.
5. Layers/New Raster Layer.
6. Selections/Select All.
7. Open landscapefallbridge.pspimage of fall scene. Highlight misted layer.
8. Copy/Paste into Selection. Selections/Select None.
9. In Layers Palette, set Blend Mode to Luminance (Legacy), Opacity to 39.
10. Layers/New Raster Layer.
11. Flood fill New Raster layer with #ffffff (white).
12. In Layers Palette, set to Overlay, Opacity to 40.
13. Image/Resize/Resize by 83%, Resize all layers unchecked.
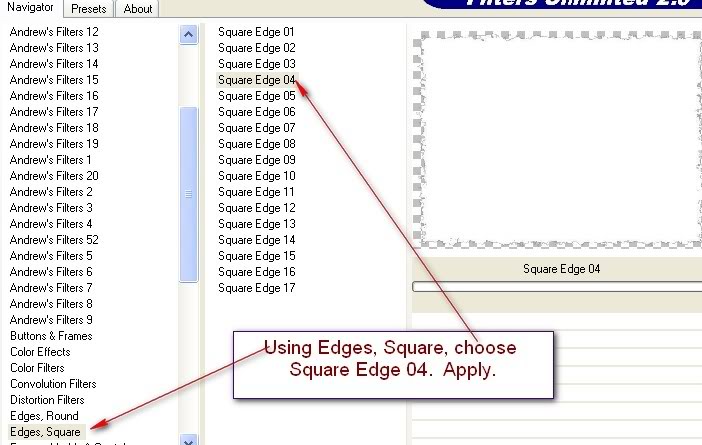
14. Effects/Filters Unlimited/Edges,Square/Square edge 04.
15. Layers/Duplicate.
16. Image/Resize/Resize by 70%, Resize all layers unchecked.
17. Open k@rine_dreams_Autumn_Face1260_september_2010.pspimage.
18. Copy/Paste as New Layer.
19. Image/Resize/Resize by 70%, Resize all layers unchecked.
20. Move to left side of image.
21. In Layers Palette, set to Luminance (Legacy), Opacity 58.
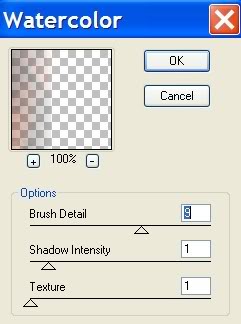
22. Effects/Artistic/watercolor. See example below.
23. Open HJR_Autumn leaf001_03Nov2007.pspimage.
24. Copy/Paste as New Layer.
25. Image/Resize/Resize by 50%/Resize all layers unchecked.
26. Layers Palette/Blend Mode to Luminance (Legacy). Move to center/bottom.
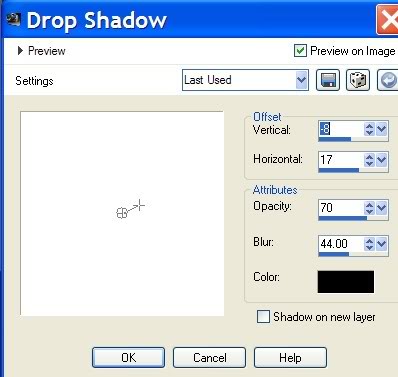
27. Effects/3-D Effects/Drop Shadow Vertical -8, Horizontal 17, Opacity 70, Blur 44, color #000000 (black).
28. Open Margit_Autumn leaves2_AO_1.pspimage.
29. Copy/Paste as New Layer.
30. Image/Resize/Resize by 30%, Resize all Layers checked.
31. Effects/3-D Effects/Drop Shadow Vertical -8, Horizontal 17, Opacity 70, Blur 44, color #000000 (black).
32. Place on top of the large gold leaf.
33. Open anna.br_autumn-girl_29_09_10.pspimage.
34. Copy/Paste as New Layer. Move to right side of image.
35. Effects/3-D Effects/Drop Shadow Vertical -8, Horizontal 17, Opacity 70, Blur 44, color #000000 (black).
36. Open Poem.png image which I have made for you. Copy/Paste as New Layer. Place in upper left corner as I have mine.
37. Sign your name or leave your watermark. Merge/Merge Visible.
38. Effects/Alf's Border FX/Border Fade III, Noise 14, Width 10 (or you may use any bevel effect you want for the border area).
39. Save as a .jpg image. Copy. It will remain in memory.
40. Open up Animation Shop. In the Animation Shop workspace, Paste as New Animation.
41. Edit/Duplicate till you have 13 frames in all.
42. File/Open Leaf Animation and Leaf Animation 2 .gif files.
43. Activate Leaf Animation .gif file. Highlight first frame.
44. Edit/Select All. Right click on blue top, Copy.
45. Activate the .jpg image. Highlight first frame.
46. Edit/Select All. Right click INSIDE first frame, Paste into Selected Frame. Hover your mouse guiding the leaf till you have it where you desire. In this case, choose to put it above the word "show". Left click to set in place.
47. Activate Leaf Animation 2.gif file. Highlight first frame.
48. Edit/Select All. Right click on blue top, Copy.
49. Go back to the main image and once again right click INSIDE first frame/Paste into Selected Frame, left click to place Animation 2.gif leaf left of her head piece.
50. Right click INSIDE first frame again/Paste Into Selected Frame and left click to place Animation 1.gif file, this time place it between nose of woman on the left and bouquet.
51. See my finished image for placement or choose your own places for the leaves. You may play around in the leaf placement for fun!
52. Click the Animation button on the top tool bar to see if your animation pleases you. If the leaves are falling too fast, click Animation/Frame Properties and change from default setting of 10 to 20. You may choose another setting if you desire. Play with it until you are satisfied. The larger the number, the slower the leaves will fall.
53. When you are finished creating your image, go to File/Save As. A box will appear. Give your creation a name, choose where to save it and click Save. Then click Next 3 times, then Finish.
ALL DONE! Congratulations...you have completed an animated tutorial.
A loving thanks to my testers, Evatexas and PamelaD who so faithfully test my tutorials for me.
If you are going to use this tutorial for stationery, cards or place the tutorial/tag on another site, I would appreciate you contacting me for permission, giving Arasimages credit for the original tutorial and if possible, a link back to my site. Thank you.
Copyright © Arasimages All Rights Reserved