
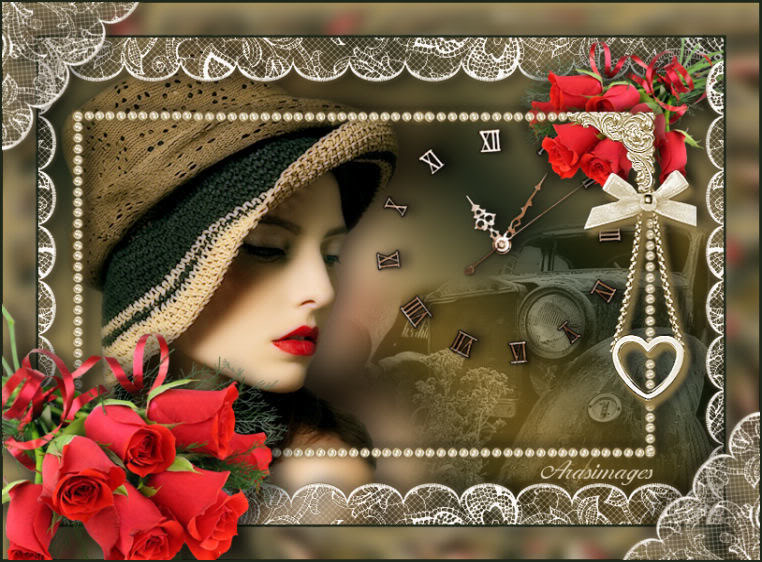
Somewhere in Time
For Danish and French translation, click on the flags.


For this tutorial you will need the materials in the zip file below.

Unzip the materials into a working folder. Open the materials in PSP, copy and close originals. Place the Font GRADL .TTF in your Fonts folder or open it from your working folder and keep it minimized while using it. It will show up in your PSP Font selection. You will need the plugins Fun House and Xero for this tutorial.
I have used PSPX3 to create this tutorial but you may use an earlier version. It is assumed you have a working knowledge of PSP.
The tubes are from Arasimages, Irene and Karine Dreams . Please visit Arasimages Tubes and other tuber sites on the Links page for other beautiful tubes.
Use the key below to mark your place along the way.

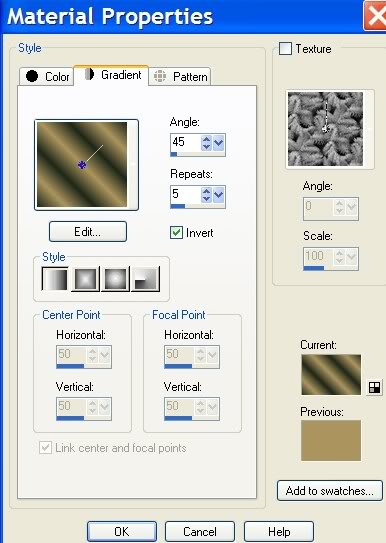
1. In Materials Palette, set the Foreground color to #ab945d, Background to #1e2719.
2. Set Materials Palette to Gradient, Style Linear, Angle 45, Repeats 5, Invert checked.
3. New/New Image 732px by 532px. Flood fill with Gradient.
4. Adjust/Blur/Gaussian Blur, Radius of 15.
5. Open the DI_tube1916.pspimage of old car. Copy/Paste as New Layer.
6. Pull car down into bottom right corner.
7. Set Blend Mode to Luminance (Legacy). Drop opacity to 45.
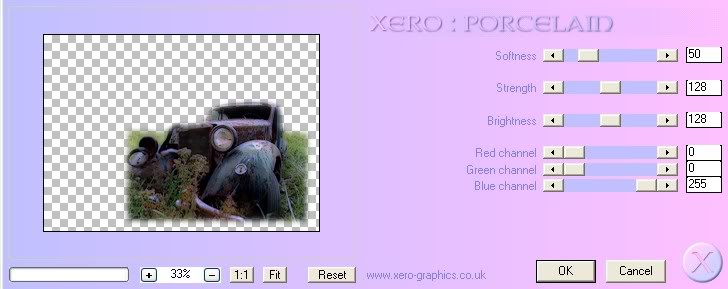
8. Effects/Xero/Porcelain. Use setting below.
9. Open K@rine_dreams_Beautiful_Face1243_septembre_2010.pspimage of woman. Copy/Paste as New Layer.
10. Adjust/Blur/Gaussian Blur, set to Radius of 28.
11. Image/Resize/Resize by 80%, Resize all layers unchecked. Pull her a little to the left and up.
12. Paste woman again and resize the same as Step 11.
13. Pull to fit on left side of image and a little downward, allowing the blurred layer beneath to show a little on the right.
14. Effects/Xero/Porcelain on the woman. Use settings as in Step #8.
15. Effects/3-D Drop Shadow, Vertical -4, Horizontal 12, Opacity 60, Blur 42, color #000000.
16. Open Midnight_fantacy_clock_shadow.pspimage. Copy/Paste as New Layer.
17. Image/Resize/Resize by 80%, Resize all layers unchecked. Pull down a little.
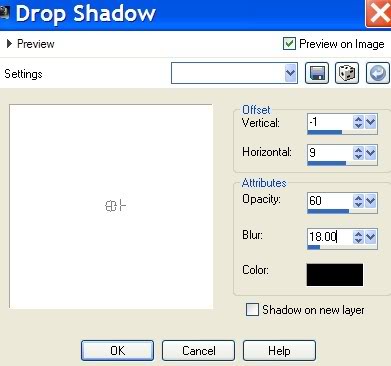
18. Effects/3-D Effects/Drop Shadow, Symmetric checked, Vertical -1, Horizontal 9, Opacity 60, Blur 18, color #000000.
19. Open RedBouquet.pspimage of flowers. Copy/Paste as New Layer.
20. Image/Resize/Resize by 45%, Resize all layers unchecked.
21. Image/Mirror. Pull bouquet up into top right corner.
22. Effects/3-D Effects/Drop Shadow, Vertical 4, Horizontal -9, Opacity 60, Blur 22, color #000000.
23. Open Pearls_with_heart.pspimage. Copy/Paste as New Layer.
24. Adjust/Sharpness/Sharpen.
25. Effects/3-D Effects/Drop Shadow, Vertical 4, Horizontal 9, Opacity 60, Blur 22, color #000000.
26. Open encaje.pspimage of lace. Copy/Paste as New Layer.
27. Pull in place at top of image.
28. Effects/3-D Effects/Drop Shadow, Vertical 4, Horizontal 9, Opacity 60, Blur 22, color #000000.
29. Layers/Duplicate. Image/Flip.
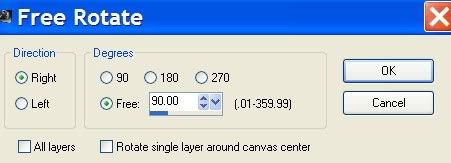
30. Layers/Duplicate. Image/Free Rotate/90 degrees/Right.
31. Pull into place on left. Layers/Duplicate.
32. Image/Mirror, making sure it is in proper place on right side.
33. Highlight top lace layer and pull beneath the rose layer. Go to the current top layer and highlight to continue.
34. Image/Add Borders. Add 3px border, Symmetric checked, color #1e2719.
35. Image/Add Borders. Add 35px border, Symmetric checked, color #ab945d.
36. Using Magic Wand, click inside the 35px border to activate it.
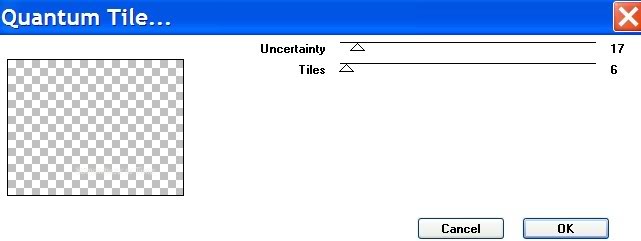
37. Effects/Fun House/Quantum Tile, using example below.
38. Adjust/Blur/Gaussian Blur, Radius 10.
39. Selections/Select None.
40. Copy/Paste encaje_lace.psp image again. Using your Pick Tool (by your move tool), grab the node and rotate it, then move it till you have the lace positioned as I have mine in finished image. See top left corner.
41. Effects/3-D Effects/Drop Shadow, Vertical 4, Horizontal 9, Opacity 60, Blur 22, color #000000.
42. Duplicate lace. Image/Mirror. Image flip.
43. Open RedBouquet.pspimage of flowers again. Copy/Paste as New Layer.
44. Image/Resize/Resize by 75%, Resize all layers unchecked.
45. Place bouquet of roses into bottom left corner.
46. Effects/3-D Effects/Drop Shadow, Vertical 4, Horizontal 9, Opacity 60, Blur 22, color #000000. Repeat.
47. OPTIONAL: Using Font Gradl, size 60, color #1e2719, write Somewhere in Time if you wish. Convert to Raster Layer.
48. Sign your name or leave your watermark.
49. Image/Add Borders 3px, Symmetric checked, color #1e2719.
Big hugs to my testers, PamelaD and Evatexas.
If you are going to use this tutorial for stationery, cards or place the tutorial/tag on another site, I would appreciate you contacting me for permission, giving Arasimages credit for the original tutorial and if possible, a link back to my site. Thank you.
Copyright © Arasimages All Rights Reserved