
Double Trouble
For Italian and Danish translation, click on the flags.


For this tutorial you will need the materials in the zip file below.

Unzip the materials into a working folder. Open the materials in PSP, copy and close originals. Place the Fonts Chopin Script in your Fonts folder or open it from your working folder and keep it minimized while using it. It will show up in your PSP Font selection. You will need plugin Alien Skin Xenofex2 for this tutorial.
I have used PSPX3 to create this tutorial but you may use an earlier version. It is assumed you have a working knowledge of PSP.
The tubes used in this creation are from K@rine_Dre@ms and anna.br. Please visit Arasimages Tubes and other tuber sites on the Links page for other beautiful tubes.
Use the snowflake below to mark your place along the way.

1. In Materials Palette, set the Foreground color to #d8b4aa, Background to #677091.
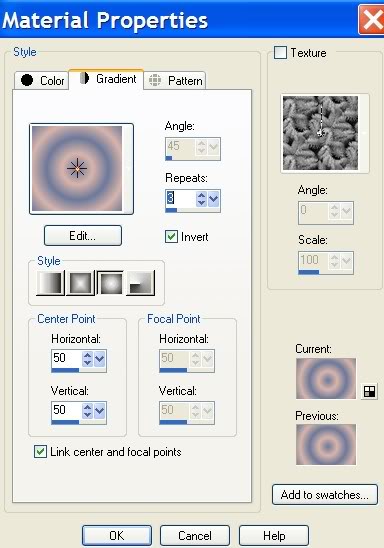
2. In Materials Palette, set to Gradient Sunburst, Angle 0, Repeats 3, Invert checked.
3. New/New Image 760px by 560px. Flood fill with Gradient.
4. Adjust/Blur/Gaussian Blur, Radial 13.
5. Effects/Distortion Effects/Pixelate. Use settings shown below.
![]()
6. Effects/Edge Effects/Enhance.
7. Open anna.br_jogo-de-cores_27-11-10.pspimage. Copy/Paste as New Layer.
8. Layers Palette/Lower Opacity to 75.
9. Open K@rine_dreams_Pretty_Winter_1387_Decembre_2010.pspimage. Copy/Paste as New Layer.
10. Image/Resize/Resize by 45%, Resize all layers unchecked.
11. Move pretty lady to right bottom corner.
12. Effects/3-D Effects/Drop Shadow, Vertical 1, Horizontal 1, Opacity 57, Blur 29, color #000000.
13. Paste lady as New Layer again. Image/Mirror.
14. Image/Resize/Resize by 76%, Resize all layers unchecked.
15. Place in lower left corner.
16. Effects/3-D Effects/Drop Shadow, Vertical 1, Horizontal 1, Opacity 57, Blur 29, color #000000.
17. Adjust/Sharpness/Sharpen More.
18. Using Eraser tool, erase shadow where snow comes together between the two women.

19. Merge/Merge Down.
20. Change background color in Materials Palette to color #fbfbf9.
21. Open Chopin Script, set to Size 72. Write Double Trouble and place in uppper center of image.

22. Convert to Raster Layer. Add your name or watermark.
23. Highlight Raster layer 2 and Merge/Merge Down with Raster layer 1. Close this merged layer off (Background).
24. Highlight and Merge/Merge Visible the women layer and text layers.
25. Copy/Paste as New Image. Save as a PSP Animation Shop (*psp) file in your working folder naming it Women.
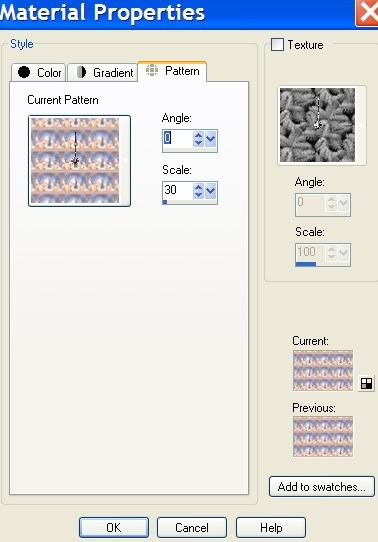
26. Open the original image (Background) layer. In Materials Palette, set the Pattern to Current Pattern (of Image), Angle 0, Scale 30. See example below.
27. Delete the women/text layer. (You have saved it in your working folder).
28. Image/Add Borders/3px, Symmetric checked, color #677091.
29. Image/Add Borders/2px, Symmetric checked, color #d8b4aa.
30. Image/Add Borders/3px, Symmetric checked, color #677091.
31. Image/Add Borders/3px right and left sides, 33px top and bottom, Symmetric unchecked, color #d8b4aa.
32. Using Magic Wand, click on 33px/3px border. Flood fill with Current Pattern.
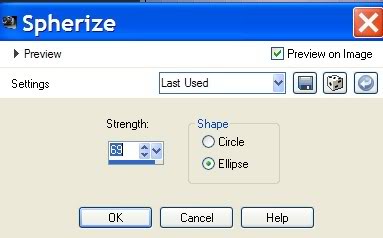
33. Effects/Geometric Effects/Spherize. See settings below.
34. Adjust/Blur/Gaussian Blur, Radial at 13.
35. Selections/Select None.
36. Image/Add Borders/3px, Symmetric checked, color #677091.
37. Image/Add Borders/2px, Symmetric checked, color #d8b4aa.
38. Image/Add Borders/3px, Symmetric checked, color #677091.
39. Layers/Duplicate twice, having three layers in all.
40. Close off bottom and middle layers. Highlight top layer.
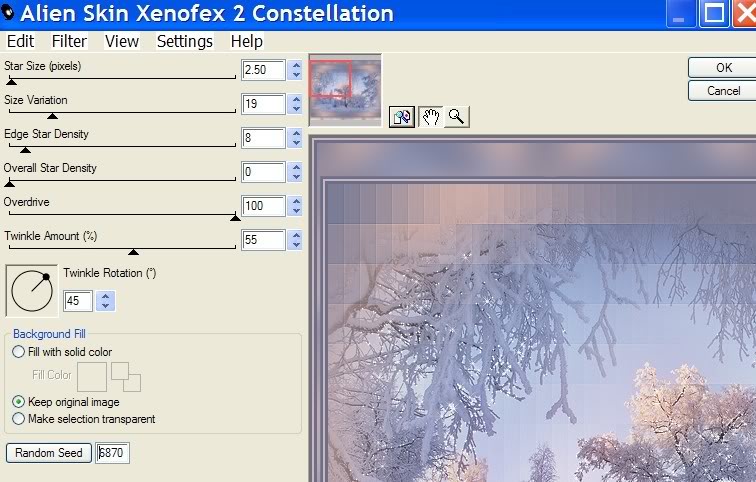
41. Effects/Alien Skin Xenofex 2/Constellation. See settings below.
42. Close off top layer. Highlight and open middle layer.
43. Effects/Alien Skin Xenofex 2/Constellation. Click on Random Seed for this layer.
44. Close off middle layer. Highlight and open bottom layer.
45. Repeat Step 42.
46. Open all layers. File/Save As/PSP Animation Shop (*psp) image. Save it in your working folder as Background Animated.
47. Open Animation Shop. File/Open. Open Background Animated.
48. Animation Shop/File/Open. Open Women file. Click Copy on the blue top border.
49. Click on the FIRST frame of Background Animated image. Edit/Select All.
50. Edit/Propagate paste.
51. Right click inside FIRST frame of Background image. Paste into Selection. Place the women and text where it should be and left click to set it in place.
52. Click on the Animation button to see if your animation is pleasing to you. If it is, then File/Save As/. When the box comes up, state where to save it, give your work a name and click Save. Click Next 3 times then Finish.
You are finished with your sparkling creation! I hope you have enjoyed the journey.
Big hugs to my testers, PamelaD and Evatexas.
If you are going to use this tutorial for stationery, cards or place the tutorial/tag on another site, I would appreciate you contacting me for permission, giving Arasimages credit for the original tutorial and if possible, a link back to my site. Thank you.
Copyright © Arasimages All Rights Reserved