
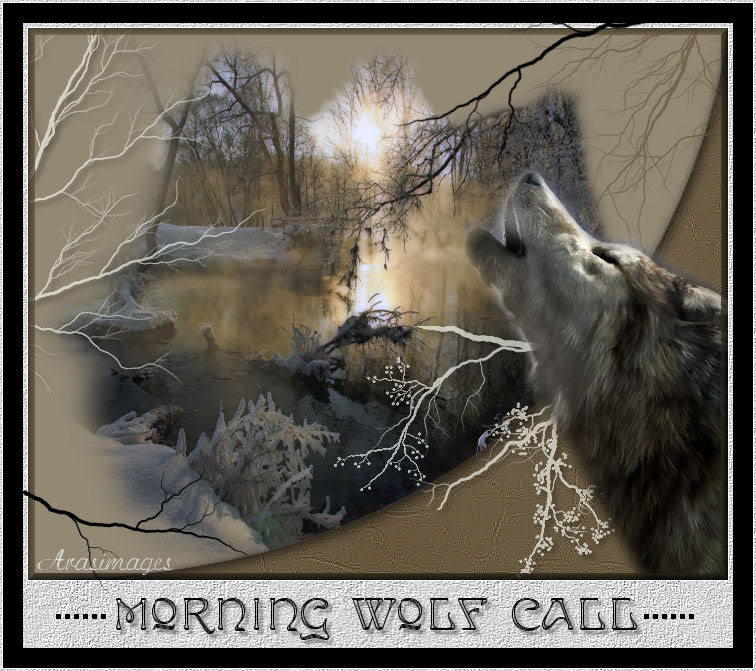
Morning Wolf Call
For Danish translation, click on the flag.

For this tutorial you will need the materials in the zip file below.

Unzip the materials into a working folder. Open the materials in PSP, copy and close originals. Place the Font Edda in your Fonts folder or open it from your working folder and keep it minimized while using it. Doing the later, it will show up in your PSP Font selection. Place the Mask66 and PM Mask in your PSP Files/Masks folder. Open the brushes in PSP and File/Export to your brushes. Place the Pattern in your PSP/Patterns folder. You will need plugin Xero/Porcelain for this tutorial.
I have used PSPX3 to create this tutorial but you may use an earlier version. It is assumed you have a working knowledge of PSP.
The background tube is from Colorel and the wolf from Arasimages. Please visit the Links page and Arasimages Tubes for lots of beautiful tubes.
Use the leaf below to mark your place along the way.

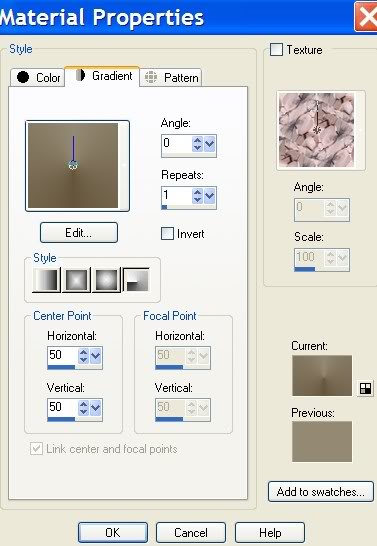
1. In Materials Palette, set the Foreground color to #948973, Background to #65553c.
2. In Materials Palette, set to Gradient Radial, Angle 0, Repeats 1, Invert unchecked.
3. New/New Image 700px by 552px. Flood fill with Gradient.
4. Layers/New Raster Layer. Flood fill with background color #65553c.
5. Layers/Load/Save Mask/Load Mask from Disk/Mask_66, Load.
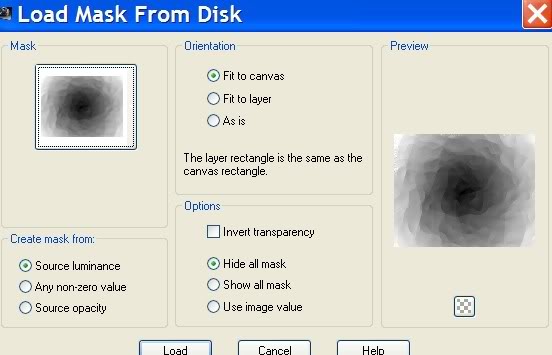
6. Merge/Merge Group.
7. Effects/Edge Effects/Enhance. Enhance more.
8. Layers/New Raster Layer. Flood fill with foreground color #948973.
9. Layers/Load/Save Mask/Load Mask from Disk/PM_Mask, Load.
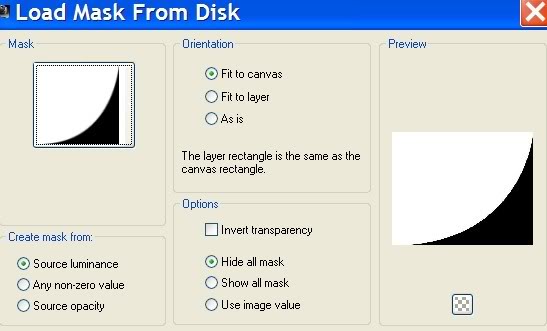
10. Merge/Merge Group.
11. Using Magic Wand, select inside the PM_Mask to activate it.
12. Open winterwonderl2-colorel.pspimage. Copy/Paste into Selection.
13. Effects/3-D Effects/Drop Shadow. Vertical 4, Horizontal 4, Opacity 70, Blur 18, color #000000. Selections/Select None.
14. Effects/Xero/Porcelian. Use settings below.

15. Layers/New Raster Layer. Set Foreground color to #f1f1e8.
Note: If you prefer to have more control over where your branches are placed after stamping, add a New Raster Layer for each one and be sure to put a drop shadow on the ones where appropriate.
16. From Tool bar, choose Paint Brush/Tree bare branch. Use settings as in example below.

17. Stamp once in upper left side using color #f1f1e8.
18. From Tool bar, choose Paint Brush/Tree berries. Use settings as in example below.

19. Stamp once in lower right side using color #f1f1e8.
20. Effects/3-D Effects/Drop Shadow, Vertical 4, Horizontal 4, Opacity 50, Blur 8, color #000000.
21. Using background color #65553c, stamp Tree bare branch in upper right corner twice, placing each stamp a bit different. Use settings below. (make Rotate 180). No drop shadow on these branches.

22. Lower Opacity of tree branch layer to 70.
23. Open Sorensen_Designs Mist Sept 165.pspimage. Copy/Paste as New Layer.
24. Image/Resize/Resize by 55%, Resize all Layers Unchecked.
25. Effects/3-D Effects/Drop Shadow, Vertical 4, Horizontal 4, Opacity 50, Blur 8, Color #000000.
26. Place wolf in bottom right hand corner.
27. Merge/Merge Visible.
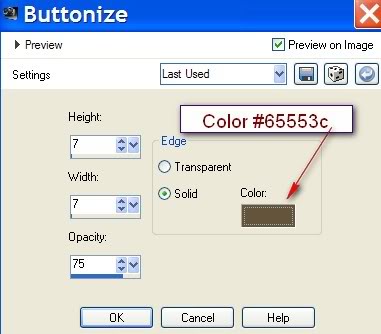
28. Effects/3-D Effects/Buttonize. Use settings below.
29. Image/Add Borders/Top and Sides set to 5px, Bottom set to 68. Symmetric unchecked, color #f1f1e8.
30. Using Magic Wand, select the 5/5/5/68 border.
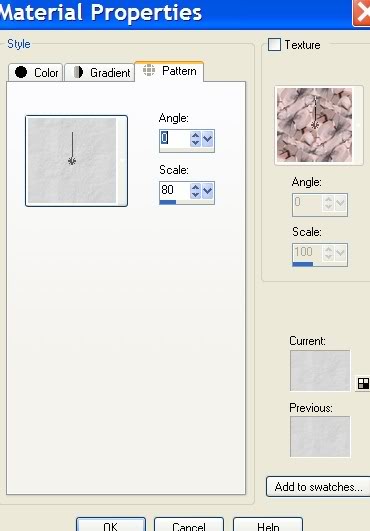
31. In Materials Palette, set Pattern to Crumpled Paper. Flood fill selected border. Use settings below.
32. Effects/Edge Effects/Enhance More. Selections/Select None.
33. Select the Text tool, Font Edda, Size 40, background color #000000. Type "Morning Wolf Call". Convert to Raster Layer.

34. Effects/3-D Effects/Drop Shadow, Vertical 4, Horizontal 4, Opacity 50, Blur 4, color #000000.
35. Tool bar/Paint Brush/Brush hgb brushes0018 004. Using settings as below, color #000000, stamp on each side of text.

36. Image/Add Borders/20px border, Symmetric checked, color #000000.
Note: For more control of where your branches will be, add a New Raster Layer for each branch.
37. Tool bar/Paint Brush/Tree bare branch 2 brush. Use settings below in color #000000. Stamp a branch in upper right corner.

38. Tool bar/Paint Brush/Tree bare branch 2 brush/Size 230, Rotation 0. Stamp on lower left corner one time using color #000000.
39. Image/Add Borders/3px border, Symmetric checked, color #f1f1e8.
40. Use Magic Wand to select it, flood fill with Pattern as in larger border.
41. Effects/Edge Effects/Enhance More. Selections/Select None.
42. Sign your name or leave watermark. Convert to Raster Layer.
43. Merge/Merge Visible.
I hope you have enjoyed the tutorial as much as I have making it for you.
Big hugs to my testers, PamelaD and Evatexas.
If you are going to use this tutorial for stationery, cards or place the tutorial/tag on another site, I would appreciate you contacting me for permission, giving Arasimages credit for the original tutorial and if possible, a link back to my site. Thank you.
Copyright © Arasimages All Rights Reserved