
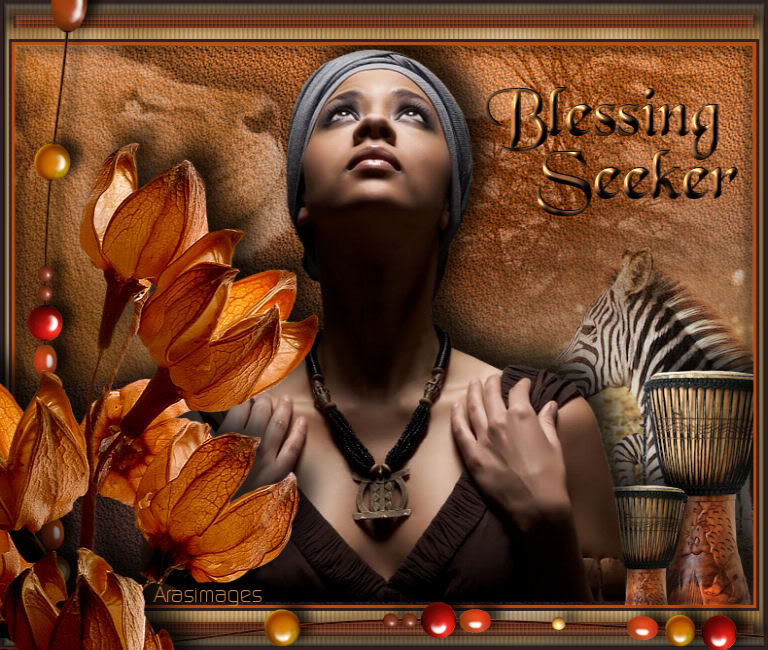
Blessing Seeker
For Italian, Spanish, Danish, and German translation, click on the flags.


For this tutorial you will need the materials in the zip file below.

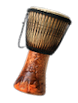
Use the drum below to mark your place along the way.
Unzip the materials into a working folder. Open the materials in PSP, copy and close originals. Place the Texture36 in your PSP Texture folder. Place the font Cherries Black in your PSP/Fonts folder or just open and minimize to task bar for it to show in your fonts when you click on your Text tool. You will need no plugins to do this tutorial. I have used PSPX3 to create this tutorial but you may use an earlier version. It is assumed you have a working knowledge of PSP.
Thanks go to Dieter and Marion, Jet, MDS, Yvonne, Novica.com and Arasimages for the beautiful tubes used. Please visit the tuber sites listed on my Links page. You will also find many lovely tubes in my Tubes section.
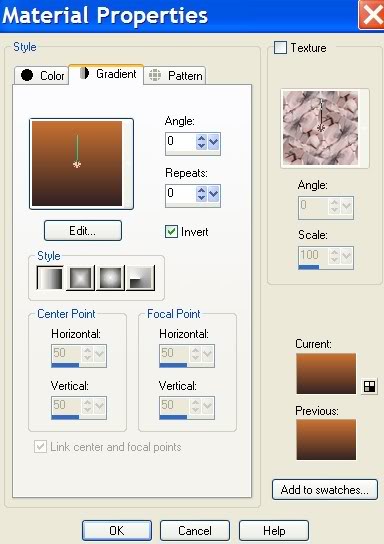
1. In Materials Palette, set Foreground to color #c87132, Background to color #312022. Under the Gradient tab, set the Style to Linear, Angle 0, Repeats 0, Invert checked.
2. New/New Image 760px by 560px. Flood fill with Gradient.
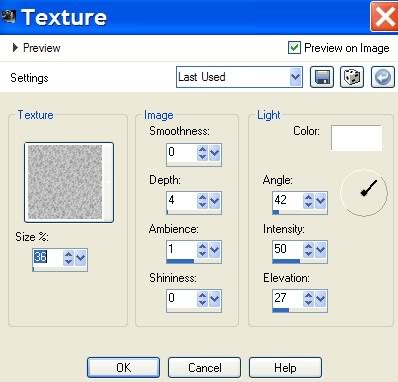
3. Effects/Texture Effects/Texture/jd-texture36. Apply as in setting example below.
4. Open mds1650Lowe08.01.07pspimage of lion. Copy/Paste as New Layer.
5. Effects/3-D Effects/Drop Shadow Vertical -17, Horizontal 17, Opacity 78, Blur 35, #color black.
6. Move to upper left corner.
7. Layers/Blend Mode/Luminance (Legacy). Opacity set to 48.
8. Open mds8093 African trees Background.pspimage. Copy/Paste as New Layer. Place in upper right corner.
9. Layers/Blend Mode/Luminance (Legacy). Drop Opacity to 40.
10. Open zebra_resting-other.pspimage, misted layer. Copy/Paste as New Layer.
11. Move to bottom right side of image and place so part of image is showing.
12. Drop Opacity to 88.
13. Open KingoftheForest.Novica.pspimage. Copy/Paste as New Layer.
14. Image/Resize/Resize by 30%, Resize all Layers unchecked.
15. Effects/3-D Effects/Drop Shadow Vertical -17, Horizontal 17, Opacity 78, Blur 35, color #000000, black.
16. Place drum in bottom right corner.
17. Paste KingoftheForest drum again as New Layer.
18. Image/Resize/Resize by 45, Resize all layers Unchecked.
19. Effects/3-D Effects/Drop Shadow Vertical -17, Horizontal 17, Opacity 78, Blur 35, color #000000, black.
20. Place smaller drum in front of larger drum as I have done. Merge/Merge Down.
21. Open jet-woman15-maart-2008.pspimage. Copy/Paste as New Layer.
22. Effects/3-D Effects/Drop Shadow Vertical -17, Horizontal 17, Opacity 78, Blur 35, color #000000, black.
23. Image/Add Borders/Border of 3px, Symmetric checked, color #ffffff.
24. Select with Magic Wand. Flood fill with color #be4a0c.
25. Effects/3-D Effects/Drop Shadow Vertical -6, Horizontal -6, Opacity 78, Blur 13, color #000000, black.
26. Effects/3-D Effects/Drop Shadow Vertical 6, Horizontal 6, Opacity 78, Blur 13, color #000000, black.
27. Selections/Select None.
28. Image/Add Borders/Border of 3px, Symmetric checked, color #312022.
29. Image/Add Borders/Border of 36px top and bottom, Border of 6px sides, Symmetric unchecked, color #ffffff.
30. Select 36px by 6px border with Magic Wand.
31. Open bande.pspimage. Copy/Paste into Selection.
32. Selections/Modify/Contract by 11. Layers/New Raster Layer.
33. Flood fill each bar across the top and bottom that is active with background color #312022.
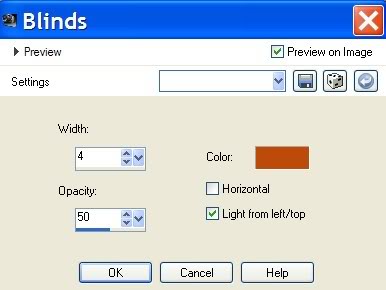
34. Effects/Texture/Blinds. Use settings as below using color #be4a0c.
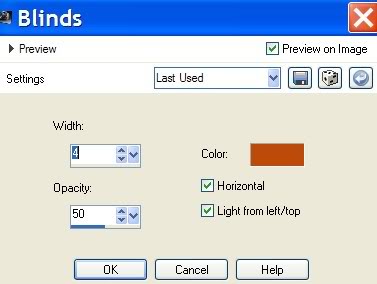
35. Effects/Texture/Blinds. Use same settings as before, color #be4a0c, except this time check Horizontal also. See example below.
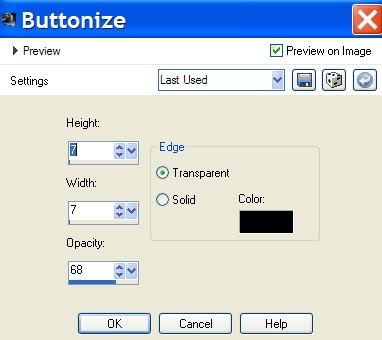
36. Effects/3-D Effects/Buttonize (bars), using settings below, color #000000.
37. Selections/Select None.
38. Effects/3-D Effects/Buttonize (whole image) as in Step #36.
39. Image/Add Borders/Border 3px, Symmetric checked, color #312022.
40. Open mneaves_ittyBeadyBitof Autumn_bead wire3.pspimage. Copy/Paste as New Layer.
41. Image/Resize/Resize by 50%, Resize all Layers unchecked.
42. Image/Mirror. Image/Flip. Move beads down to bottom across the border.
43. Effects/3-D Effects/Drop Shadow, Vertical -6, Vertical 12, Opacity 78, Blur 16, color #000000.
44. Copy/Paste mneaves_ittyBeadyBitof Autumn_bead wire3 again.
45. Repeat Resize by 50% again, then Image/Flip.
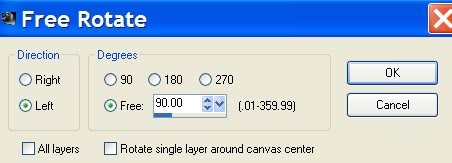
46. Image/Free Rotate/Rotate Left by 90 degrees.
47. Effects/3-D Effects/Drop Shadow, Vertical -6, Vertical 12, Opacity 78, Blur 16, color #000000.
48. Move beads to left side of image, right of left border as I have done. You may choose which beads to show as it pleases you.
49. Open Yvonne_bloem_11_21_oktober_2008.pspimage. Copy/Paste as New Layer.
50. Effects/3-D Effects/Drop Shadow Vertical -17, Horizontal 17, Opacity 78, Blur 35, #color black.
51. Place flower at bottom left side of image.
52. From Tool bar, select your Text tool. Choose Font Cherries Black, Size 72, color #312022 and type Blessing.

53. Convert to Raster Layer.
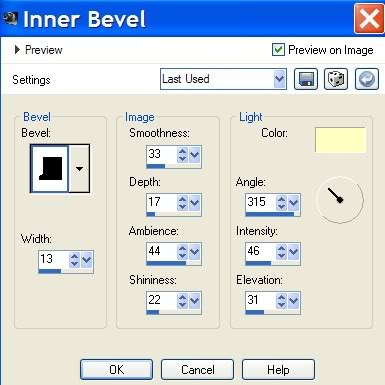
54. Effects/3-D Effects/Inner Bevel with settings as seen below. Use color #ffffc0. Repeat.
55. Effects/3-D Effects/Drop Shadow Vertical -1, Horizontal 1, Opacity 100, Blur 1, color#000000.
56. Using Text tool as above in Step 52, type Seeker. Convert to Raster Layer.
57. Do an Inner Bevel twice as in Step 54, drop shadow as in Step 55.
58. Place text into positions as seen in my finished image, upper right corner.
59. Sign your name or leave watermark. Convert to Raster Layer.
60. Merge/Merge Visible. You are finished. I hope you have enjoyed the African journey with me.
Thanks to Evatexas and PamelaD who so faithfully test my tutorials for me.
If you are going to use this tutorial for stationery, cards or place the tutorial/tag on another site, I would appreciate you contacting me for permission, giving Arasimages credit for the original tutorial and if possible, a link back to my site. Thank you.
Copyright © Arasimages All Rights Reserved