
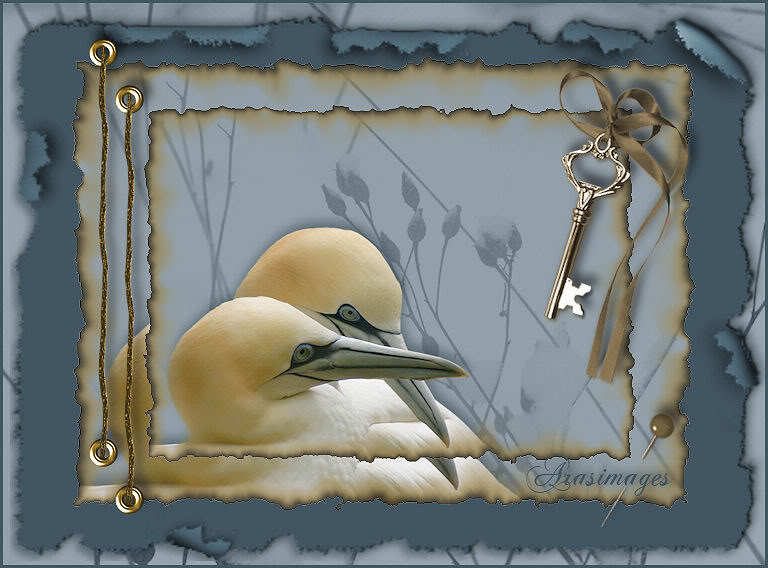
Birds in Blue
For Danish and French translations, click on the flags.


For this tutorial you will need the materials in the zip file below.

Unzip the materials into a working folder. Open the materials in PSP, copy and close originals. You will need Alien Skin Xenofex2/burnt edges to do this tutorial. I have used PSPX3 to create this tutorial but you may use an earlier version. It is assumed you have a working knowledge of PSP.
Thanks go to Mtm and Arasimages for the tubes used. Please visit the tuber sites listed on my Links page. You will also find many lovely tubes in my Tubes section.
Use the pin below to mark your place along the way.

1. In Materials Palette, set Foreground to color #8f9ca5, Background to color #425762.
2. New/New Image 762px by 562px. Flood fill with foreground color #8f9ca5.
3. Layers/New Raster Layer. Select All.
4. Open Weeds.pspimage. Copy/Paste into Selection.
5. In Layers Palette, set Blend Mode to Luminance (Legacy), Opacity down to 60.
6. Layers/New Raster Layer.
7. Open Mat_brown_torn.png paper. Using Color Changer Tool from tool bar, change color of paper to background color #425762. If you do not have a version with color changer, then Adjust/Hue and Saturate/Colorize using Hue of 143, Saturation of 50.
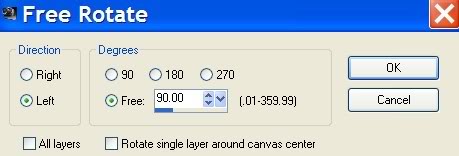
8. Image/Free Rotate Left by 90 degrees. See example below.
9. Copy/Paste into Selection. Selections/Select None.
10. Effects/3-D Effects/Drop Shadow, Vertical 5, Horizontal -5, Opacity 54, Blur 11, color #34464e.
11. Effects/3-D Effects/Drop Shadow, Vertical -5, Horizontal 5, Opacity 54, Blur 11, color #34464e.
12. New/New Image 630px Width by 460px height. Flood fill with foreground color #8f9ca5.
13. Layers/New Raster Layer. Select All.
14. Open Weeds.pspimage. Copy/Paste into Selection. Selections/Select None.
15. Layers/Blend Mode/Luminance (Legacy). Lower Opacity to 27.
16. Open Mtm_Birds 37-small-1 Jan 2008.pspimage. Copy/Paste as New Layer.
17. Pull down to bottom of image.
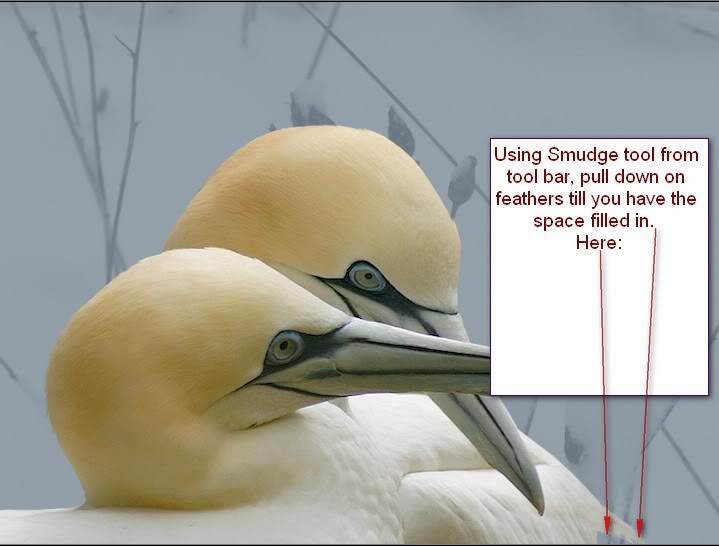
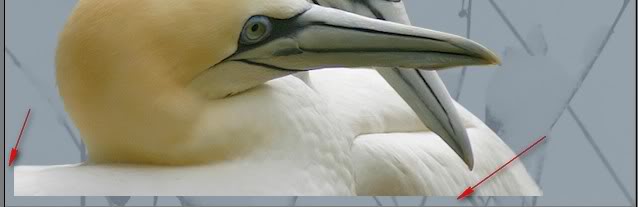
18. Using the Smudge Brush from Tool Bar, smudge lower right corner of feathers so the edge is not squared. The Push Tool could be used instead if you do better with it.

19. Image/Resize/Resize by 84%, Resize all Layers unchecked.
20. Pull the birds down and place in bottom left corner leaving a small amount of blue showing. See Example below.
21. Effects/3-D Effects/Drop Shadow, Vertical -10, Horizontal 4, Opacity 54, Blur 22, color #34464e.
22. Merge/Merge Visible.
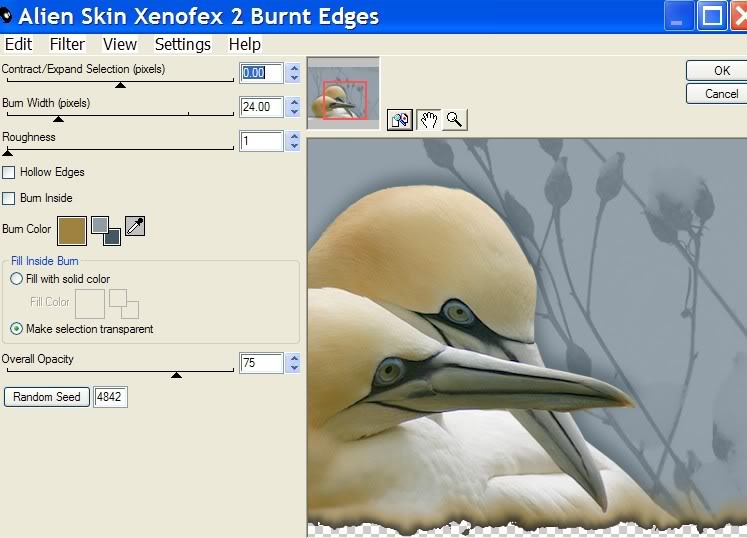
23. Effects/AlienSkinXenofex2/Burnt Edges. Use settings below, burn color #a08240.
24. Copy/Paste as New Layer into the 762px by 562px image.
25. Working with the birds image, undo AlienSkinXenofex2/burnt edges effect and merged step. Make sure all layers are open and bird layer is highlighted.
26. Image/Resize/Resize by 84%, Resize all layers unchecked.
27. Pull birds down into left bottom corner, leaving a small amount of blue showing as before in Step 20. Merge/Merge Visible.
28. Effects/AlienSkinXenofex2/Burnt Edges. Use same settings except for the Random Seed. Set it to 9238 or whatever you like.
29. Image/Resize/Resize by 77%, Resize all layers unchecked.
30. Copy/Paste as New Layer into the 762px by 562px image (over first bird layer).
31. Open llaves.pspimage of key. Copy/Paste as New Layer.
32. Image/Resize/Resize by 87%, Resize all layers unchecked.
33. Place in upper right corner of foreground bird layer.
34. Effects/3-D Effects/Drop Shadow, Vertical -9, Horizontal 7, Opacity 54, Blur 14, color #000000.
35. Open scraptube_06.pspimage. Copy/Paste as New Layer.
36. Effects/3-D Effects/Drop Shadow, Vertical -9, Horizontal 7, Opacity 54, Blur 14, color #000000.
37. Place to the left side of bird layers as I have done.
38. Duplicate. Move duplicated layer of scraptube to right and down of first layer as I have done.
39. Open epingle.pspimage of pin. Copy/Paste as New Layer.
40. Image/Resize/Resize by 87%, Resize all layers unchecked.
41. Image/Free Rotate/Rotate Right by 15 degrees.
42. Move down to bottom right corner of Raster 4. Using Eraser tool, erase in center of pin so it appears it is pinned to layer.
43. Effects/3-D Effects/Drop Shadow/Vertical -9, Horizontal 7, Opacity 54, Blur 14, color #000000.
44. Sign your name or leave watermark. Convert to Raster Layer.
45. Image/Add Borders/3px border, Symmetric checked, color #425762.
46. Adjust/Sharpness/Sharpen.
47. Save your work, and thanks for working my tutorial.
Thanks to Evatexas and PamelaD who so faithfully test my tutorials for me.
If you are going to use this tutorial for stationery, cards or place the tutorial/tag on another site, I would appreciate you contacting me for permission, giving Arasimages credit for the original tutorial and if possible, a link back to my site. Thank you.
Copyright © Arasimages All Rights Reserved