

Puurrrfect
For Italian and Danish translation, click on the flags.


For this tutorial you will need the materials in the zip file below.

Unzip the materials into a working folder. Open the materials in PSP, copy and close originals. You will need Filters Unlimited, Simple and Toadies/Plain Mosaic Blur plugins to do this tutorial. I have used PSPX3 to create this tutorial but you may use an earlier version. It is assumed you have a working knowledge of PSP although you may find the tutorial is written in detail.
Thanks go to Karen, Leny's Designs and Arasimages for the tubes used. Please visit the tuber sites listed on my Links page. You will also find many lovely tubes in my Tubes section.
Use the lilacs below to mark your place along the way.

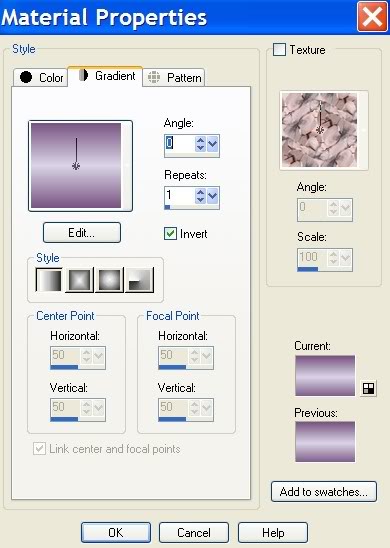
1. In Materials Palette, set Foreground to color #dad4e6, Background to color #795482.
2. In Materials Palette, create a Gradient of Style Linear, Angle 0, Repeats 1, Invert checked.
3. New/New Image 762px by 562px. Flood fill with Gradient.
4. Open flieder.pspimage. Copy/Paste as New Layer. Move to upper left corner.
5. Using the Color Changer tool, right click the Background color #795482 on the darkest spot of the lilac cluster.
6. Effects/Simple/Top Left Mirror.
7. Merge/Merge Visible.
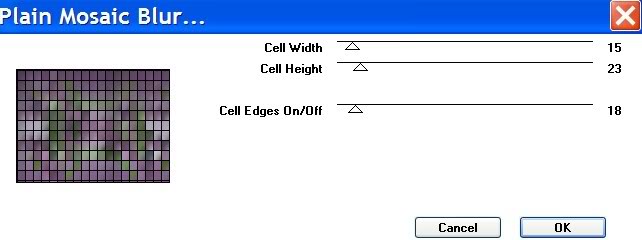
8. Effects/Toadies/Plain Mosiac Blur.
9. Open TwoKittensE.pspimage. Copy/Paste as New Layer.
10. Move kittens down a little.
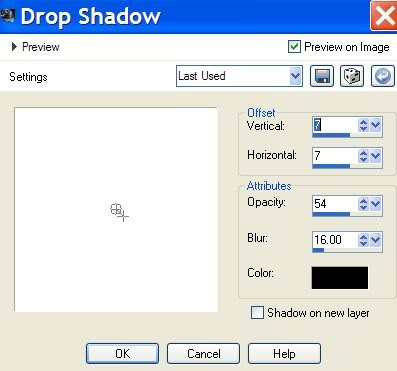
11. Effects/3-D Effects/Drop Shadow, Vertical 7, Horizontal 7, Opacity 54, Blur 16, color #000000.
12. Image/Picture Frame. Choose Edge Fun 02 frame and apply.
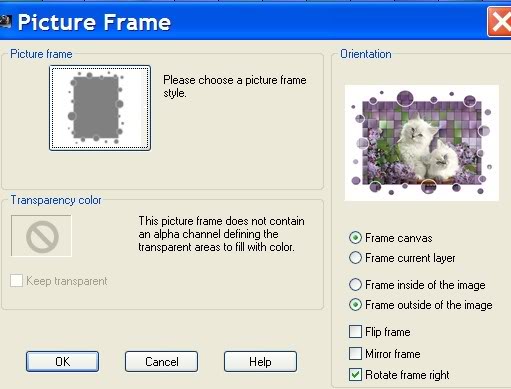
13. Flood fill frame with Gradient.
14. Effects/Toadies/Plain Mosaic Blur, settings as in Step #8.
15. Effects/3-D Effects/Drop Shadow, Vertical 7, Horizontal 7, Opacity 54, Blur 16, color #000000.
16. Open flieder.pspimage. Copy/Paste as New Layer.
17. Using Color Changer, change color of lilacs using color #cb97c7.
18. Move lilacs into bottom left corner.
19. Effects/3-D Effects/Drop Shadow, Vertical 7, Horizontal 7, Opacity 54, Blur 16, color #000000.
20. Open LD-VogueShoe.pspimage. Copy/Paste as New Layer.
21. Image/Resize/Resize by 84%, Resize all Layers unchecked.
22. Pull shoe into bottom left corner as I have mine.
23. Using Color Changer, change color of shoe using color #ddacea.
24. Open lilac2.pspimage. Copy/Paste as New Layer. Keep lilac2 open.
25. Move into upper left corner as I have mine.
26. Effects/3-D Effects/Drop Shadow, Vertical 7, Horizontal 7, Opacity 54, Blur 16, color #000000.
27. Copy/Paste as New Layer again. Image/Mirror and move into bottom right corner.
28. Effects/3-D Effects/Drop Shadow, Vertical 7, Horizontal 7, Opacity 54, Blur 16, color #000000.
29. Copy/Paste as New Layer again. Place lilacs below kittens.
30. Effects/3-D Effects/Drop Shadow, Vertical 7, Horizontal 7, Opacity 54, Blur 16, color #000000.
31. Change Background color in Materials Palette to #ffffff.
32. From the Tool Bar, select the Text tool. Using Scriptina font, Size 72, color #ffffff, type "Puurrrfect".

33. Convert to Raster Layer and place across the top center area.
34. Open Fflieder_kl.pspimage of small lilacs. Copy/Paste as New Layer.
35. Move the small cluster of lilacs to the right end of your text.
36. Effects/3-D Effects/Drop Shadow, Vertical 7, Horizontal 7, Opacity 54, Blur 16, color #000000.
37. Sign your name in a font, size and color of your choice. Convert to Raster Layer.
38. Merge/Merge Visible.
39. Effects/Filters Unlimited/Buttons and Frames/Glass Frame 1. Frame size 17, Contrast 128.
You are finished. I hope you have enjoyed this tutorial as much as I have creating it for you.
Thanks to Evatexas and PamelaD who so faithfully test my tutorials for me.
If you are going to use this tutorial for stationery, cards or place the tutorial/tag on another site, I would appreciate you contacting me for permission, giving Arasimages credit for the original tutorial and if possible, a link back to my site. Thank you.
Copyright © Arasimages All Rights Reserved