
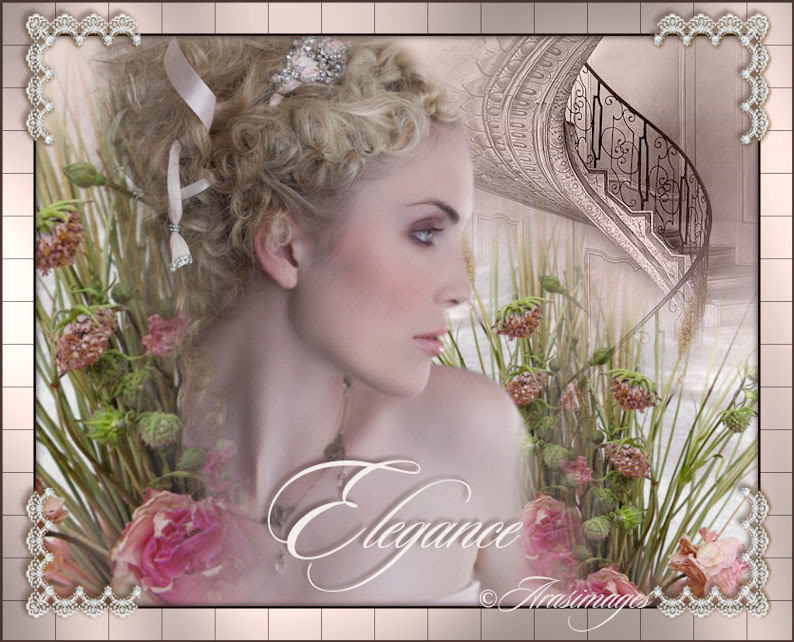
Pink Elegance
For Italian and Danish translation, click on the flags.


For this tutorial you will need the materials in the zip file below.

Thanks go to Irene and Corinne Vicaire for the tubes used in this tutorial. Please visit the tuber sites listed on my Links page. You will also find many lovely tubes in my all-free Tubes section.
Use the pearl below to mark your place along the way.

Unzip the materials into a working folder. Open the materials in PSP, copy and close originals. You will need Simple, Graphics Plus and Tormentia plugins to do this tutorial. I have used PSPX3 to create this tutorial but you may use an earlier version. It is assumed you have a working knowledge of PSP although this is a very easy tutorial to do.
1. In Materials Palette, set Foreground to color #e6d2cb, Background to color #bd9598.
2. Set to Gradient Linear, Angle to 0, Repeats to 0, Invert checked.
3. New/New Image 760px by 600px. Flood fill with Gradient.
4. Open m86wv209.pspimage of stairs. Copy/Paste as New Layer.
5. Move stairs to right upper side of image. Set Blend Mode to Luminance/Legacy.
6. Open Mist corinne.vicaire-fleurs 06.03.11.pspimage of flowers. Copy/Paste as New Layer.
7. Image/Resize/Resize by 65%, Resize all layers unchecked. Image/Mirror.
8. Place to right of center in image near stairs.
9. Paste again the flowers, resize as before.
10. Place in bottom right corner so they cluster together with other flowers.
11. Open DI_tube 1221.pspimage of woman. Copy/Paste as New Layer.
12. Move woman a little to the left.
13. Open Mist corinne.vicaire-fleurs 06.03.11.pspimage of flowers.
14. Image/Mirror. Place on left side of image.
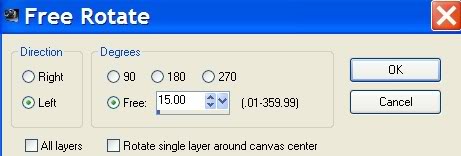
15. Image/Free Rotate Left, 15 degrees as shown below.
16. Using Eraser tool, erase some of the misted part of the flowers off woman's neck.
17. Image/Add Borders/2px border, Symmetric checked, color #4b342e.
18. Image/Add Borders/33px border, Symmetric checked, color #e6d2cb.
19. Select Magic Wand and click on 33px border to activate it.
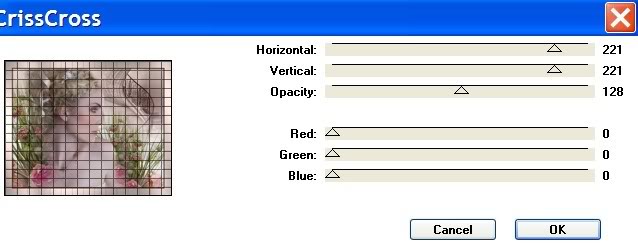
20. Effects/Tormentia/CrissCross. Use settings below.
21. Effects/Graphics Plus/Cross Shadow. Have settings all on 50 except for last one which should be at 128.
22. Effects/3-D Effects/Drop Shadow. Vertical -4, Horizontal -4, Opacity 54, Blur 10, color #00000.
23. Effects/3-D Effects/Drop Shadow. Vertical 4, Horizontal 4, Opacity 54, Blur 10, color #000000. Selections/Select None.
24. Image/Add Borders/2px border, Symmetric checked, color #4b342e.
25. Select Text tool. Select Font Sloop-Script Three, Size 150, color #f3edeb.
26. Type the letter "E".
27. Use same font and color, change size to 90 and type "legance". Convert to Raster Layer.
28. Using the Move tool, move text to lower middle of image.
29. If you wish, use the text provided in materials instead of creating your own text. Drop Shadow is provided.
30. Effects/3-D Effects/Drop Shadow, Vertical -4, Horizontal -4, Opacity 54, Blur 6, color #4b342e.
31. Open Corner.pspimage. Copy/Paste as New Layer.
32. Place in upper left corner.
33. Effects/3-D Effects/Drop Shadow, Vertical -4, Horizontal -4, Opacity 54, Blur 6, color #4b342e.
34. Effects/Simple/Top Left Mirror. This will place the Corner in all four corners of your image.
35. Sign your name or leave your watermark. Convert to Raster Layer.
36. Merge/Merge Visible. Save as .jpg file in your working folder.
Thank you Eva and Pamela for testing these tutorials for me.
If you are going to use this tutorial for stationery, cards or place the tutorial/tag on another site, I would appreciate you contacting me for permission, giving Arasimages credit for the original tutorial and if possible, a link back to my site. Thank you.
Copyright © Arasimages All Rights Reserved