
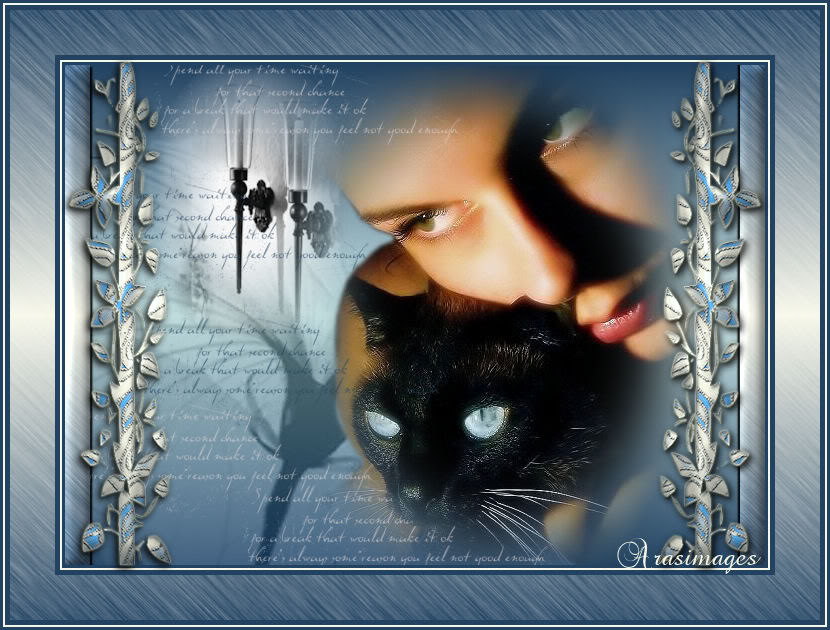
Friends In Blue
For Danish translation, click on the flags.

For this tutorial you will need the materials in the zip file below.

Credit is given for materials used when original author is known. Tubes used in this tutorial are from Sorensen_Designs, Aimelle and Deiter and Marion. Thank you tubers for your beautiful work. Please visit the tuber sites listed on my Links page. You will also find many more tubes in my all-free Tubes section.
Use the bookmark below to mark your place along the way.
![]()
Unzip the materials into a working folder. Export missm-Lyric 001 brush to your brushes folder in PSP. Place the Pattern Corel_15_17.bmp in your Patterns folder in PSP. (Check to see if you already have it installed.) Open the materials in PSP, copy and close originals. You will need the plugin Filter Graphics Plus/Cross Shadow for this tutorial. I have used PSPX3 to create this tutorial but you may use an earlier version. It is assumed you have a working knowledge of PSP to do this tutorial.
1. Create a New Image 650px by 500px, transparent.
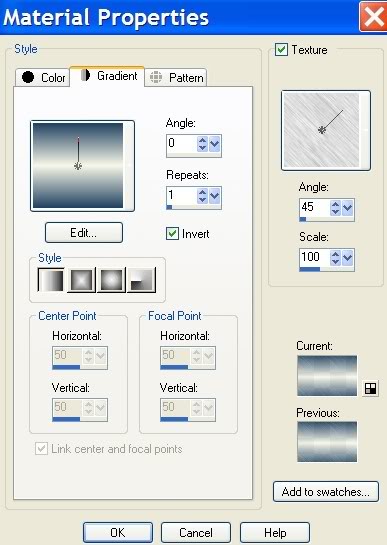
2. In Materials Palette, set Foreground to color #cce8e9, Background to color #214261.
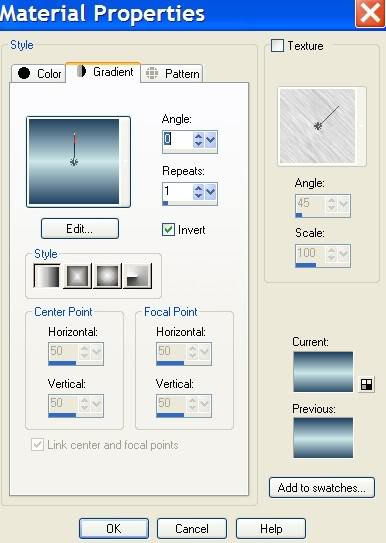
3. Create Gradient using the Foreground/Background colors, Style set to Linear, Angle 0, Repeats 1, Invert checked.
4. Flood fill New Image with Gradient.
5. Open Aimelle-tube_Meyers_02-SM.pspimage of flower. Copy/Paste as New Layer.
6. Using the Pick Tool (by the Move Tool), grab the nodes and stretch flower image out but leave a little space on the right.
7. Blend Mode set to Luminance (Legacy). Set Opacity to 59.
8. Open SS_615_Misted.pspimage of woman and cat. Copy/Paste as New Layer.
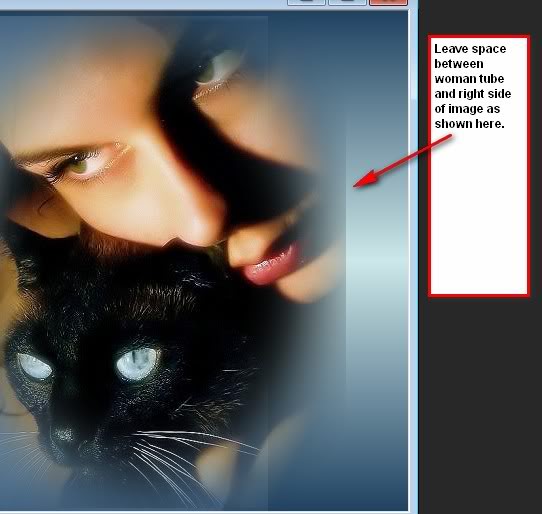
9. Move toward right side of image, leaving a space between the lady and right border.
10. Open mds750dekomist.pspimage of lamps. Copy/Paste as New Image.
11. Image/Resize/Resize by 80%, Resize all Layers unchecked.
12. Move lamps to left side of woman, lining up the right lamp bottom with border of woman image.
13. Close off Raster 4 of lamp for now.
14. Highlight Raster 2 of flower. Using the Eraser tool, erase the flower bleed through off woman's face and arm and the cat, and above the flower.
15. Highlight Raster 3 of woman and cat. Using Selection Tool/Freehand Selection set Point to Point,Mode/Replace, Feather set to 5 and Smoothing set to 4, Anti-alias checked, select around left side of woman to elimate the sharp edge and shadow.
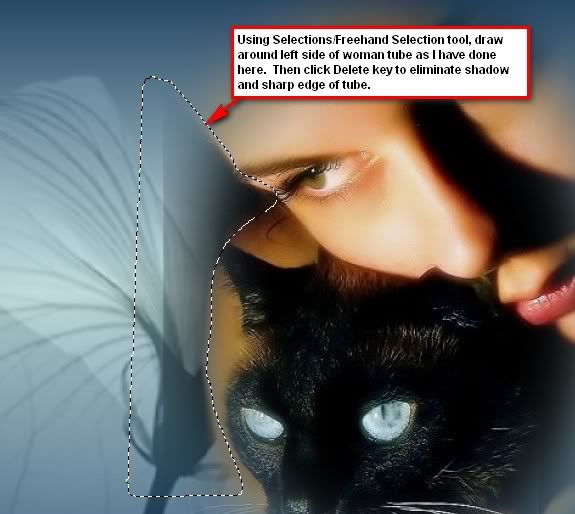
16. Click Delete key once. Selections/Select None.
17. Highlight top Layer and open (Raster 4).
18. Layers/New Raster Layer.
19. From Tool bar, select Paint Brush tool. Select the missm-Lyric 001 brush.

20. In Materials Palette, change Foreground to color #ddd3d4, leave Background color set at #214261. Left click to stamp brush in center top of image. Right click over lamps. Right click again a bit lower, then left click below that and again at center bottom.
21. Using Eraser tool, erase words off cat's nose area.
22. Image/Add Borders/Uncheck Symmetric, Set Top and Bottom to 0, Sides to 25, color #ffffff.
23. Select the Magic Wand, change Feather settings to 0, leave Tolerance to 0. Hold down Shift key, click both side borders.
24. In Materials Palette, change Foreground color to #f7f7e8, check Texture box, Gradient and choose Pattern grain long Corel_15_017.
25. Flood both sides with Pattern.
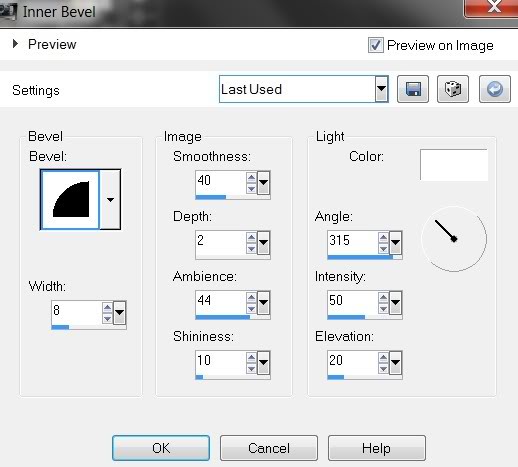
26. Effects/3-D Effects/Inner Bevel, using settings as shown below.
27. Effects/Graphics Plus/Cross Shadow, using settings of all 50's with the exception of the last two at 128. (Default).
28. Effects/3-D Effects/Drop Shadow Vertical 2, Horizontal 2, Opacity 100, Blur 2, color #000000.
29. Effects/3-D Effects/Drop Shadow Vertical -2, Horizontal -2, Opacity 100, Blur 2, color #000000.
30. Selections/Select None.
31. Image/Add Borders, 3px border, color #214261, Symmetric checked.
32. Image/Add Borders, 2px border, color #f7f7e8, Symmetric checked.
33. Image/Add Borders, 5px border, color #214261, Symmetric checked.
34. Image/Add Borders, 45px border, color #f7f7e8, Symmetric checked.
35. Using Magic Wand, click inside 45px border to activate it.
36. Using current colors in the Gradient, flood fill the 45px border with the pattern.
37. Selections/Select None.
38. Image/Add Borders, 5px border, color #214261, Symmetric checked.
39. Image/Add Borders, 2px border, color #f7f7e8, Symmetric checked.
40. Image/Add Borders, 3px border, color #214261, Symmetric checked.
41. Open Sorensen_Designs Element 1_L.pspimage. Copy/Paste as New Layer.
42. Image/Resize/Resize by 86%/Resize all layers unchecked.
43. Move to right side of image so line of woman tube is covered and some leaves are on the smaller border.
44. Effects/Graphics Plus/Cross Shadow. Have all settings at 50 except for the last one which should be set to 128.
45. Left click in the aqua color of the leaf tube with the Color Changer tool if you desire. This is optional.
46. Effects/3-D Effects/Drop Shadow/Vertical 2, Horizontal 2, Opacity 100, Blur 11, color #000000.
47. Layers/Duplicate. Image/Mirror.
48. Sign your name. Convert to Raster Layer.
49. Merge/Merge All.
A big thank you to PamelaD and Evatexas for testing my tutorials for me.
If you are going to use this tutorial for stationery, cards or place the tutorial/tag on another site, I would appreciate you contacting me for permission, giving Arasimages credit for the original tutorial and if possible, a link back to my site. Thank you.
Copyright © Arasimages All Rights Reserved