
Wild River
For Italian, Danish and French translation, click on the flags.


For this tutorial you will need the materials in the zip file below.

Credit is given for materials used when original author is known. Tubes used in this tutorial are from MTM, JHanna, Nikita, and Karine Dreams . Thank you tubers for your beautiful work and permission to use. Please visit the tuber sites listed on my Links page. You will also find many more tubes in my all-free Tubes section.
Use the bookmark below to mark your place along the way.

Unzip the materials into a working folder. Open the materials in PSP, copy and close originals. You will need the plugin Filters Unlimited/AFS IMPORT/MIRRBEVL and Filters Unlimited/Distortion/Ink Blots for this tutorial. I have used PSPX3 to create this tutorial but you may use an earlier version. It is assumed you have a working knowledge of PSP to do this tutorial but beginners may not find it hard to do.
1. Create a New Image 760px by 560px, transparent.
2. In Materials Palette, set Foreground to color #955d0a, Background to color #000000.
3. Flood fill the transparent image with Foreground color #955d0a.
4. Layers/New Raster Layer. Selections/Select All.
5. Open JHanna_165 background.jpg image. Copy/Paste into Selection.
6. Lower Opacity to 64. Selections/Selections None.
7. Effects/Filters Unlimited/Distortion Filters/Ink Blots. Intensity set to 64.
8. Open 1220640388_paysages.pspimage. Copy/Paste as New Layer. Position a small amount left and up from center.
9. Open Mtm_Dieren-104-Paarden-14 Nov 2008.pspimage. Copy/Paste as New Layer.
10. Image/Resize/Resize by 51%, Resize all layers unchecked. Position to right side of image.
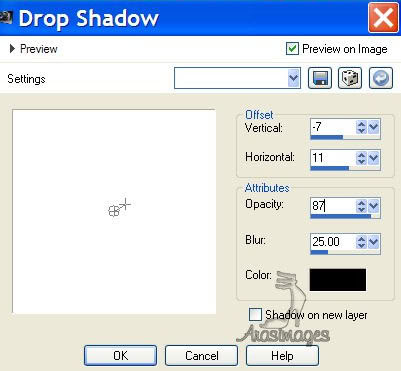
11. Effects/3D Effects/Drop Shadow/Vertical -7, Horizontal 11, Opacity 87, Blur 25, color #000000. Repeat Drop Shadow.
12. Open k@rine_dreams_Petty_Woman_1817_Juillet_2001.pspimage. Copy/Paste as New Layer.
13. Image/Resize/Resize by 70%, Resize all layers unchecked. Position in left bottom corner.
14. Highlight Raster 3 (image of water scene). Using Eraser tool, erase water image off right side of woman's face and forehead.
15. Go back to top layer (Raster 5) to continue.
16. Open faeriethrone1.pspimage. Copy/Paste as New Layer.
17. Move to right side of image, having bottom flat branches at bottom of image and right side off the edge a small amount.
18. Effects/3-D Effects/Drop Shadow/Vertical -7, Horizontal 11, Opacity 87, Blur 25, color #000000. Repeat Drop Shadow.
19. Open autumn-blaadjes-bibi.pspimage. Copy/Paste as New Layer.
20. Image/Mirror.
21. Adjust/Hue and Saturation/Colorize. Use example below.
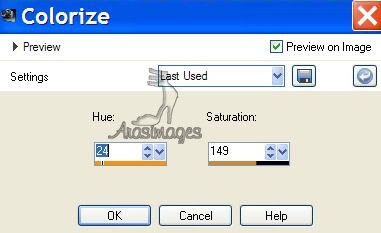
22. Move into upper left corner.
23. Effects/3-D Effects/Drop Shadow/Vertical -7, Horizontal 11, Opacity 87, Blur 25, color #000000. Repeat Drop Shadow.
TIP: Save your work as a "working image" psp file in your working folder in case you want to come back to it and move layers to fit better later on.
24. Image/Add Borders/5px border, color #000000, Symmetric checked.
25. Image/Add Borders/3px border, color #955d0a, Symmetric checked.
26. Image/Add Borders/15px border, color #000000, Symmetric checked.
27. Using Magic Wand, click inside the 15px border to activate it.
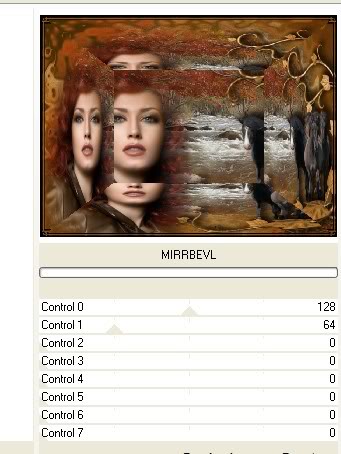
28. Effects/Filters Unlimited/AFS/MIRRBEVL.
29. Selections/Select None.
30. Sign your name or leave your watermark. Convert to Raster Layer.
31. Merge/Merge Visible. Save as .jpg file.
32. ANIMATION DIRECTIONS.
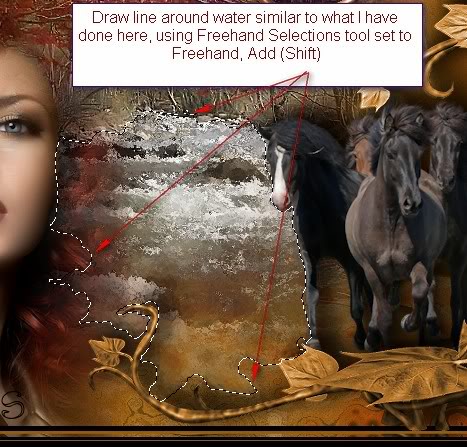
33. Using the Freehand Selection tool, set to settings below, draw around the water you wish to animate.

34. Duplicate your image 4 times, having 5 layers in all. Close off all layers except the top layer (Copy (4) of Merged).
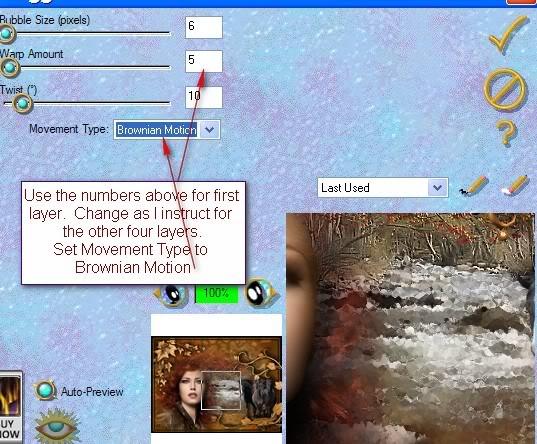
35. Effects/Eye Candy 3.1/Jiggle. Use setting as you see them below.
36. Close off top layer (Copy 4 of Merged). Move to Copy (3) of Merged Layer, open and highlight. Apply settings Bubble Size 18, Warp Amount 18, Twist 19.
37. Close off Copy (3) of merged layer. Move to Copy (2) of Merged Layer, open and highlight. Apply settings Bubble Size 7, Warp Amount 7, Twist 8.
38. Close off Copy (2) of Merged layer. Move to Copy of Merged Layer, open and highlight. Apply settings of Bubble Size 5, Warp Amount 6, Twist 3.
39. Close off Copy of Merged Layer. Move to Merged Layer, open and highlight. Apply settings of Bubble Size 5, Warp Amount 11, Twist 3.
40. Open all unopened layers. File/Save As/give your work a name and save as file type PSP Animation Shop (*.psp) in your working folder.
41. Working in Animation Shop, File/Open the file you just saved.
42. Edit/Select All. Animation/Frame Properties. Set to 23. (The higher the speed, the slower the animation.)
43. Click on the Animation button at the top tool bar to see if your animation is working as you would like.
44. When all is the way you want, File/Save As. A box will come up for you to give your work a name, name where to save it and it will save as a .gif file.
45. Click Next, Next, Next as the boxes change and last, click Finish. You are done.
Thank you for working this tutorial. I hope you enjoyed it; come back again soon for another one.
Big hugs for PamelaD and Evatexas for their faithful checking of my written tutorials.
If you are going to use this tutorial for stationery, cards or place the tutorial/tag on another site, I would appreciate you contacting me for permission, giving Arasimages credit for the original tutorial and if possible, a link back to my site. Thank you.
Copyright © Arasimages All Rights Reserved