
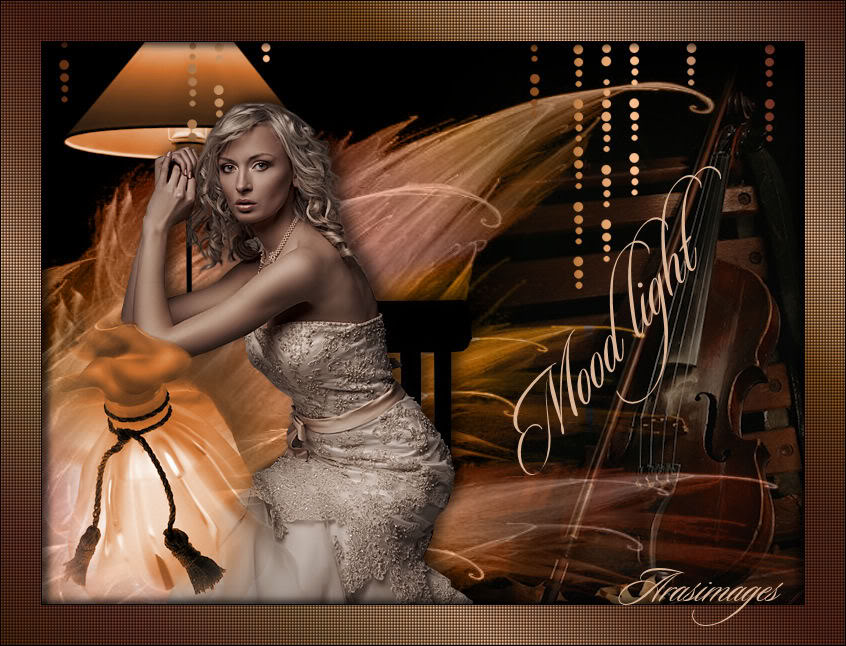
Mood light
For Italian, Danish and German translation, click on the flags.


For this tutorial you will need the materials in the zip file below.

Thanks go to Nikita, Dakara, Irene and eSoliel for the beautiful tubes/masque used. Please visit the tuber sites listed on my Links page.
Use the bookmark below to mark your place along the way.
![]()
Unzip the materials into a working folder. Place the Gradient in your gradient folder and the Selection in your Selection folder. Open the materials in PSP, copy and close originals. You will need no special plugins to do this tutorial. I have used PSPX3 to create this tutorial but you may use an earlier version. It is assumed you have a working knowledge of PSP.
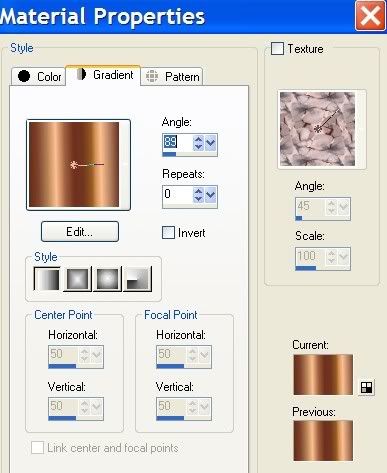
1. In Materials Palette, Under the Gradient tab, find the dkd_pibronze Gradient and set it to Foreground, Background to #000000. Under the Gradient tab, set the Style to Linear, Angle 89, Repeats 0, Invert unchecked.
2. New/New Image 762px by 562px. Flood fill with Gradient.
3. Open cal_guis_lampe_1210 Image. Highlight the middle layer. Copy/Paste as New Layer.
4. Image/Resize/Resize by 75%/Resize all layers unchecked. Move to middle right side of image.
5. Layers/New Layer. Selections/Select All.
6. Open 1250181071_Masques.jpg. Copy/Paste into Selection.
7. Layers/Luminance/(Legacy). Selections/Select None.
8. Open cal_guis_lampe_1210 tube. Highlight Raster 1 (first layer). Copy/Paste as New Layer.
9. Image/Resize/Resize by 75%/Resize all layers unchecked.
10. Repeat resize. Move toward left side of image.
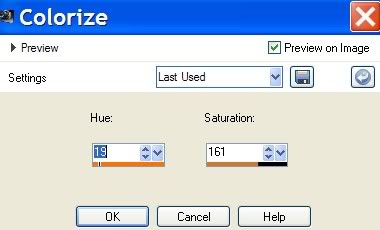
11. Adjust/Hue and Saturation/Colorize. Use settings as in my example:
12. Open Di_tube_1222. Copy/Paste as New Layer. Move violin over to right side of image. Lower Opacity to 52.
13. Layers/New Layer. Selections/Load Save Selection/Load Selection from Disk. Choose Selection Arasimages Drop 5. Load.
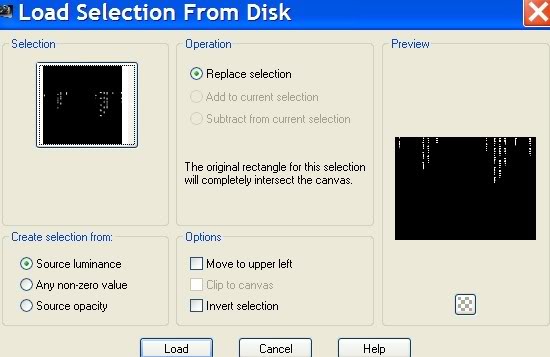
14. Flood fill Selections dots with Foreground (Gradient).
15. Selections/Select None.
16. Open calquisglam291108 woman tube. Copy/Paste as New Layer. Move to left under lamp shade.
17. From Tool bar, choose your Selections/Freehand Selection tool using settings below, select the portion of the chair and dress and press Delete key to remove dress of woman from chair on down to bottom on right side.

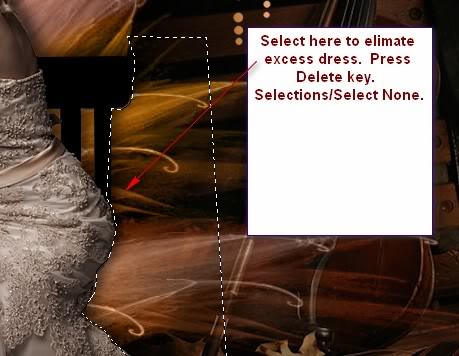
18. Selections/Select None.)
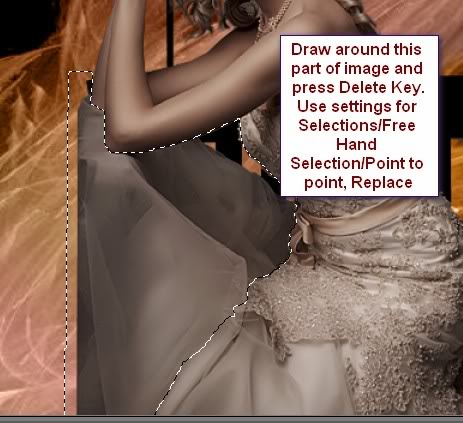
19. Using same settings and method, select the woman's dress and chair from the left side of woman. See example.
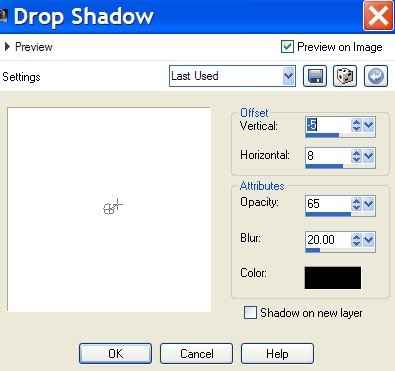
20. Effects/3-D Effects/Drop Shadow, Vertical -5, Horizontal 8, Opacity 65, Blur 20, color #000000, black.
21. Open eSoleil_25040071741.pspimage. Copy/Paste as New Layer.
22. Image/Resize/Resize by 65%, Resize all layers unchecked.
23. Move bottle to left bottom corner. Duplicate and Merge/Merge Down.
24. Adjust/Hue and Saturation/Colorize. Hue set to 19, Saturation set to 161.
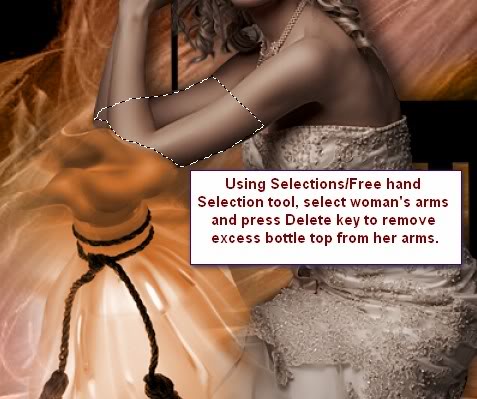
25. Using Eraser tool, having woman layer highlighted, carefully erase her elbow area off the inside of bottle top.
26. Using Selections/Freehand Selection tool, set to Point to Point, Replace, Feather 0 and having bottle layer highlighted, select her elbow and arm area. (see example). Press Delete key. Selections/Select None.
27. In Materials Palette, set background (bottom) color to #dcb496.
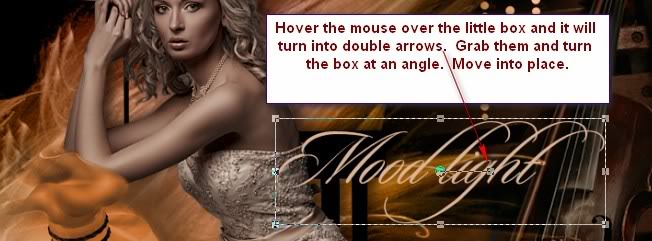
28. From Tool bar, select the Text tool. Use Font Sloop-Script Three, Size 85, Vector, color #dcb496.

29. Write "Mood light". With the text box still active, hover over the little square until you see double arrows, grab them and move text turning at an angle. See example below.
30. Layers/Convert to Raster Layer. Move into place.
31. Image/Add Borders 1px, color #000000, black, Symmetric checked.
32. In Materials Palette, change the Gradient Angle to 38, all the rest stays the same.
33. Image/Add Borders 40px, color #dcb496. Symmetric checked.
34. From Tool bar, select Magic Wand. Click inside the 40px border to activate it.
35. Flood fill with Foreground Gradient.
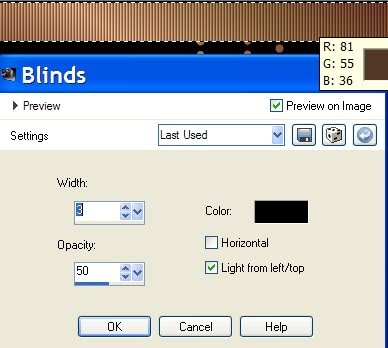
36. Effects/Texture Effects/Blinds. Use settings below:
37. Effects/Texture Effects/Blinds. Check the Horizontal box and all other settings remain as in step above.
38. (Keep the border selected). Effects/3-D Effects/Drop Shadow, Vertical 5, Horizontal 8, Opacity 65, Blur 10, color #000000, black.
39. Effects/3-D Effects/Drop Shadow, Vertical -5, Horizontal -8, Opacity 65, Blur 10, color #000000, black.
40. Selections/Select None.
41. Image/Add Borders 1px, color #000000, Symmetric checked.
42. Sign your name or place your watermark. Merge/Merge Visible.
A big thank you to Evatexas and PamelaD who so faithfully test my tutorials for me.
If you are going to use this tutorial for stationery, cards or place the tutorial/tag on another site, I would appreciate you contacting me for permission, giving Arasimages credit for the original tutorial and if possible, a link back to my site. Thank you.
Copyright © Arasimages All Rights Reserved