
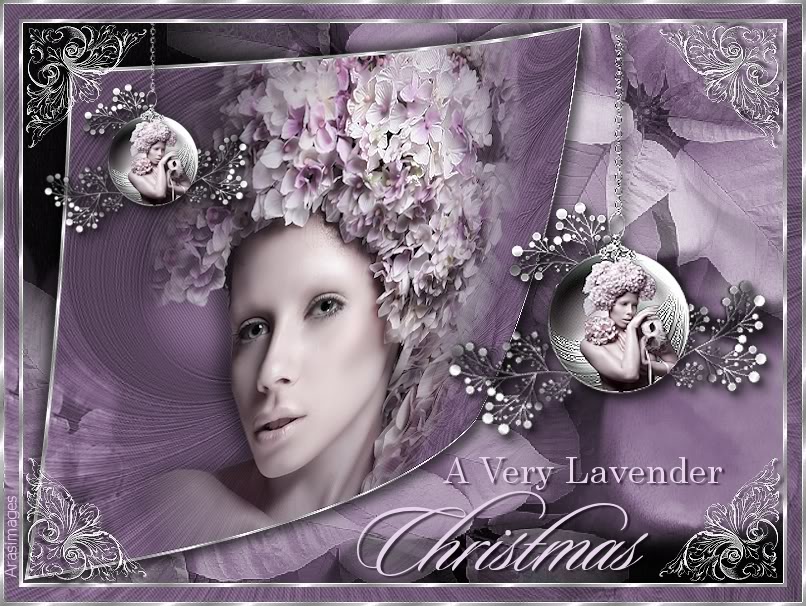
A Very Lavender Christmas
For Italian and Danish translation, click on the flags.


For this tutorial you will need the materials in the zip file below.

Thanks go to JHanna; to Nikita; Karine Dreams and Arasimages for the beautiful tubes used. Please visit the tuber sites listed on my Links page.
Use the bookmark below to mark your place along the way.
Unzip the materials into a working folder. Open the materials in PSP, copy and close originals. You will need plugin Simple to do this tutorial. I have used PSPX3 and PSPX4 to create this tutorial but you may use an earlier version. It is assumed you have a working knowledge of PSP.
1. In Materials Palette, set Foreground to #ffffff, Background to #e9d4ee.
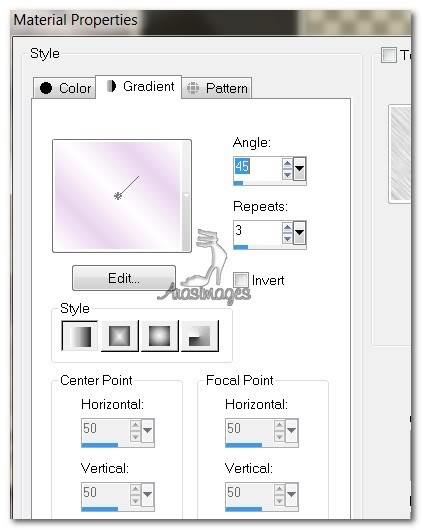
2. Create Gradient using Style Linear, Angle 45, Repeats 3, Invert unchecked.
3. New/New Image 760px by 560px. Flood fill with Gradient.
4. Adjust/Blur/Gaussian Blur, Radius set to 30.
5. Open 1223225276_wallpapers_vegetal.jpg. Copy/Paste as New Layer.
6. Layers/New Raster Layer. Selections/Select All.
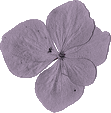
7. Open 12206401502_fleurs.pspimage. Copy/Paste into Selection.
8. In Layers Palette, set to Luminance. Opacity on 53. Selections/Select None.
9. Effects/Edge Effects/Enhance. Move flower into upper right corner.
10. Duplicate. Image/Mirror. Image/Flip. Move flower into lower left corner.
11. Merge/Merge Visible. Copy/Paste as New Image on workspace and minimize. We will use this later.
12. New/New Image/760px by 560px. Selections/Select All.
13. Open JHanna_105bground.jpg. Copy/Paste into Selection. Selections/Select None.
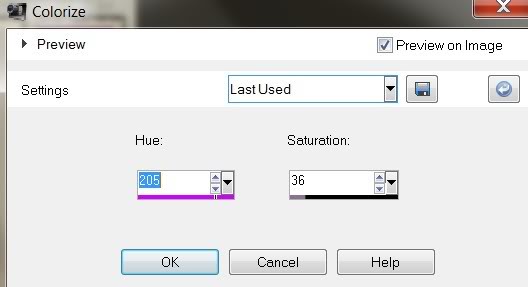
14. Adjust/Hue and Saturation/Colorize. Hue set to 205, Saturation set to 36.
15. Open K@rine_Dreams_Misted_Woman_1831_Juillet_2011.pspimage. Copy/Paste as New Layer.
16. Effects/3D Effects/Drop Shadow/ -6 Vertical, -18 Horizontal, Opacity 57, Blur 28, color #000000.
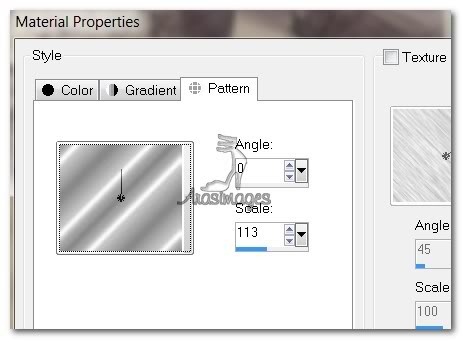
17. In Materials Palette, set Foreground to Pattern, select MD_Silver2 Pattern. Angle set to 0, Repeats 113.
18. Image/New Borders/4px border, Symmetric checked, color #ffffff.
19. Using Magic Wand, click within 4px border to activate it. Flood fill with MD_Silver2 Pattern.
20. Effects/Edge Effects/Enhance. Selections/Select None.
21. Promote Background layer to Raster Layer. (Important).
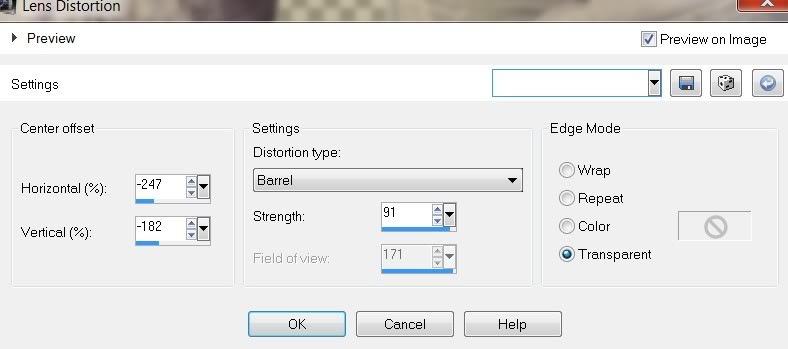
22. Effects/Distortion Effects/Lens Distortion. Use settings below.
23. Image/Resize/Resize by 98%, Resize all layers unchecked.
24. Adjust/Sharpness/Sharpen. COPY!
25. Maximize the Background you worked on earlier and Paste the woman on Background image as New Layer. Move distorted image toward left. See where I have placed mine.
26. Effects/3D Effects/Drop Shadow, Vertical 6, Horizontal 6, Opacity 57, Blur 15, color #000000.
27. Effects/3D Effects/Drop Shadow, Vertical -6, Horizontal -6, Opacity 57, Blur 15, color #000000.
28. Open HangingBall.pspimage. Copy/Paste as New layer.
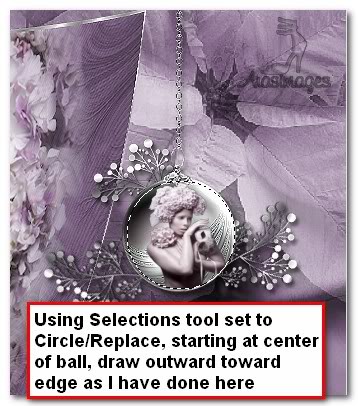
29. Using Selections Tool, Selections set to Circle, Replace, Feather 0, draw a circle within the ball out to the edges.

30. Open K@rine_Dreams_Lady_Masquerade_1829_Juillet_2011.pspimage.
31. Using Selections Tool, Selections set to Circle, Replace, Feather 0, on the tube itself, draw a circle to encompasse her head and down to her waist. COPY.

32. Go back to the main working image and Paste into Selection (ball). You should now have the lady within the ball.
33. Adjust/Sharpness/Sharpen. Selections/Select None.
34. Duplicate. Image/Resize/Resize by 80%, Resize all layers unchecked.
35. Effects/3D Effects/Drop Shadow, Vertical 6, Horizontal 6, Opacity 57, Blur 15, color #000000.
36. Move Christmas ball with lady in it to upper left corner.
37. Highlight Raster 3. Image/Resize/Resize by 125%, Resize all layers unchecked.
38. Adjust/Sharpness/Sharpen. Move to center right side.
39. Effects/3D Effects/Drop Shadow, Vertical 6, Horizontal 6, Opacity 57, Blur 15, color #000000.
40. Go back to top layer and highlight it to continue.
41. From Text tool, select Font Century, Size 36, color #e9d4ee, settings below.

42. Type "A Very Lavender". Convert to Raster Layer. Set into place at bottom right corner.
43. Effects/3D Effects/Drop Shadow, Vertical 2, Horizontal 3, Opacity 57, Blur 2, color #000000.
44. From Text tool, select Font Sloop Script Three, Size 100, color #e9d4ee. Type "Christmas".

45. Convert to Raster Layer. Set into place beneath A very Lavender text.
46. Effects/3D Effects/Drop Shadow, Vertical 2, Horizontal 3, Opacity 57, Blur 2, color #000000.
47. Image/Add Borders/4px border, Symmetric checked, color #ffffff.
48. Select the 4px border with magic wand to activate it. Flood fill the border with the MD_Silver2 Pattern.
49. Effects/Edge Effects/Enhance. Selections/Select None.
50. Image/Add Borders/15px border, Symmetric checked, color #000000.
51. Select the 15px border with Magic Wand to activate it.
52. Open JHanna_105bground.jpg image. Copy/Paste into Selection.
53. Adjust/Hue and Saturation/Colorize. Hue set to 205, Saturation set to 36.
54. Selections/Select None.
55. Image/Add Borders/4px border, Symmetric checked, color #ffffff.
56. Select the 4px border with magic wand to activate it. Flood fill the border with the MD_Silver2 Pattern.
57. Effects/Edge Effects/Enhance. Selections/Select None.
58. From Tool bar, select the Paint Brush tool, Victorian Corner1 Brush. Set to settings below.

59. Layers/New Raster Layer. Stamp twice in upper left corner.
60. Effects/Edge Effects/Enhance.
61. Effects/3D Effects/Drop Shadow, Vertical -3, Horizontal -3, Opacity 57, Blur 3, color #000000.
62. Effects/Simple/Top Left Mirror.
63. Sign your name or leave your watermark. Convert to Raster Layer.
64. Merge/Merge Visible. Save as .jpg.
65. You are finished! I hope you have an enjoyable Christmas and it is filled with beauty!
A big thank you to Evatexas and PamelaD who tested this tutorial for me.
If you are going to use this tutorial for stationery, cards or place the tutorial/tag on another site, I would appreciate you contacting me for permission, giving Arasimages credit for the original tutorial and if possible, a link back to my site. Thank you.
Copyright © Arasimages All Rights Reserved