
Butterfly Kisses
For Danish and German translation, click on the flags.


For this tutorial you will need the materials in the zip file below.

Thanks go to Arasimages tuber PamelaD for the beautiful tube used. The lacy border image origin is unknown; if this is your work, please let me know so I may give you credit. Please visit the tuber sites listed on my Links page for other lovely tubes.
Use the bookmark below to mark your place along the way.

Unzip the materials into a working folder. Open the materials in PSP, copy and close originals. You will need Filters Unlimited II and Graphics Plus plugins to do this tutorial. I have used PSPX4 to create this tutorial but you may use an earlier version. It is assumed you have a working knowledge of PSP.
1. In Materials Palette, set Foreground to #c1adc9, Background to #834883.
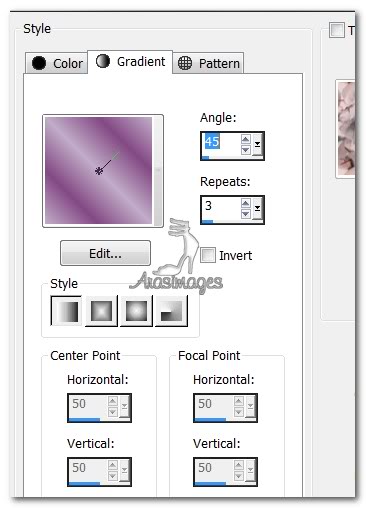
2. Create Gradient using Style Linear, Angle 45, Repeats 3, Invert unchecked.
3. New/New Image 660px by 560px. Flood fill with Gradient.
4. Layers/New Raster Layer. Selections/Select All.
5. Open LilacLovelies.pspimage. Copy Misted Layer/Paste into Selection. Selections/Select None.
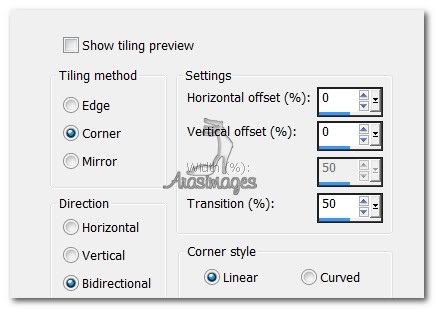
6. Effects/Image Effects/Seamless Tile. Use settings as shown below.
7. Layers/New Raster Layer. Flood fill with Gradient.
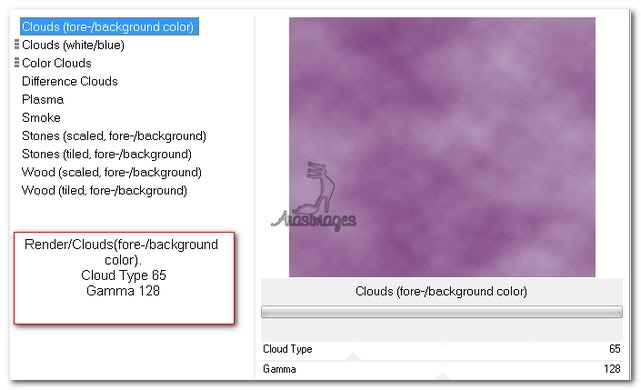
8. Effects/Filters Unlimited II/Render/Clouds (Fore/Background color) See settings below.
9. Set Opacity to 84.
10. Open p@t_fram_ribl.png image. Using Selections Tool, select around the inside color. Press Delete key. Selections/Select None. COPY.
11. Paste as New Layer. Effects/Edge Effects/Enhance.
12. Close out p@t_fram_ribl.png image, do not save.
13. In Materials Palette, change background color to #232814. Flip foreground to background using double arrows, close off background.
14. Select Pen Tool from Tool bar. Have settings as seen in example below.

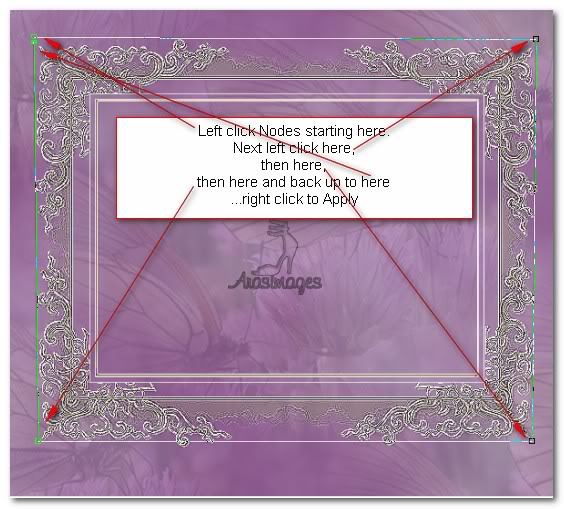
15. Start your line at the top left corner by left clicking to set a Node. Move to right top corner and left click another Node. Drop down to bottom right corner and left click a Node, then to bottom left corner repeat Node, then back to where you started, left click a Node again. Right click, Apply. You should now see a thin line around the lacy border.
16. In Materials Palette, switch background with foreground using double arrows.
17. Using Text tool, Font English III Presto BT (TT0595M.TF), size 48, color #232814, beginning at top left corner, type in the words below.

18. Hover the cursor on the line until you see a T with a curved line under it. Type the words "Butterfly Kisses Soft Breezes Bird Songs Gentle Rain". They will follow the line around the lacy border. Try to have them even using spaces as necessary between words.
19. Apply. In the Layers Palette, click on the plus symbol to open the Vector Layer and close off the New Path Layer. Convert to Raster Layer.
20. Make sure the top layer is highlighted to continue your work.
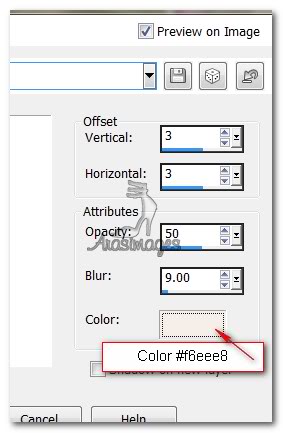
21. Effects/3D Effects/Drop Shadow, Vertical 3, Horizontal 3, Opacity 50, Blur 9, color #f6eee8. Repeat.
22. Open LilacLovelies.pspimage. Copy Misted layer, Paste as New Layer.
23. Image/Resize/Resize by 50%, Resize all layers Unchecked.
24. Image/Mirror. Move into upper right corner of lacey border.
25. Set Opacity to 80.
26. Paste as New Layer on main image again.
27. Move into place where I have placed mine.
28. Back to LilacLovelies, highlight tubed layer, copy/Paste as New Layer on main image.
29. Place directly on top of the misted layer of butterflies.
30. Effects/3D Effects/drop Shadow, Vertical -13, Horizontal 14, Opacity 50, Blur 17, color #c1adc9.
31. Image/Add Borders/3px border, Symmetric checked. Color #0f2527.
32. Image/Add Borders/40px border, Symmetric checked. Color #ffffff.
33. Using Magic Wand, click inside the white border to activate it.
34. Change Gradient to Angle 0, Repeats 1, Invert checked. Flood fill 40px border with Gradient.
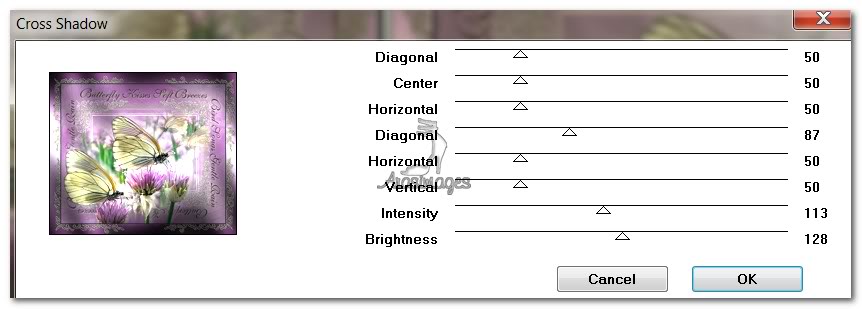
35. Effects/Graphic Plus/Cross Shadow. See example below.
36. Open p@t_fram_ribl.png image. Copy/Paste into Selection.
37. Effects/Edge Effects/Enhance.
38. Selections/Select None.
39. Image/Add Borders/3px border, Symmetric checked. Color #0f2527.
40. Sign your name or leave your watermark. Convert to Raster layer if necessary. Save as .jpg.
A big thank you to Evatexas and PamelaD who tested this tutorial for me.
If you are going to use this tutorial for stationery, cards or place the tutorial/tag on another site, I would appreciate you contacting me for permission, giving Arasimages credit for the original tutorial and if possible, a link back to my site. Thank you.
Copyright © Arasimages All Rights Reserved