
Spellbound
For Italian and French translation, click on the flags.


For this tutorial you will need the materials in the zip file below.

Thanks go to Silvie and to Dina for the beautiful tubes used. If you see your name listed but no link, please contact me so I can give you proper credit. Please visit the tuber sites listed on my Links page.
Use the Dot below to mark your place along the way.

Unzip the materials into a working folder. Place the Selections into your PSP/Selections folder. Open the materials in PSP, copy and close originals. You will need the plugins AP_06 and Graphics Plus and the program Animation Shop to do this tutorial. I have used PSPX4 to create this tutorial but you may use an earlier version. It is assumed you have a working knowledge of PSP.
1. In Materials Palette, set Foreground to #f6612c, Background to #b60129.
2. Create a Gradient in the Materials Palette using Linear, Angle 0, Repeats 1, Invert checked.
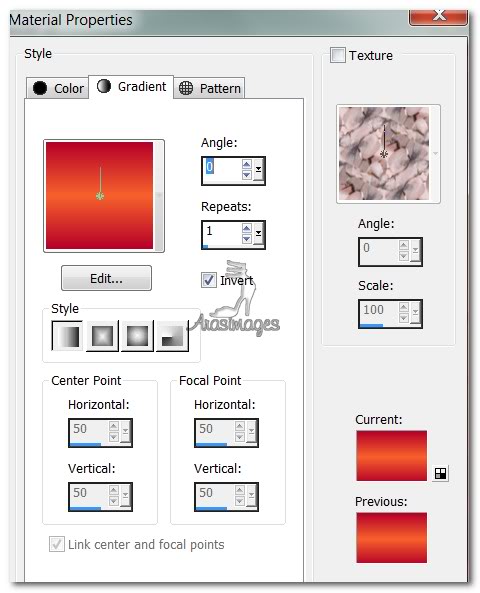
3. New/New Raster Layer 700px by 550px. Flood fill with Gradient.
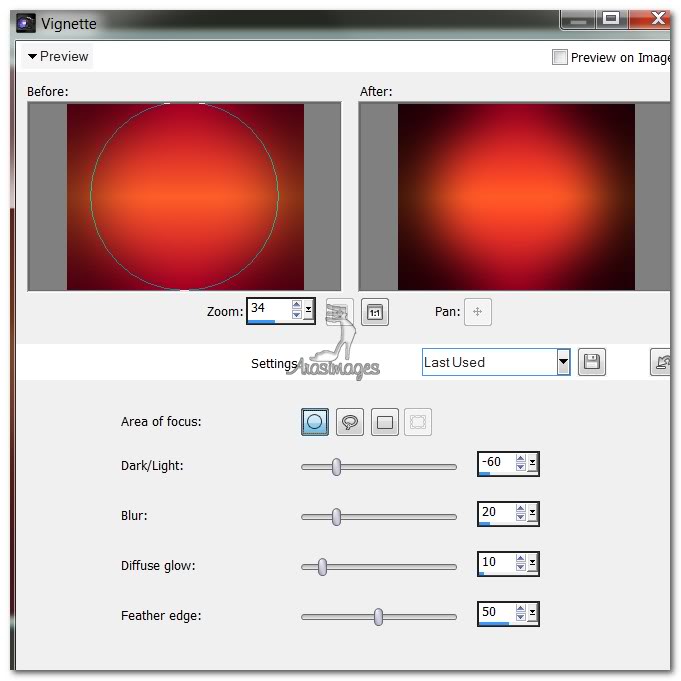
4. Effects/PhotoEffects/Vignette. (If you are using an older version of PSP, you may not have this feature. Then try FiltersUnlimited/PhotoAgingKit/Centrespot-Vignetting).
5. Layer/New Raster Layer. Select All.
6. Open OrangeSunflower_di04-07.pspimage. Copy/Paste into Selection.
7. Lower Opacity to 46. Selections/Select None.
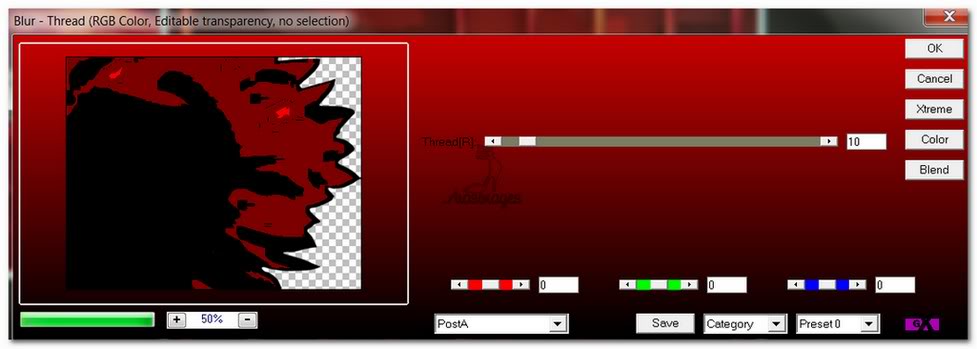
8. Effects/AP_06/Threshhold/Noise/Blur-Thread/Post A. Use settings below.
9. Layers/New Raster Layer.
10. Selections/Load/Save Selection/Load Selection from Disk. Choose TopSunspotsArasimages Selection. Load. Use example of settings below.
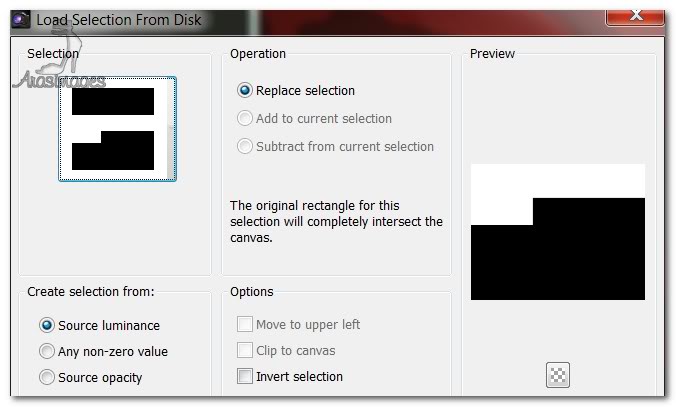
11. Change Background color in Materials Palette to #000000. Flood fill Selection with it.
12. Keep selection Selected. Effects/3D Effects/Drop Shadow ON NEW LAYER checked/Vertical 10, Horizontal 10, Opacity 50, Blur 25, color #000000.
13. Selections/Select None. Duplicate Raster 3 Shadow. Go to top layer/Image/Flip.
14. Effects/3D Effects/Drop Shadow, Vertical -10, Horizontal 10, Opacity 50, Blur 25, color #000000.
15. Layers/New Raster Layer.
16. Selections/Load/Save Selection/Load Selection from Disk. Choose SimpleLineArasimage selection. Load.
17. Flood fill line with Background color #000000. Selections/Select None.
18. Duplicate. Pull Duplicated line down to top edge of Selection. (See my example).
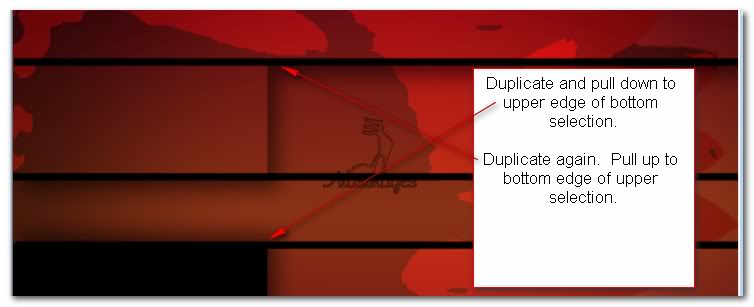
19. Duplicate. Pull Duplicated line up to bottom edge of upper drop shadow. (See example above).
20. Open OrangeSunflower_di04-07.pspimage. Copy/Paste as New Layer.
21. Image/Resize/Resize by 60%/Resize all layers unchecked.
22. Move to upper left corner.
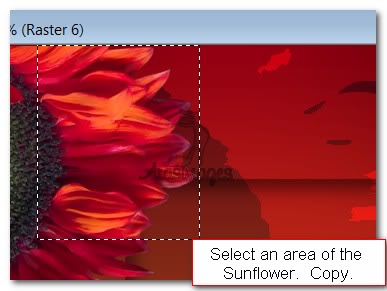
23. Select a portion of the flower as seen below. Copy! Paste as New Layer. Selections/Select None.
24. Using Pick Tool, rotate and move the petals to the bottom of the sunflower, arranging so they fit in with other petals to look natural.
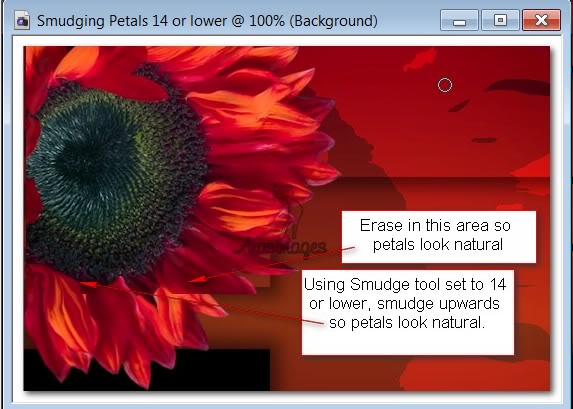
25. Using Eraser tool erase any petal that doesn't look normal on the duplicated layer and/or original layer. Then using the Smudge tool set to size 14, all other settings default, smudge the petals so they look natural. See example.
26. Merge/Merge down.
27. Using Color changer tool, Background color #000000, click in the green portion of the Sunflower center.
28. Effects/3D Effects/Drop Shadow, Vertical -10, Horizontal 10, Opacit 50, Blur 15, color #000000. Repeat drop shadow.
29. Duplicate the finished Sunflower. Image/Mirror. Move into upper right corner using Pick Tool to arrange so it fits nicely.
30. Open Lady_5.30.01.12.pspimage. Copy/Paste as New Layer.
31. Image/Resize/Resize by 60%/Resize all Layers unchecked.
32. Pull Lady5 down between the flower layers, placing her along bottom of shadow layer and right edge of image.
33. Effects/3D Effects/Drop Shadow, Vertical 10, Horizontal -10, Opacity 50, Blur 20, color #000000. Repeat drop shadow.
34. Open Lady4.30.01.12.pspimage. Copy/Paste as New Layer. Image/Mirror.
35. Image/Resize/Resize by 60%, Resize all layers unchecked. Lower Opacity to 34.
36. Pull Lady4 down below Raster 3 black Selection, placing her about in center of image below center line.
37. Return to top layer and highlight to continue.
38. From Text tool, choose font Reisling, set to Size 300, Italized, Background color #00000 and type the letter "S". Convert to Raster Layer.

39. Change size of text to 100 and type "pellbound". Convert to Raster Layer. Move text so it lines up properly. Duplicate "pellbound".
40. In Materials Palette, change the Background color to #b60129 and Foreground color #f6612c. Create a Gradient with Angle at 0, Repeats 1, Invert unchecked. Flip Foreground with Background using double arrows so Gradient is on the bottom.
41. Change the size of text back to 300, type the letter "S". Convert to Raster Layer.
42. Change the size of text back to 100, type the letters "pellbound". Convert to Raster Layer.
43. Arrange the word so it lines up properly. Highlight the top layer. Merge/Merge Down.
44. Effects/3D Effects/Drop Shadow, Vertical 2, Horizontal 2, Opacity 50, Blur 2, color #000000.
45. Image/Add Borders/2px border, Symmetric checked, color #f6612c.
46. Image/Add Borders/2px border, Symmetric checked, color #000000.
47. Image/Add Borders/15px border, Symmetric checked, color #ffffff.
48. Using Magic Wand, select the 15px border to activate it.
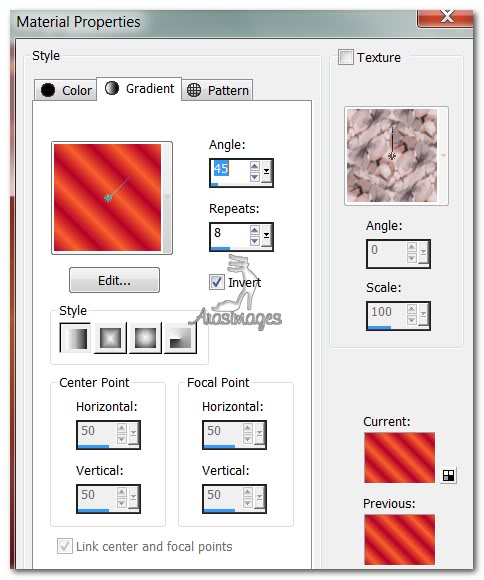
49. In the Materials Palette, switch the Foreground with Background colors again. Set Gradient Angle to 45, Repeats to 8, check Invert. Flood fill with the Gradient as shown below.
50. Effects/Graphics Plus/Cross Shadow/Default settings.
51. Selections/Select None.
52. Image/Add Borders/35px border, Symmetric checked, color #000000.
53. Image/Add Borders/15px border, Symmetric checked, color #ffffff.
54. Using Magic Wand, select the 15px border to activate it. Flood fill with the Gradient as shown in Step #49.
55. Effects/Graphics Plus/Cross Shadow. Use Default settings.
56. Selections/Select None.
57. Image/Add Borders/2px border, Symmetric checked, color #000000.
58. Image/Add Borders/2px border, Symmetric checked, color #f6612c.
59. Place your name or watermark. Save the image as a .jpg named Spellbound in your working folder.
60. We are now going to create an animation for on your image. This is optional; it is up to you to decide if you want to have your work animated or not.
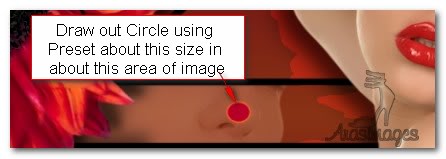
61. Set foreground to #f6612c and Background to #b60129. Select the Preset tool, find the Preset Ellipse, use settings as seen below.

62. In approximately the center of your image, draw out a circle. Convert to Raster Layer.
63. Effects/3D Effects/Inner Bevel. Use settings below.

64. Effects/3D Effects/Drop Shadow, Vertical 2, Horizontal 2, Opacity 50, Blur 2, color #000000.
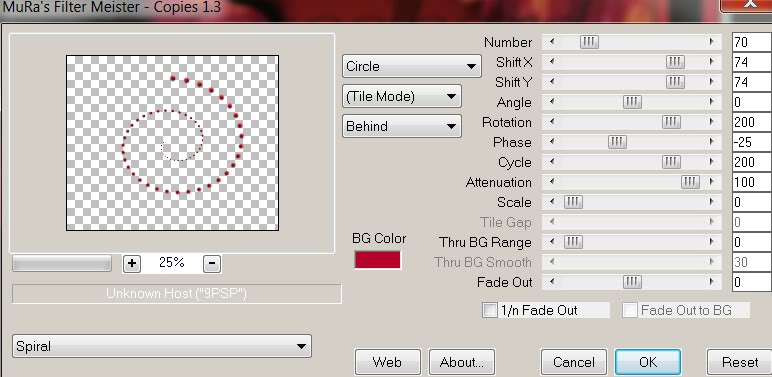
65. Effects/MuraMeister/Copies. Use settings below.
66. Copy! Open Animation Shop. Paste as New Animation. From the tool bar, Create New Animation transparent frame sized 600px by 550px.
67. Copy New Animation. Right click inside 600px by 550px frame/Paste into Selected Frame. Left click to set into center.
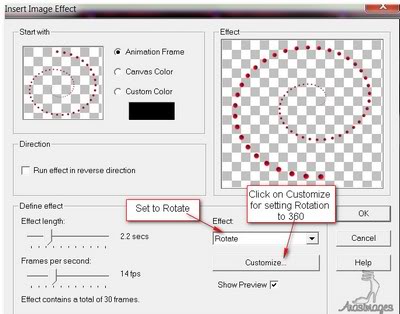
68. Effects/Insert Image Effects. Choose Rotate and other settings as seen below. Click on Customize and set Maximum Angle at 360. Click OK in each of the Image Effects box and Customize box.
69. You now have 31 frames. Highlight the first frame, Edit/Select All. Animation/Frame Properties, set at 13. Check your animation to see if it is at the speed you like. On first frame, from top bar click COPY.
70. Open the saved .jpg image called Spellbound. Edit/Duplicate until you have 31 frames. Highlight the first frame, Edit/Select All.
71. In first frame of .jpg image, right click/Paste into Selected Frame. Move with your mouse to where you want it to be, (centered) and left click to set into place. View/Animation to see if the animation is proper.
72. File/Save As. A box will come up where you name your work and begin to save as a .gif file. Choose where you will save it, click Save. Click Next three times as the boxes keep popping up. Then click Finish. Your image is now saved and you are done!
73. Congratulations! You are finished and I hope you have enjoyed the journey.
A big thank you to Evatexas and PamelaD who tested this tutorial for me.
If you are going to use this tutorial for stationery, cards or place the tutorial/tag on another site, I would appreciate you contacting me for permission, giving Arasimages credit for the original tutorial and if possible, a link back to my site. Thank you.
Copyright © Arasimages All Rights Reserved