
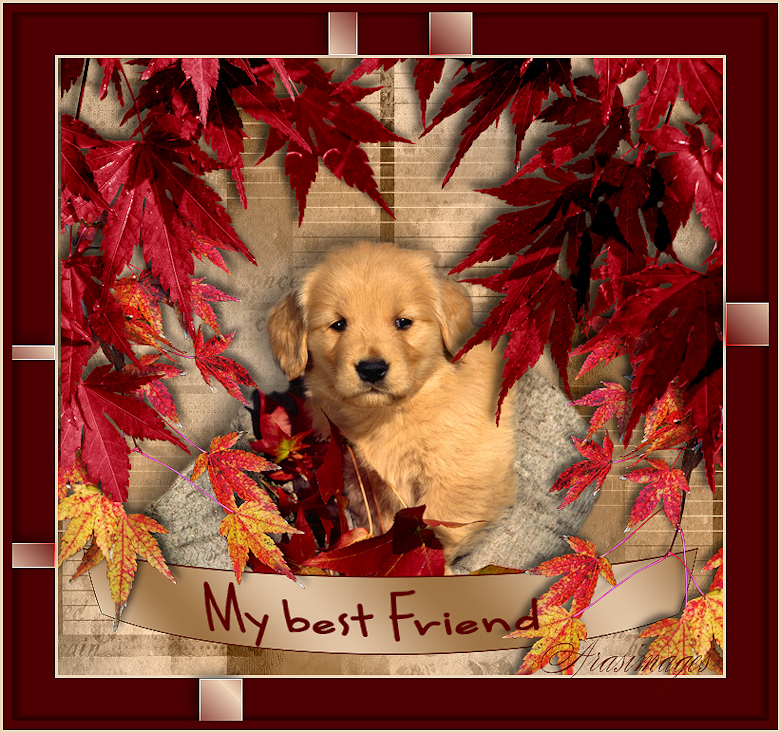
My Best Friend
For Italian and Danish translation, click on the flags.


For this tutorial you will need the materials in the zip file below.

Thanks go to PamelaD and Evatexas from Arasimages for the lovely tubes used in this tutorial. Please visit the other tubers links on my Links page.
Use the bookmark below to mark your place along the way.

Unzip the materials into a working folder. Open the materials in PSP, copy and close originals. You will need Plugin VM Distortion to do this tutorial. I have used PSPX4 to create this tutorial but you may use an earlier version. It is assumed you have a working knowledge of PSP but this would be considered an easy tutorial for the beginner through accomplished PSPer.
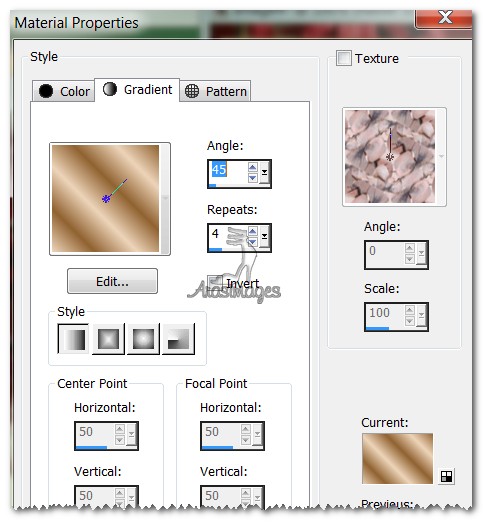
1. In Materials Palette, set Foreground color to #edd4b9, Background color to #906231.
2. Set to Gradient, Style Linear, Angle 45, Repeats 4, Invert unchecked.
3. New/New Image 700px by 650px. Flood fill with Gradient.
4. Adjust/Blur/Gaussian blur, Radius 25.
5. Layers/New Raster Layer. Selections/Select All.
6. Open achtergrond.voor site.jpg image. Copy/Paste into Selection.
7. Selections/Select None. Blend Mode set to Luminance (Legacy).
8. Open puppyintree.pspimage. Copy/Paste as New Layer. Pull down slightly.
9. Effects/3D Effects/Drop Shadow, Vertical -9, Horizontal -12, Opacity 55, Blur 33, Color #000000.
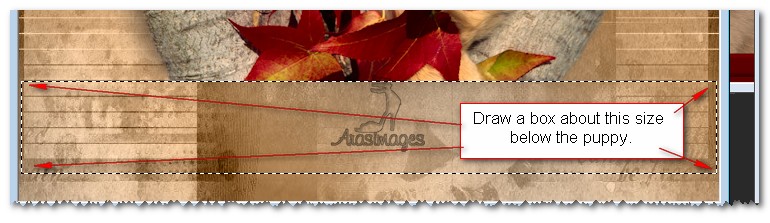
10. Using Selections tool, draw a selection below the puppy for the text. It can be larger or smaller than the one I chose to do. See below
11. Layers/New Raster Layer. Flood fill with color #5c0000.
12. Selections/Modify/Contract by 2px. Press Delete key.
13. Flood fill inside "marching ants" selection using the original foreground/background gradient.
14. Adjust/Blur/Gaussian blur, Radius 25.
15. Selections/Select None.
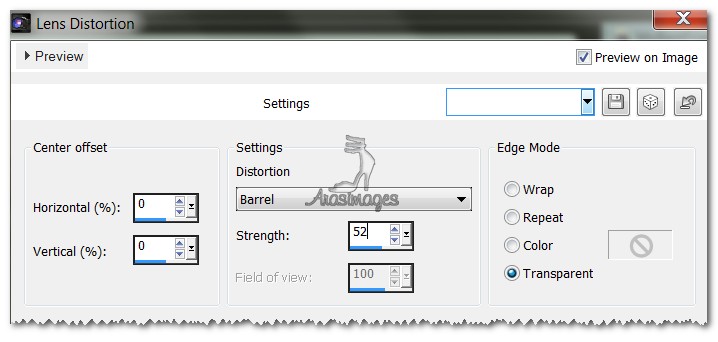
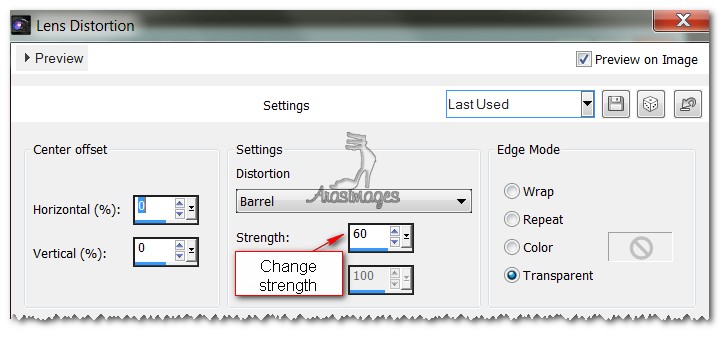
16. Effects/Distortion Effects/Lens Distortion. Use settings below.
17. Open CrimsonLeaves.pspimage. Copy/Paste as New Layer.
18. Move to bottom right corner.
19. Effects/3D Effects/Drop Shadow, Vertical -5, Horizontal -5, Opacity 55, Blur 10, color #000000.
20. Duplicate. Image/Mirror. Move to left side of image a little above the bottom left corner.
21. Open ScarletLeaves.pspimage. Copy/Paste as New Layer.
22. Move leaves to fit at the top of image.
23. Image/Add Borders, 3px border, Symmetric checked, color #edd4b9.
24. Image/Add Borders, 45px border, Symmetric checked, color #5c0000.
25. Using Magic Wand, Mode set to Replace, select inside 45px border.
26. Change background color to #5c0000. Gradient Repeats to 14.
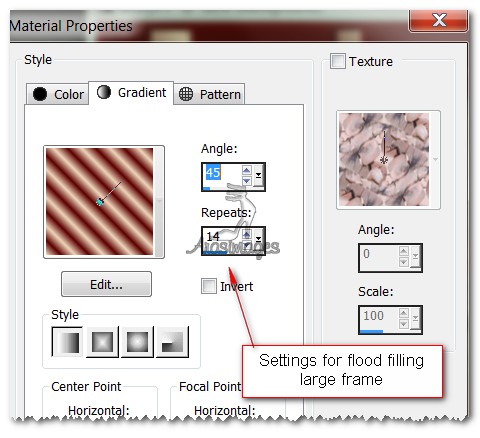
27. Layers/New Raster Layer. Flood fill with new gradient.
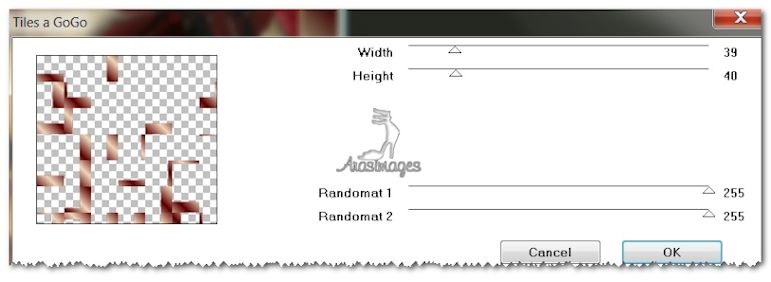
28. Effects/VM Distortion/Tiles a GoGo. Use settings as shown.
29. Effects/Edge Effects/Enhance.
30. Using Magic Wand, Mode set to Replace, left click on one of the "ribbons" that show in the 45px border to activate them.
31. Effects/3D Effects/Drop Shadow, Vertical -5, Horizontal -5, Opacity 55, Blur 24, color #000000.
32. Selections/Invert.
33. Image/Add Borders, 10px border, Symmetric checked, color #5c0000.
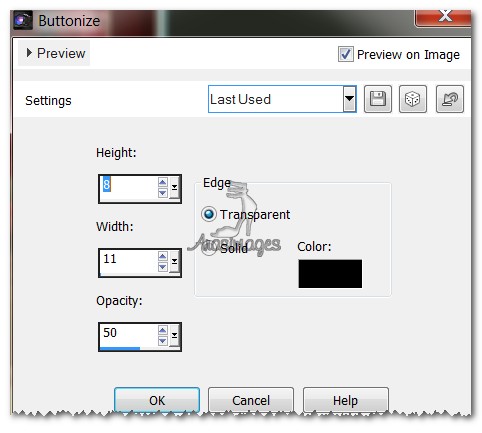
34. Effects/3D Effects/Buttonize. Use settings below, then Selections/Select None.
35. Image/Add Borders, 3px border, Symmetric checked, color #edd4b9.
36. From Text tool, select Font Smarty Pants BTN, Size 72, type the words "My best Friend" using color #5c0000.

37. Convert to Raster Layer. Move into place on the curved band you created for text.
38. Effects/Distortion Effects/Lens Distortion. Settings as seen below.
39. Adjust the text if you need to in order for it to fit properly on the band.
40. Sign your name or leave your watermark if you wish.
41. Merge/Merge Visible. Do not forget to save your work.
Big hugs to Evatexas and PamelaD who tested this tutorial for me.
If you are going to use this tutorial for stationery, cards or place the tutorial/tag on another site, I would appreciate you contacting me for permission, giving Arasimages credit for the original tutorial and if possible, a link back to my site. Thank you.
Copyright © Arasimages All Rights Reserved