
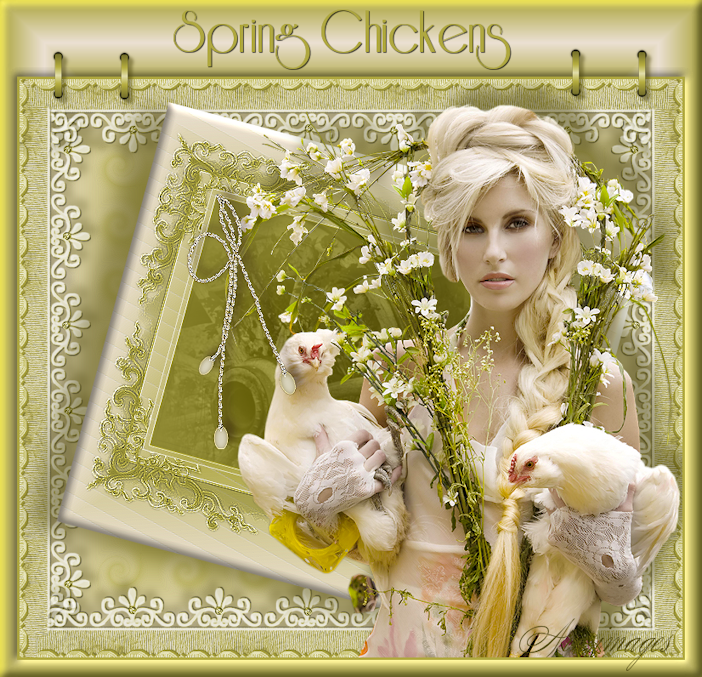
Spring Chickens
For Italian, Danish and French translation, click on the flags.


For this tutorial you will need the materials in the zip file below.

Thanks go to Guismo, Soleil and to Evatexas of Arasimages for the lovely tubes and scraps used in this tutorial. Please visit the other tubers links on my Links page.
Unzip the materials into a working folder. Open the materials in PSP, copy and close originals. You will need Plugins Video Rave and EyeCandy5/Impact to do this tutorial. I have used PSPX4 to create this tutorial but you may use an earlier version. It is assumed you have a working knowledge of PSP. Remember to occasionally save your work for possible future changes.
Use the bookmark below to mark your place along the way.

1. In Materials Palette, set Foreground color to #eee3d5, Background color to #afa840.
2. Set to Gradient, Style Rectangular, Angle 0, Repeats 1, Invert unchecked.
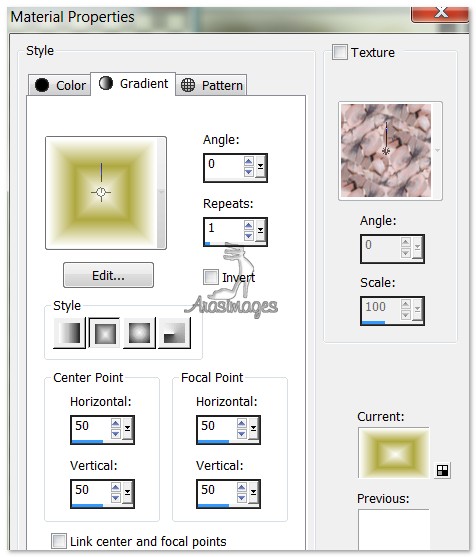
3. New/New Image 780px by 680px. Flood fill with Gradient.
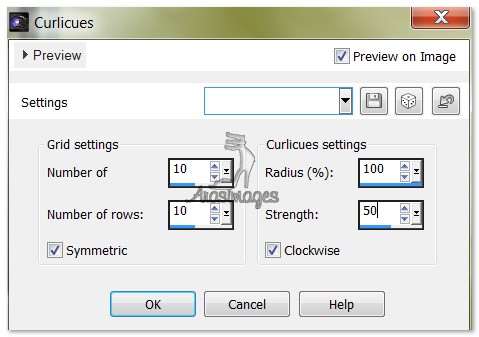
4. Effects/Distortion Effects/Curlicues. Use settings as seen below.
5. Effects/Edge Effects/Enhance.
6. Open rose-blanche-ruban1-Soleil-21-03-07.png. Copy/Paste as New Layer.
7. Image/Resize/Resize by 80%, Resize all layers unchecked.
8. Adjust/Hue and Saturation/Colorize. Set Hue to 40, Saturation to 119.
9. Move to left side of image having only part of the lace border showing. See my image for an example.
10. Effects/3D Effects/Drop Shadow, Vertical -8, Horizontal 8, Opacity 50, Blur 15, color #4c450c.
11. Duplicate. Image/Mirror. (Place on right side of image as on left.)
12. Duplicate. Image/Free Rotate Left by 90 degrees. Pull to the top.
13. Duplicate. Image/Flip. It should be at the bottom.
14. Making sure the bottom layer of border is highlighted and using Selections/Delete key, or Eraser tool, remove the lace in the corners so the green portion looks clean. Do this on both left and right sides of bottom layer.
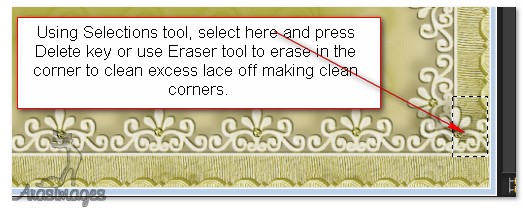
15. Highlight top layer of border and repeat Step #14 to clean up top corners of lace.
HINT: You might have to move the borders around a bit so they meet nicely in corners. I used both Selection tool and Eraser tool to clean my corners. Just play till it looks right to you.
16. Layers/New Raster Layer. Flood fill with gradient.
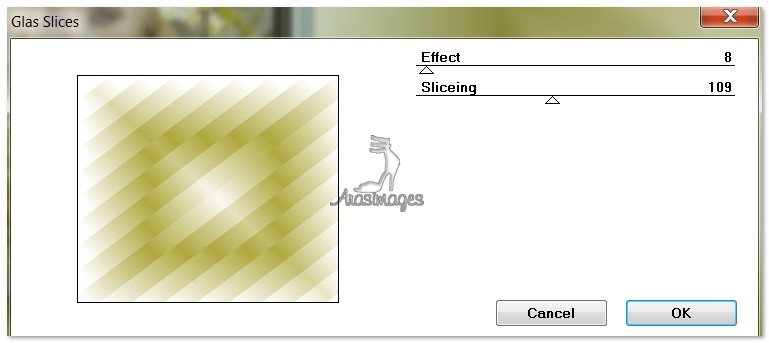
17. Effects/Video Rave/Glas Slices. Use settings as seen below.
18. Effects/Edge Effects/Enhance. Repeat.
19. Image/Resize/Resize by 75%, Resize all layers unchecked.
20. Selections/Select All. Selections/Float. Selections/Defloat.
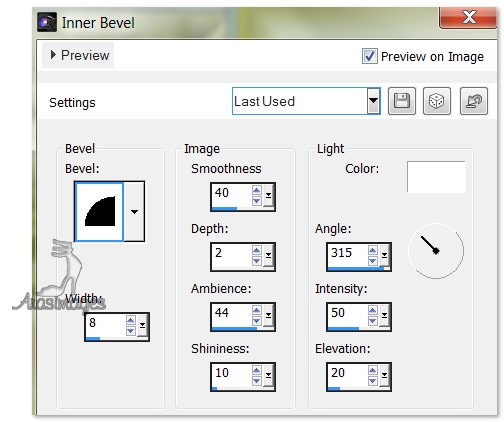
21. Effects/3D Effects/InnerBevel. Use settings below.
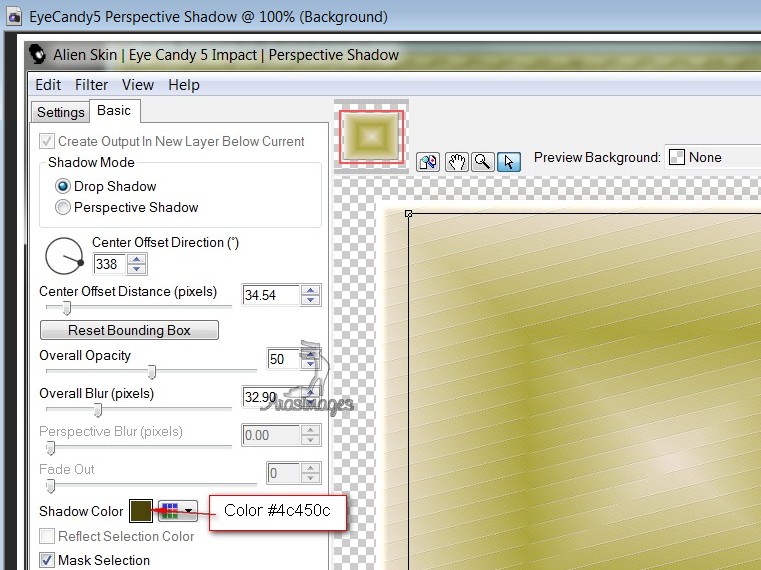
22. Effects/EyeCandy5/Impact/Perspective Shadow. Use settings as seen below.
23. Selections/Select None. Image/ImageMirror.
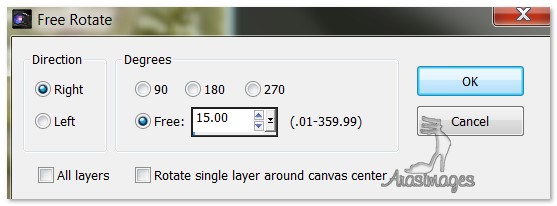
24. Image/Free Rotate Right by 15 degrees. Use settings below.
25. Open p@t_fram_ribl.pspimage. Copy/Paste as New Layer.
26. Image/Free Rotate Right by 15 degrees.
27. Adjust/Hue and Saturation/Colorize. Hue set at 40, Saturation at 119.
28. Adjust/Sharpness/Sharpen.
29. Click in green center of frame with Magic Wand. Layers/New Raster Layer.
30. Open WheelE.pspimage. Image/Mirror. Copy Wheel layer/Paste into Selection.
31. Set Blend Mode to Luminance (Legacy), Opacity to 44.
32. Selections/Select None.
33. Open calguisdouceurprintaniere26022012.pspimage of woman. Copy/Paste as New Layer.
34. Move woman down and to right side of image.
35. Adjust/Sharpness/Sharpen.
36. Effects/3D Effects/Drop Shadow, Vertical -21, Horizontal 23, Opacity 50, Blur 23, color #4c450c.
37. Open rose-blanche-etiqueta-Soleil-23-01-07.png. Copy/Paste as New Layer.
38. Using the Selections tool, Free hand selection, select around tag portion of the image. Delete. Deselect.
39. Image/Resize/Resize by 80%, Resize all layers unchecked.
40. Place the rope with pearls into the upper left corner of the background rectangle.
41. Effects/3D Effects/Drop Shadow, Vertical -8, Horizontal 8, Opacity 50, Blur 15, color #000000.
42. Adjust/Sharpness/Sharpen. Repeat.
43. Image/Add Borders. Add 3px border, Symmetric checked, color #afa840.
44. Image/Add Borders. Add 20px borders on bottom and both sides, 90px border on top, Symmetric not checked, color #4c450c.
45. Left click inside large border with Magic Wand to activate it.
46. Change the Gradient to Angle 0, Repeats 7, Invert checked. (Foreground #eee3d5, Background #afa840. Flood fill the border.
47. Effects/3D Effects/Inner Bevel, using settings below. Deselect.
48. From Text tool, choose font Riesling, Size 80, color #afa840, Bold, and type "Spring Chickens".

49. Objects/Distribute/Space evenly Horiz. Convert to Raster Layer.
50. Effects/3D Effects/Drop Shadow, Vertical 1, Horizontal 1, Opacity 50, Blur 1, color #000000.
51. Place in center of top border. Duplicate. Merge/Merge Down.
52. Open the bandLucy.pspimage. Copy/Paste as New Layer. Repeat Step #27 to recolor.
53. Image/Resize/Resize by 65%, Resize all layers unchecked.
54. Effects/3D Effects/Drop Shadow, Vertical 5, Horizontal 5, Opacity 50, Blur 5, color #4c450c.
55. Duplicate. Place each of the brackets in the upper left corner of the image. See my finished image for example.
56. Merge/Merge Down. Duplicate and move the duplicated brackets to upper right corner where I have mine.
57. Place your watermark or name and Merge/Merge Visible. Save your work.
Big hugs to Evatexas and PamelaD who tested this tutorial for me.
If you are going to use this tutorial for stationery, cards or place the tutorial/tag on another site, I would appreciate you contacting me for permission, giving Arasimages credit for the original tutorial and if possible, a link back to my site. Thank you.
Copyright © Arasimages All Rights Reserved