
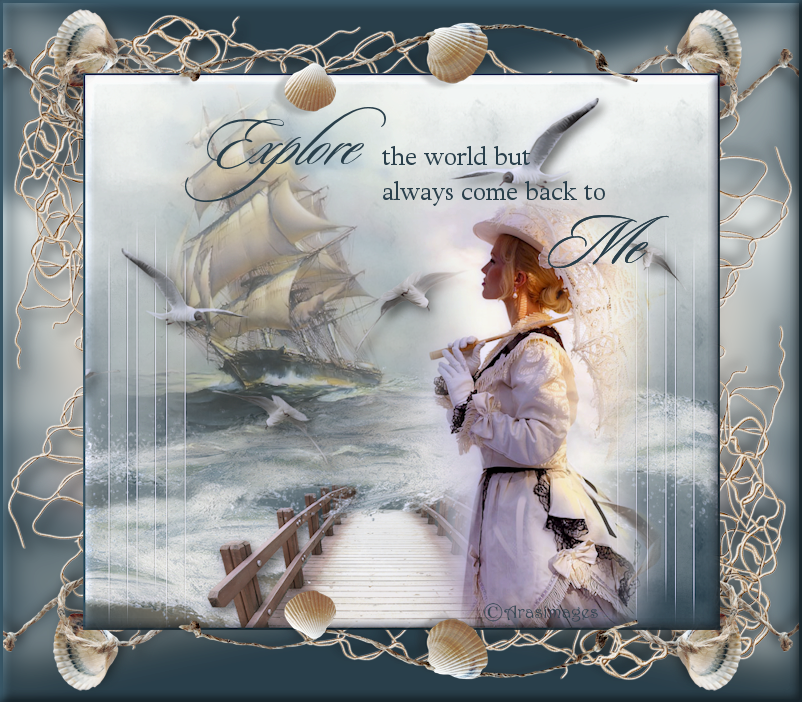
Come Back To Me
For Italian and Danish translation, click on the flags.


For this tutorial you will need the materials in the zip file below.

Unzip the materials into a working folder named Come back to Me. Open the materials in PSP, copy and close originals. Export the Geometric10 brush into your PSP/Brush folder. You will use plugin Simple/Top Left Mirror, Xero and The Plugin Site/Hypertyle for this tutorial. I have used PSPX5 to create this tutorial but you may use an earlier version. It is assumed you have a working knowledge of PSP to follow these directions.
Thanks go to Irene; to Devilinside and to the various unknown owners/tubers of the images used which were found at free sites on the internet; if any of these are yours, let me know and I will be happy to link and give credit to you by name.
Use the bookmark below to mark your place along the way.
1. In Materials Palette, set Foreground #fbfefb, Background #2b414d.
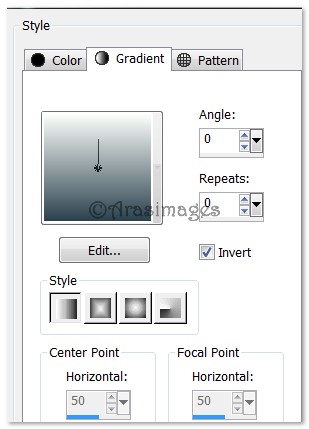
2. Create a Gradient using the above colors, Style Linear, Angle 0, Repeats 0, Invert checked.
3. New/New Image/790px by 690px. Flood fill with Gradient.
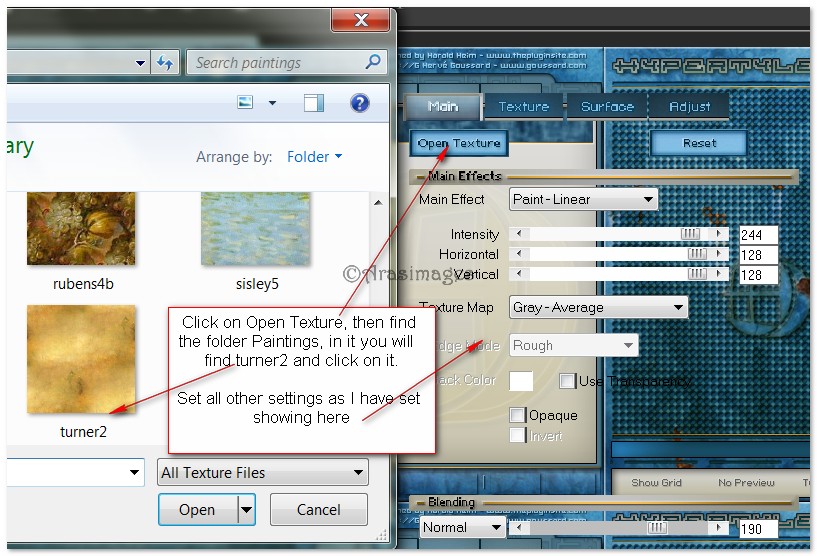
4. Effects/ThePlugInSite/Hypertile. When you click on Hypertile, click on Open Texture, then Paintings, then find turner2 and apply. Use the settings as seen below in example.
5. Open Sandbar.pspimage. Copy/Paste as New Layer.
6. Pull Sandbar down to bottom left corner.
7. Open SeaWave.pspimage. Copy/Paste as New Layer.
8. Move SeaWave down to bottom left corner.
9. Open BoardWalk.pspimage. Copy/Paste as New Layer.
10. Lower Opacity to 93. Move to center bottom of image.
11. Effects/3D Effects/Drop Shadow, Vertical 7, Horizontal 7, Opacity 50, Blur 17, color #000000.
12. Open SeaWave.pspimage. Copy/Paste as New Layer.
13 Place in center of image above the BoardWalk .
14. Paste as New Layer again. Image/Mirror. Place on right side of image so water is splashing over end of BoardWalk.
15. Open DI_tube17.pspimage. Copy/Paste as New Layer.
16. Image/Resize/Resize by 80%/Resize all layers unchecked.
17. Move ship to upper left corner. Lower Opacity to 75.
18. In Materials Palette, change Foreground to color #fbfefb.
19. Layers/New Raster Layer.
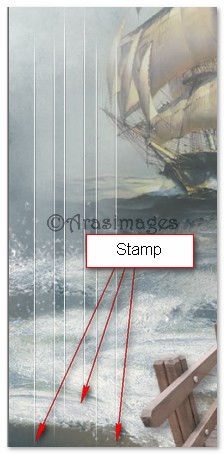
20. From Tool bar, select the Brush Tool, Geometric10 brush, color #fbfefb, use settings below, stamp three times on bottom left corner.

21. Effects/Edge Enhance/Enhance.
22. Duplicate. Image/Mirror.
23. Open SeaBirds.pspimage. Copy/Paste as New Layer. Place to upper right on image.
24. Effects/3D Effects/Drop Shadow, Vertical 7, Horizontal 7, Opacity 50, Blur 17, color #000000.
25. Again Paste Seabirds as New Layer. Image/Mirror.
26. Effects/3D Effects/Drop Shadow, Vertical 7, Horizontal 7, Opacity 50, Blur 17, color #000000.
27. Image/Resize/Resize by 85%/Resize all layers unchecked.
28. Place to left on image. Lower Opacity to 80.
29. Open Devilsinside_419_2009.pspimage. Copy/Paste as New Layer.
30. Image/Resize/Resize by 80%/Resize all layers unchecked.
31. Place woman to the right on image.
32. Image/Add Borders/Add 3px border, Symmetric checked, color #2b414d.
33. Duplicate. Working on duplicated layer, Image/Resize/Resize by 80%/Resize all layers unchecked.
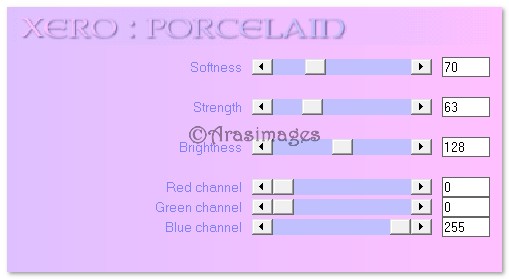
34. Effects/Xero/Porcelain. Use settings below.
35. Effects/3D Effects/Inner Bevel. Use settings below.

36. Promote Background layer and close off.
37. Go to bottom layer and highlight.
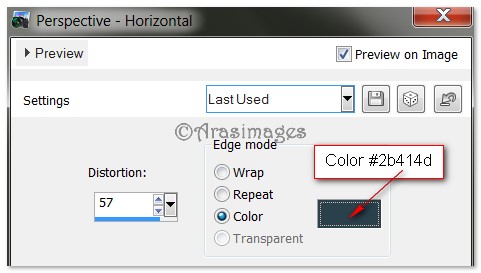
38. Effects/Geometric Effects/Perspective-Horizontal. Use settings below.
39. Duplicate. Image/Mirror. Drop Opacity to 57.
40. Merge/Merge Down.
41. Adjust/Blur/Gaussian Blur set to Radius of 14.
42. Open Fishnet.pspimage. Copy/Paste as New Layer.
43. Image/Resize/Resize by 80%/Resize all layers unchecked.
44. Move Fishnet to top/left sides.
45. Effects/3D Effects/Drop Shadow, Vertical 7, Horizontal 7, Opacity 50, Blur 17, color #000000.
46. Duplicate. Image/Mirror. Image/Flip.
47. Highlight top layer and open, continue working.
48. Open SeashellAndRope.pspimage. Copy/Paste as New Layer.
49. Move to top of inner resized image.
50. Duplicate. Image/Flip.
51. Open SeashellAndRope2.pspimage. Copy/Paste as New Layer.
52. Image/Resize/Resize by 50%/Resize all layers unchecked.
53. Place Seashells in top left corner.
54. Effects/3D Effects/Drop Shadow, Vertical 7, Horizontal 7, Opacity 50, Blur 17, color #000000.
55. Effects/Simple/Top Left Mirror. OK.
56. Move the corner shells below the resized inner image layer.
57. Highlight top layer to continue working.
58. Open Text.pspimage provided and Copy/Paste as New Layer.
59. Move the text to fit nicely over inner resized image.
60. Image/Add Borders/Add 3px border, Symmetric checked, color #2b414d.
61. Effects/3D Effects/Inner Bevel. Use settings below.
62. Sign your name or leave your watermark if you wish. Merge/Merge Visible. Save as .jpg file.
Big hugs go to Evatexas and PamelaD who test my tutorials for me and are my valued advisors.
If you are going to use this tutorial for stationery, cards or place the tutorial/tag on another site, I would appreciate you contacting me for permission, giving Arasimages credit for the original tutorial and if possible, a link back to my site. Thank you.
Copyright © Arasimages All Rights Reserved