
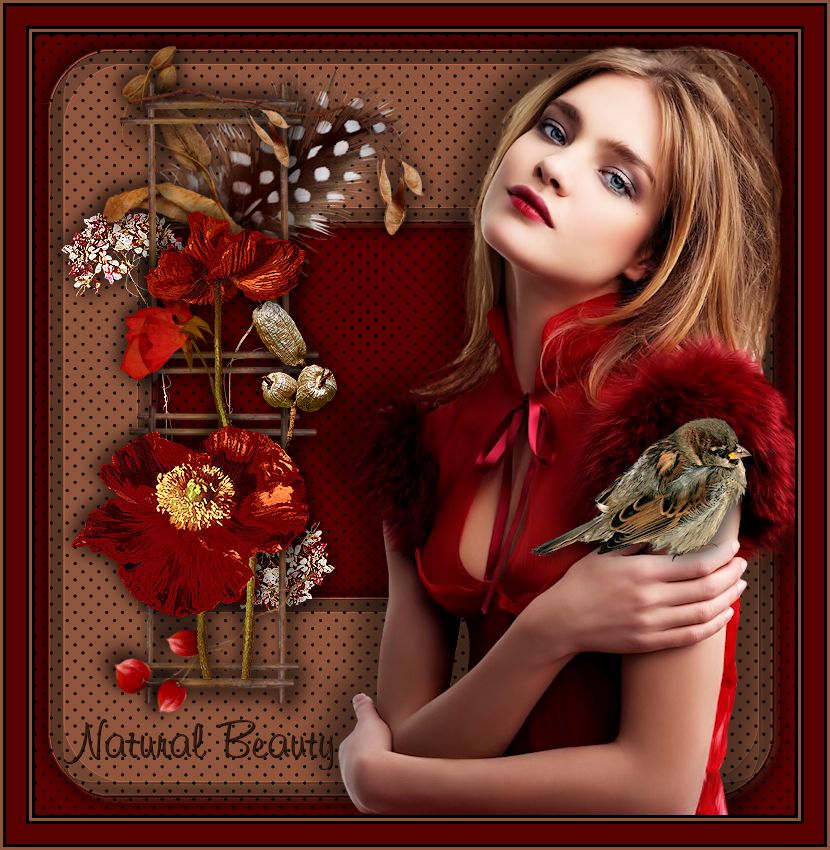
Natural Beauty
For Italian, Danish and German translation, click on the flags.


For this tutorial you will need the materials in the zip file below.

Unzip the materials into a working folder named Natural Beauty. Open the materials in PSP, copy and close originals. Place the Corel PspMask in your PSP Mask folder. You will use plugins 2manekenai(tm) MezzoForce_Ice and Mura's Seamless/Polkadot for this tutorial. I have used PSPX4 to create this tutorial but you may use an earlier version. It is assumed you have a working knowledge of PSP to follow these directions.
Thanks go to the various unknown owners/tubers of the images used which were found at free sites on the internet; if any of these are yours, let me know and I will be happy to link and give credit to you by name.
Use the bookmark below to mark your place along the way.

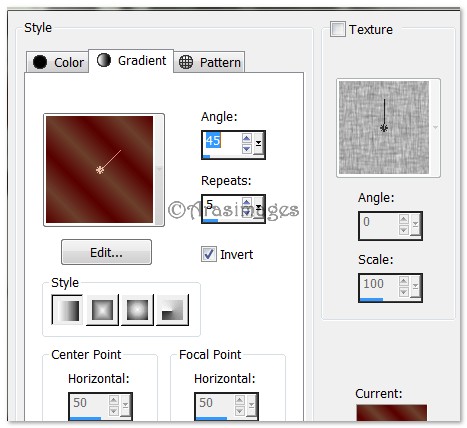
1. In Materials Palette, set Foreground #6c402d, Background #580100.
2. Create a Gradient using the above colors, Style Linear, Angle 45, Repeats 5, Invert checked.
3. New/New Image/760px by 780px. Flood fill with Background color #580100.
4. Layers/New Raster Layer. Flood fill with Foreground color #6c402d.
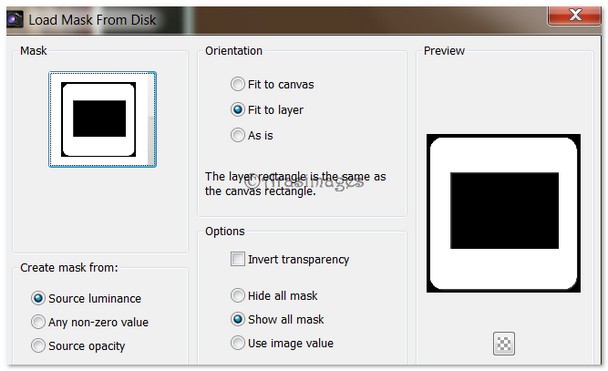
5. Layers/Load/Save Mask/Load Mask from Disk. Select 35mm Mask. Load. Merge/Merge Group.
6. Effects/3D Effects/Drop Shadow, Vertical 6, Horizontal 6, Opacity 60, Blur 22, color #000000.
7. Effects/3D Effects/Drop Shadow, Vertical -6, Horizontal -6, Opacity 60, Blur 22, color #000000.
8. Effects/Edge Effects/Enhance More.
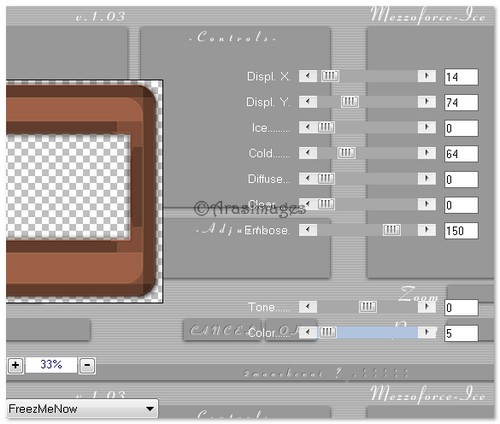
9. Effects/2manekeai(tm)/MezzoForce_Ice.
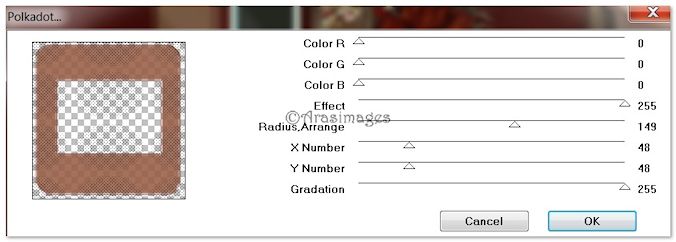
10. Effects/Mura's Seamless/Polkadots.
11. Ipen MR_Natalia_30.12.12.pspimage. Copy/Paste as New Layer.
12. Resize/Resize by 70%/Resize all layers checked.
13. Move lady to right side of image.
14. Effects/3D Effects/Drop Shadow, Vertical 12, Horizontal 25, Opacity 44, Blur 36, color #000000.
15. Repeat Drop Shadow using Vertical -12, Horizontal -25, all other settings the same.
16. Open HouseFinch.pspimage. Copy/Paste as New Layer.
17. Image/Resize/Resize by 38%/Resize all layers unchecked.
18. Move HouseFinch on top of lady's hand.
19. Effects/3D Effects/Drop Shadow, Vertical 6, Horizontal 6, Opacity 60, Blur 22, color #000000.
20. Open DriedHydrangeaStem.pspimage. Copy/Paste.
21. Image/Mirror. Move flower up to top left corner of red inside square.
22. Effects/Edge Effects/Enhance.
NOTE: We will be placing layers of flowers and other images to form the collage on the left of the main image. Instead of directing you to place a drop shadow on each and every one, please do so using the drop shadow settings below unless I specify to place it on one side only or not at all. Also, as you work, you may have to adjust your layers so they fit nicely. Make sure you always return to the top layer to continue working.
23. Effects/3D Effects/Drop Shadow, Vertical 6, Horizontal 6, Opacity 60, Blur 22, color #000000. Apply again using Vertical -6 and Horizontal -6, all the rest the same settings.
24. Duplicate the DriedHydrangeaStem. Image/Mirror. Image/Flip. Place flower along the bottom left edge of the red square.
25. Open SpeckledFeather.pspimage. Copy/Paste as New Layer.
26. Image/Resize/Resize by 80%/Resize all layers unchecked.
27. Place feather to the right of upper Hydrangea flower.
28. No drop shadow. Adjust/Sharpness/Sharpen.
29. Open BrownSeedPods.pspimage. Copy/Paste as New Layer.
30. Place between feather and left side Hydrangea. (Apply drop shadow).
31. Open StickTrellis.pspimage. Copy/Paste as New Layer. (Apply drop shadow V6, H6, rest the same, twice.)
32. Duplicate. Image/Flip. Adjust so one sits atop of the other. See my image for placement.
33. Open Lanterns.pspimage. Copy/Paste as New Layer.
34. Using Pick tool and turning nodes, turn so stem is pointing upward on the right. Place at bottom of StickTrellis.
35. Using Eraser tool set to Size 20, erase excess stem off red background near lady. (Apply both drop shadows.)
36. Open RedStem.pspimage. Copy/Paste as New Layer.
37. Image/Mirror. Place to the left of Trellis. Apply drop shadows.
38. Open PodsonStem.pspimage. Copy/Paste as New Layer.
39. Move to center right of Trellis.
40. Adjust/Sharpness/Sharpen. Apply drop shadows.
41. Open Poppies.pspimage. Copy/Paste as New Layer.
42. Image/Resize/Resize by 75%/Resize all layers unchecked.
43. Move Poppies over flowers and stems, as I have placed mine.
44. Adjust/Sharpness/Sharpen. Apply drop shadow.
45. Open Seedpods.pspimage. Copy/Paste as New Layer.
46. Move Seedpods to top of trellis, hanging over right side. Drop shadow.
47. Save your work as a working .pspimage named Natural Beauty in case you need to make adjustments later.
48. Image/Add Borders/Add 3px border, Symmetric checked, color #000000.
49. Image/Add Borders/Add 3px border, Symmetric checked, color #8f553c.
50. Image/Add Borders/Add 3px border, Symmetric checked, color #000000.
51. Image/Add Borders/Add 20px border, Symmetric checked, color #580100.
52. Image/Add Borders/Add 3px border, Symmetric checked, color #000000.
53. Image/Add Borders/Add 3px border, Symmetric checked, color #8f553c.
54. Image/Add Borders/Add 3px border, Symmetric checked, color #000000.
55. Open the Text.pspimage. Copy/Paste as New Layer.
56. Place the Text under the collage of flowers and other items you created on left side of image.
57. Sign your name or leave your watermark if you wish. Merge/Merge Visible. Save as .jpg file.
Big hugs go to Evatexas and PamelaD who test my tutorials for me and are my valued advisors.
If you are going to use this tutorial for stationery, cards or place the tutorial/tag on another site, I would appreciate you contacting me for permission, giving Arasimages credit for the original tutorial and if possible, a link back to my site. Thank you.
Copyright © Arasimages All Rights Reserved