
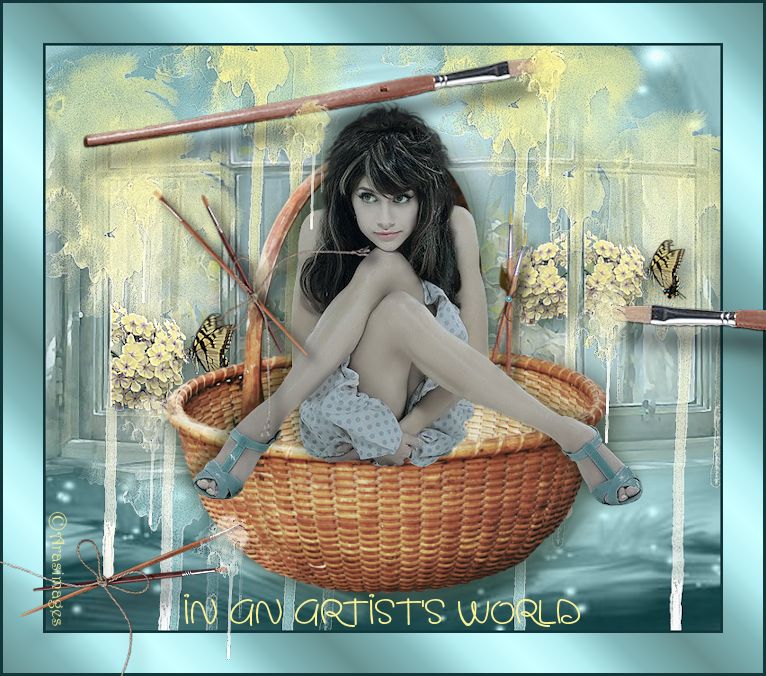
In an Artist's World
For Italian, Danish and German translation, click on the flags.


For this tutorial you will need the materials in the zip file below.

Unzip the materials into a working folder named In an Artist's World. Open the materials in PSP, copy and close originals. Export the Watercolor 1 brush into your PSP/Brushes folder. Place Wintergreen Gradient in your PSP Gradients folder. I have used PSPX5 to create this tutorial but you may use an earlier version. It is assumed you have a working knowledge of PSP to follow these directions.
Thanks go to Sorensen_Designs; Patries>; PamelaD of Arasimages and to the unknown owners of other tubes used; if any of these are yours, let me know and I will be happy to link and give credit to you by name.
Use the bookmark below to mark your place along the way.
1. In Materials Palette, set Foreground #82a1a3, Background #093538.
2. New/New Image 750px by 650px. Flood fill with background color #093538.
3. New/New Raster Layer. Selections/Select All.
4. Open Background.jpg. Copy/Paste into Selection. Selections/Select None.
5. Blend Mode set to Luminance (L).
6. Layers/New Raster Layer.
* Go to Tool bar/Paint Brush. From drop down tool bar at the top, find Watercolor 1 brush. This is what you will be using on the next few brush stamps. Use settings below.
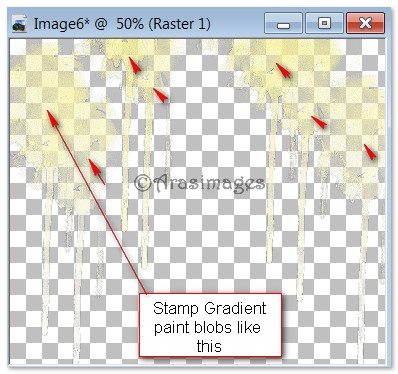
7. Using Watercolor 1 brush, color #78a5a5, size 604, stamp 5 times as in example below.
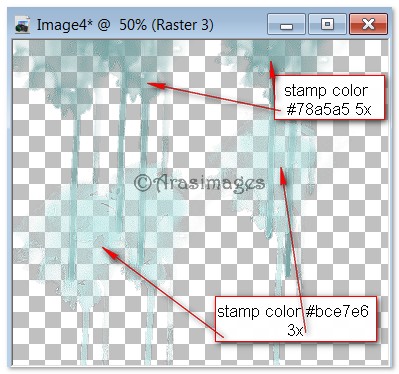
8. Using Watercolor 1 brush, color #bce7e6, size 604, stamp 3 times as in example above.
9. Effects/Edge Effects/Enhance.
10. Open Misted By Sorensen_Designs The Window April 158-08.pspimage. Copy/Paste as New Layer.
11. Image/Mirror (flip horizontal). Move window image to right side.
12. Effects/Edge Effects/Enhance.
13. Duplicate. Image/Mirror (flip horizontal). Move duplicated window to center/left and position.
14. Duplicate. Move to left side and position. Make sure the windows line up properly.
15. Layers/New Raster Layer.
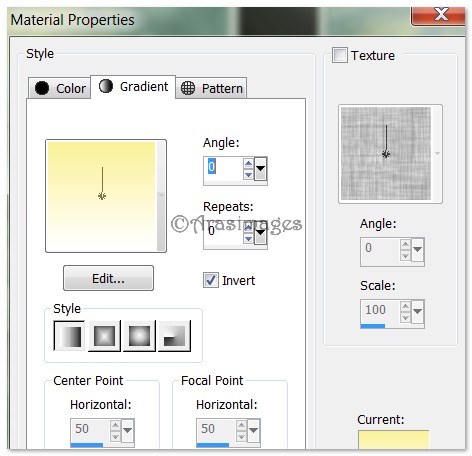
16. In Materials Palette, create a Gradient using Style Linear, Angle 0, Repeats 0, Invert checked, Foreground color #faf197, Background #ffffff.
17. Locate Watercolor 1 brush, use settings as before, stamp 6 or 7 times as in example below.
18. Effects/Edge Effects/Enhance.
19. Open ButterflyWithPhlox.pspimage. Copy Tubed Layer/Paste as New Layer.
20. Using Color Change tool, left click (Foreground color #faf197) on the flowers to change them to yellow. (Some of the lavender center may show.) Older versions of PSP do not have Color Changer tool. In this case, you may wish to use another flower of your choice.
21. Image/Resize/Resize by 25%/Resize all layers unchecked.
22. Image/Mirror (Flip Horizontal). Adjust/Sharpness/Sharpen. Move to left window corner.
23. Adjust/Sharpness/Sharpen More. Duplicate.
24. Image/Resize/Resize by 80%/Resize all layers unchecked on the duplicated layer. Move to the right side of image as I have mine.
25. Duplicate #24 resized image. Image/Mirror (Flip Horizontal). Place opposite the butterfly and flowers on the right so they face each other with the paint run between them.
26. Using Eraser tool or lasso with Freehand Selection tool, (select) and delete butterfly off the left flower cluster. See my finished tag for an example.
27. Highlight each layer of the Phlox flowers and apply a Drop Shadow of Vertical 8, Horizontal 8, Opacity 50, Blur 35, color #101d0b. Return to top layer to continue.
28. Open Basket.pspimage. Copy/Paste as New Layer.
29. Pull Basket down a little. Drop Opacity to 90.
30. Effects/3D Effects/Drop Shadow. Vertical 8, Horizontal 8, Opacity 50, Blur 35, color #101d0b. Repeat.
31. Open 1Patries_spotdress-BrittanyMurphy-25-2-08.pspimage. Copy/Paste as New Layer.
32. Place Brittany into basket. Adjust/Sharpness/Sharpen.
33. Effects/3D Effects/Drop Shadow. Vertical -8, Horizontal -8, Opacity 50, Blur 23, color #101d0b.
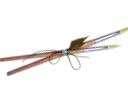
34. Open Smallbrushes.pspimage. Copy/Paste as New Layer.
35. Using the Pick tool, grab the turn node and turn the brushes so they point on an angle to the left as I have done to mine.
36. Adjust/Sharpness/Sharpen. Place the brushes on the left handle of basket.
37. Effects/3D Effects/Drop Shadow. Vertical 8, Horizontal 10, Opacity 90, Blur 15, color #000000.
38. Open DoubleBrushes.pspimage. Copy/Paste as New Layer.
39. Image/Resize/Resize by 35%/Resize all layers unchecked.
40. Adjust/Sharpness/Sharpen.
41. Using the Pick tool, grab the turn node and turn the brushes so they point upward and place into basket to Brittany's right side.
42. Using the Eraser tool, erase the overlapping longer brush handle off her leg.
43. Effects/3D Effects/Drop Shadow. Vertical 8, Horizontal 8, Opacity 60, Blur 11, color #000000.
44. Open Paint Brush.pspimage. Copy/Paste as New Layer.
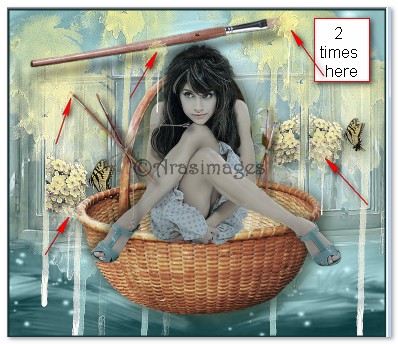
45. Image/Resize/Resize by 70%/Resize all layers unchecked.
46. Using the Pick tool, grab the turn node and turn the brush so it angles upward at the tip.
47. Place the brush above Brittany's head toward the left/center.
48. Adjust/Sharpness/Sharpen. Apply Drop Shadow Vertical 23, Horizontal 8, Opacity 45, Blur 23, color #000000.
49. In Material Palette, create a Gradient in foreground as you did in Step #16.
50. Layers/New Raster Layer.
51. Find the Watercolor 1 Brush, set to size 150 and stamp on tip of large brush twice, tip of small brush on lady's left side, Phlox on left side of lady and again on Phlox on right side of lady, and by her head on the left once each. See example below.
52. Effects/Edge Effects/Enhance.
53. Image/Add Borders/Add 3px border, Symmetric checked, color #12373a.
54. Image/Resize/Resize by 90%/Resize all layers checked!
55. Image/Add Borders/Add 40px border, Symmetric checked, color #faf197.
56. Activate 40px border using Magic Wand.
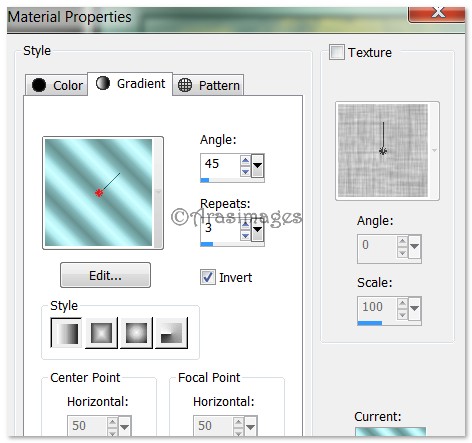
57. In Materials Palette, choose Gradient Wintergreen. Set Angle at 45, Repeats to 3, Invert checked.
58. Flood fill 40px border with new Gradient. Selections/Select None.
59. Image/Add Borders/Add 3px border, Symmetric checked, color #12373a.
60. Open Paint Brush.pspimage. Copy/Paste as New Layer.
61. Image/Mirror. (Flip/Horizontal).
62. Image/Resize/Resize by 70%/Resize all layers unchecked.
63. Move brush to right side of image over border so tip is on flowers.
64. Adjust/Sharpness/Sharpen. Apply Drop Shadow Vertical 23, Horizontal 8, Opacity 45, Blur 23, color #000000.
65. Open Small brushes.pspimage. Copy/Paste as New Layer. Place in bottom left corner.
66. Adjust/Sharpness/Sharpen. Apply Drop Shadow Vertical 23, Horizontal 8, Opacity 45, Blur 23, color #000000.
67. Layers/New Raster Layer.
68. Find the Watercolor 1 brush, Size set to 150, and using the yellow/white gradient, left click to stamp on end of Paint Brush and Small brushes.
69. Effects/Edge Effects/Enhance.
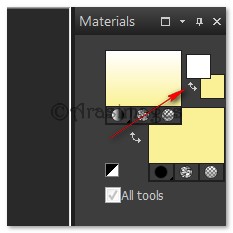
70. In Materials Palette, switch colors using small arrows so yellow is on Background (bottom).
71. From Tool bar, select Font Morning Limerick BTN, Size 36, set Caps lock. Type out the words "In an Artist's World". Convert to Raster Layer.

72. Place text at the bottom center of the image.
73. Sign your name or leave your watermark if you wish. Merge/Merge Visible. Save as .jpg file.
Big hugs go to Evatexas and PamelaD who test my tutorials for me and are my valued advisors.
If you are going to use this tutorial for stationery, cards or place the tutorial/tag on another site, I would appreciate you contacting me for permission, giving Arasimages credit for the original tutorial and if possible, a link back to my site. Thank you.
Copyright © Arasimages All Rights Reserved