
Red Riding Hood
For Spanish, Italian, Dutch and Danish translation, click on the flags.


For this tutorial you will need the materials in the zip file below.

Unzip the materials into a working folder named Red Riding Hood. Open the materials in PSP, copy and close originals. Place the Mask in your PSP/Masks file if you do not have it already. Export Charfades_Grass_Brush_Set_2 as a Custom Brush into your PSP Brushes. I have used the Plugins Redfield/Fractalius and Penta/Color Dot. It is assumed you have a working knowledge of PSP to follow these directions. I have used PSPX5 to create this tutorial but you may use an earlier version.
Thanks go to anna.br, Roby2765 and to PamelaD of Arasimages for use their lovely tubes used.
Use the bookmark below to mark your place along the way.

1. In Materials Palette, set Foreground to #a8181b, Background to #000000.
2. New/New Image of 650px by 700px.
3. Flood fill New Image with Foreground #a8181b.
4. Layers/New Raster Layer. Selections/Select All.
5. Open anna.br_lumieres_05_09_10.pspimage. Copy Misted layer/Paste into Selection. Selections/Select None.
6. Set Blend Mode to Luminance (L).
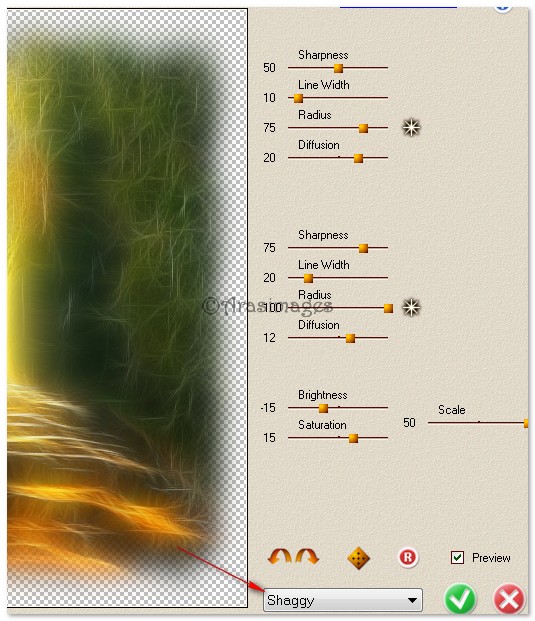
7. Effects/Redfield/Fractalius/Shaggy. Use settings as seen below.
8. Effects/Edge Effects/Enhance.
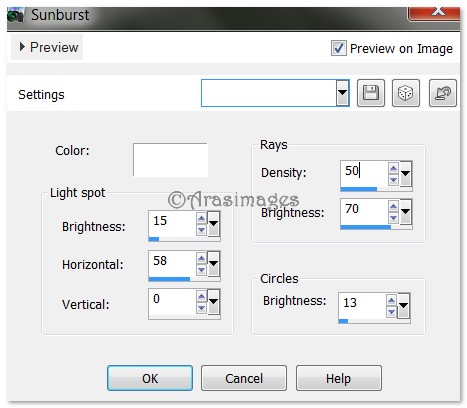
9. Effects/Illuminations Effect/Sunburst. Use settings below.
10 Layers/New Raster Layer. Flood fill with Background #000000.
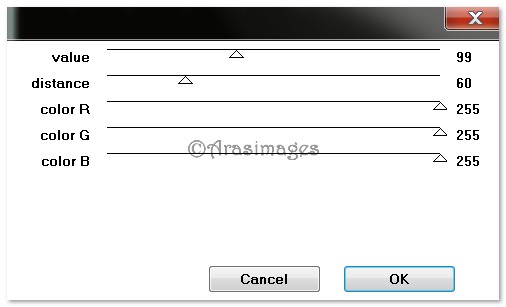
11. Effects/Penta/Color Dot. Use setting below.
12. Effects/Edge Effects/Enhance.
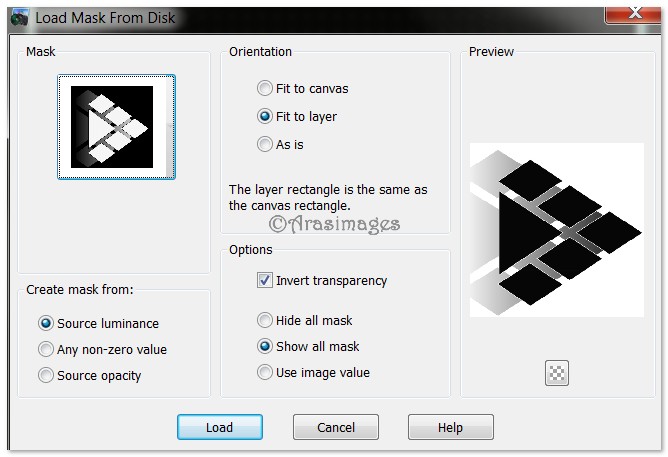
13. Layers/Load/Save Mask/Load Mask from Disk. Select 218_kris.PspMask. Apply. Use settings below.
14. Merge/Merge Group. Set Blend Mode to Hard Light.
15. Effects/Geometric Effects/Cylinder-Horizontal, Strength 80%.
16. Open anna.br_lumieres_05_09_10.pspimage. Copy Misted layer/Paste as New Layer.
17. Image/Resize/Resize by 50%/Resize all layers unchecked.
18. Adjust/Hue and Saturation/Colorize. Hue at 255, Saturation at 200.
19. Move into bottom right corner. Set Blend Mode to Hard Light.
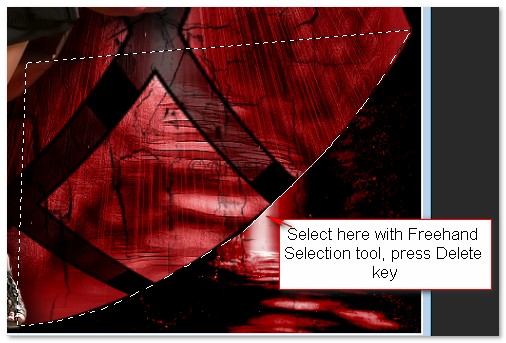
20. Using Freehand Selection tool set to Point to Point, Mode to Add (Shift), Feather 0, select as shown below and press Delete key. Selections/Select None.
21. Open cracks_brush_by_anaRasha_6.png. Copy/Paste as New Layer.
22. Open cracks_brush_by_anaRasha_3.Png. Copy/Paste as New Layer.
23. Open 65_2013 woman by Roby2765.pspimage. Copy/Paste as New Layer.
24. Image/Image/Mirror-(Flip Horizontal).
25. Move woman to left side of image.
26. Adjust/Sharpness/Sharpen.
27. Effects/3D Effects/Drop Shadow, Vertical 20, Horizontal 20, Opacity 75, Blur 35, color #000000.
28. Open LoneWolf.pspimage. Copy Misted layer/Paste as New Layer.
29. Image/Resize/Resize by 75%/Resize all layers unchecked.
30. Move wolf into upper right corner. Drop Opacity to 77.
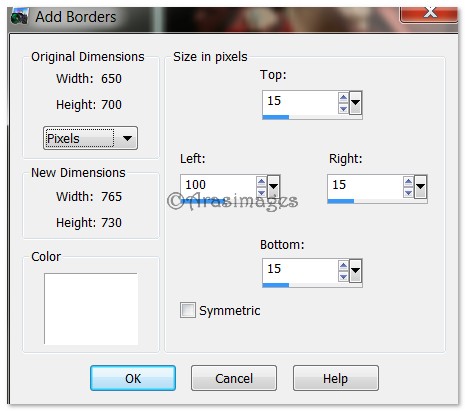
31. Image/Add Borders/Add 15px border to top, right side, bottom. Add 100px border to left side, Symmetric unchecked, color #ffffff.
32. Apply Magic Wand to border. Flood fill with Foreground #a8181b.
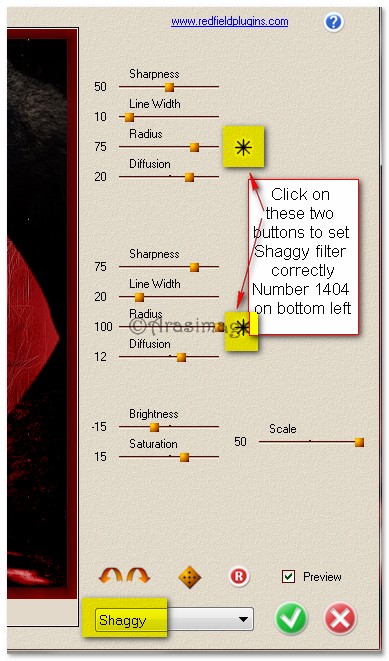
33. Effects/Redfield/Fractalius. Use settings as seen below. The bottom left number might be different than 1404 and it will not matter. (Use Shaggy filter).
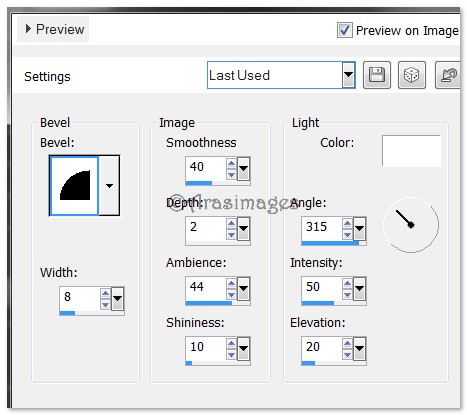
34. Effects/3D Effects/Inner Bevel. Use settings below.
35. Effects/Edge Effects/Enhance.
36. Selections/Select None.
37. Open anna.br_lumieres_05_09_10.pspimage. Copy Misted layer/Paste as New Layer.
38. Using Pick tool, pull layer to top and to bottom. Set Blend Mode to Hard Light, Opacity to 60.
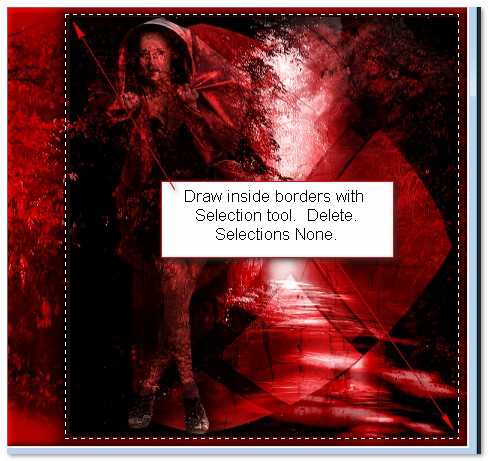
39. Using Selections tool, select within the borders. Delete. Selections/Select None.
40. Layers/New Raster Layer.
41. From Tool bar/Paint Brush, select Charafades_Ultimate_Grass_Brush_Set_2 brush. Set Size to 200. See settings below.

42. Stamp just inside the bottom left corner with Foreground color #a8181b so some red grass goes over her leg. Stamp again more toward the bottom left corner with Background color #000000 and again on the right side toward the bottom using color #000000. (See my tag for placement).
43. Image/Add Borders/Add 3 px border, Symmetric checked, color #000000.
44. From Tool bar, select Font Old English Text MT, Size 60, use settings below.

45. Type the words "Red Riding Hood". Using turn node on activated text, turn text vertical.
46. Convert to Raster Layer. Add a drop shadow of V 10, H 10, Opacity 75, Blur 6, color #a881b.
47. Objects/Align/Vertical Center. Adjust text if necessary.
48. Image/Add Borders/Add 3px border, Symmetric checked, color #a8181b.
49. Image/Add Borders/Add 3px border, Symmetric checked, color #000000.
50. Sign your name or leave your watermark if you wish. Convert to Raster Layer and Merge/Merge Visible if needed.
Big hugs go to Evatexas and PamelaD who test my tutorials for me and are my valued advisors.
If you are going to use this tutorial for stationery, cards or place the tutorial/tag on another site, I would appreciate you contacting me for permission, giving Arasimages credit for the original tutorial and if possible, a link back to my site. Thank you.
Copyright © Arasimages All Rights Reserved