
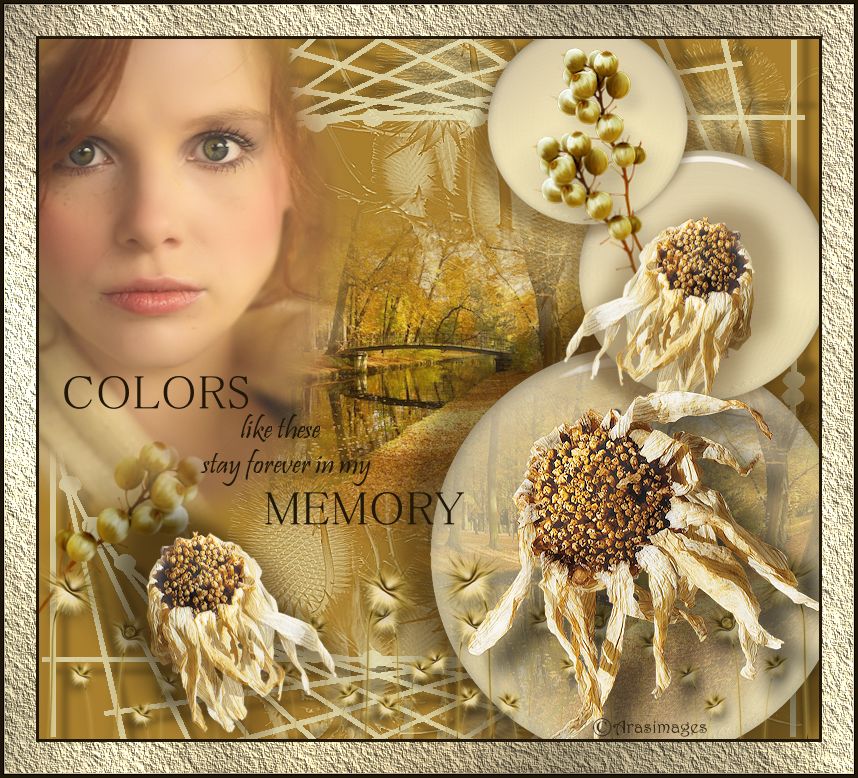
Colors Like These
For Italian, Spanish, Dutch and Danish translation, click on the flags.


For this tutorial you will need the materials in the zip file below.

Unzip the materials into a working folder named Colors Like These. Open the materials in PSP, copy and close originals. Place the Gwyn_Fiori01-9 brush in your PSP/Brushes folder. Place the mcHT_Shapes01.PspPresetShape in your PSP/Preset Shapes folder. Place the GlassArasimages file in your Alien Skin/Eye Candy 5 Impact/Settings/Glass folder. I have used the Plugins Nik Software/Color Efex Pro 3, Graphics Plus, Alien Skin Eye Candy 5 Impact and Neology. It is assumed you have a working knowledge of PSP to follow these directions. I have used PSPX5 to create this tutorial but you may use an earlier version.
Thanks go to "JHanna", to Evatexas of Arasimages and to the unknown tubers for use their lovely tubes used.
Use the bookmark below to mark your place along the way.

1. In Materials Palette, set Foreground to #e7e5c0, Background to #a97f2d.
2. New/New Image of 780px by 700px.
3. Flood fill New Image with Background #a97f2d.
4. From the Tool bar, select Paint Brush. Find the Gwyn_fiori01-9 brush. Stamp 4 times in middle with Rotation at 0, 3 times on the right side with Rotation set to 20, both with the Foreground color #e7e5c0. See settings below.

5. Effects/Edge Effects/Enhance.
6. Switch Foreground with Background color. Using the Preset Shapes/shape_13 (mcHT_Shapes01.PspShape), Line style Solid, Width 0.00, draw a line from middle left side of image to middle right side of image pulling downward to bottom. Adjust if necessary.

7. Convert to Raster Layer.
8. Effects/3D Effects/Drop Shadow. Vertical 12, Horizontal 12, Opacity 45, Blur 9, color #000000.
9. Duplicate. Image/Flip (Flip/Vertical and move to top).
10. Merge/Merge Down. Lower Opacity to 75.
11. Open landscapefallbridge.pspimage. Copy fallbridge misted layer/Paste as New Layer.
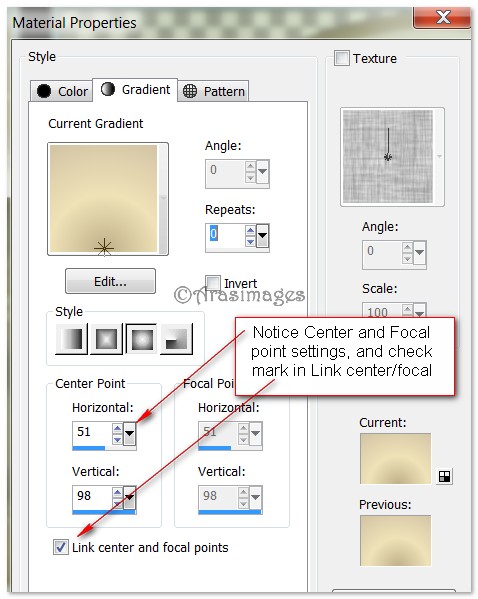
12. Image/Resize by 80%/Resize all layers unchecked. Lower opacity to 80.13. Set the Gradient to Sunburst, Angle grayed out, Repeats 0, Invert unchecked and Center Point/Focal Point as seen below and Link center/focal points checked.
14. Layers/New Raster Layer.
15. Flood new layer with Gradient.
16. Effects/Neology/Vasarely Mosaic, default setting of 20.

17. Effects/Edge Effects/Enhance, Effects/Enhance More.
18. Effects/Geometric Effects/Circle/Transparent selected.
19. Effects/Alien Skin Eye Candy 5/Impact/Glass. Click on User Settings/GlassArasimages (which you placed there) and click OK.
20. Image/Resize/Resize by 60%/Resize all layers unchecked.
21. Effects/3D Effects/Drop Shadow. Vertical -27, Horizontal 26, Opacity 38, Blur 26, color #51330e.
22. Effects/3D Effects/drop Shadow. Vertical 15, Horizontal -26, Opacity 38, Blur 26, color #51330e.
23. Duplicate. Resize by 60%. Pull 2nd circle upward for the time being...we will place it in a minute.
24. Go back to large circle. Pull down into bottom right corner.
25. Effects/3D Effects/Drop Shadow. Vertical -15, Horizontal -26, Opacity 38, Blur 26, color #000000.
26. Open landscapefallbridge.pspimage. Copy fall bridge misted layer/Paste as New Layer.
27. Place inside bottom circle. Effects/Geometric Effects/Circle/Transparent selected.
28. Adjust into center of circle. Drop Opacity to 57.
29. Now go back to the smaller circle you duplicated/resized in Step #23. Move it to lay at the top of large circle.
30. Duplicate. Resize by 80%. Move to the top and to the left a little, overlapping middle circle. Activate top layer.
31. Open Gold Berries.pspimage. Copy/Paste as New Layer.
32. Image/Resize by 75%. Adjust/Sharpness/Sharpen.
33. Image/Image/Mirror (Flip Horizontal). Move to top circle.
34. Duplicate. Image/Free Rotate/Rotate Left by 15 degrees.
35. Move to the left of first berries and down a little.
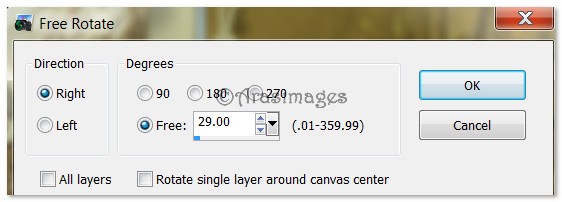
36. Paste once again the berries, Free Rotate as seen below and place in bottom left corner.
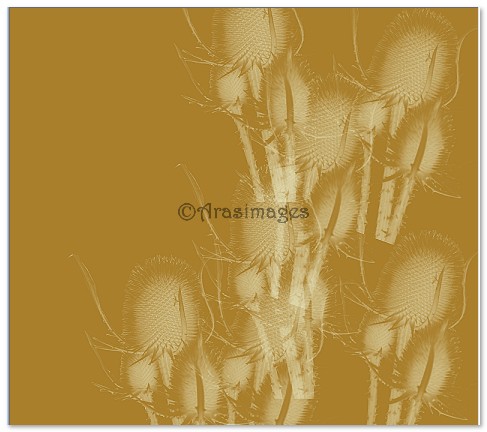
37. Open GroupFlowers.pspimage. Copy/Paste as New Layer.
38. Move to bottom right. Duplicate. Image/Mirror. (Flip Horizontal move to left side of image).
39. Open JHanna_317 tube misted.pspimage. Copy/Paste as New Layer. Up Opacity to 100.
40. Image/Resize/Resize by 85%/Resize all layers unchecked.
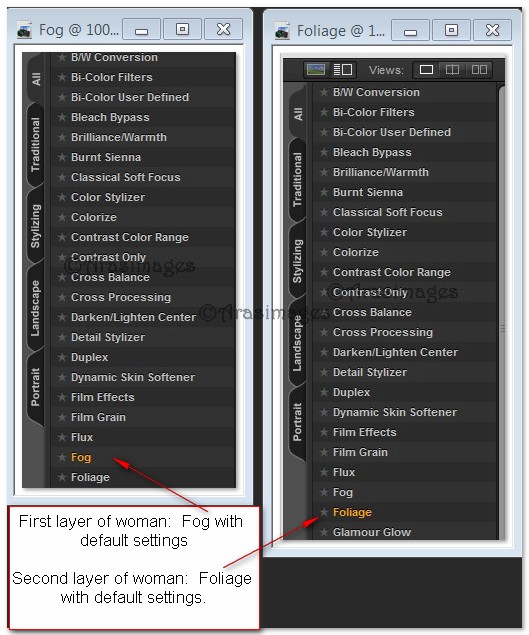
41. Effects/Nik Software/Color Efex 3/Fog. Use default settings-example on left.
42. Highlight the lines layer (Raster 3).
43. Using the Eraser tool set to Size 35, erase the lines off misted lady's face and collar.
44. Highlight top layer to continue.
45. Copy and Paste the lady as New Layer. Image/Resize by 85%.
46. Effects/Nik Software/Color Efex 3/Foliage. Use default settings (see above example in Step 41-use default settings shown on right).
47. Place the lady over first lady layer, try to be as exact as you can and lower Opacity to 61.
48. In Layers Palette, move the berries layer in Step #36 to set between the two layers of the lady's face. Move to top layer to continue.
49. Open Dried Sunflower.pspimage. Copy/Paste as New Layer.
50. Image/Resize/Resize by 35%/Resize all layers unchecked.
51. Move Sunflower over middle circle.
52. Apply Drop Shadow of Vertical -15, Horizontal 26, Opacity 38, Blur 26, color #51330e.
53. Apply Drop Shadow again of Vertical 15, Horizontal -26, Opacity 38, Blur 26, color #51330e.
54. Duplicate. Image/Mirror (Flip Horizontal. Move to left side of image in bottom corner.)
55. Apply Drop Shadow again of Vertical -15, Horizontal -26, Opacity 38, Blur 26, Color #000000.
56. Open Dried SunflowerL.pspimage. Copy/Paste as New Layer.
57. Image/Resize/Resize by 45%/Resize all layers unchecked.
58. Move Sunflower on top of largest circle.
59. Effects/3D Effects/Drop Shadow. Vertical 15, Horizontal 26, Opacity 38, Blur 26, color #000000. Repeat.
60. Adjust/Sharpness/Sharpen.
61. Change Background color to #201708. From Tool bar, select the Text tool.
62. Find the Font MS PMincho, set to Size 48, color #201708, type the word "COLORS" in upper case. Convert to Raster Layer.

63. Type the word "MEMORY". Convert to Raster Layer.
64. Find the Font Pristina, set to size 30, color #201708. Type the words "like these" in lower case. Convert to Raster Layer.

65. Type the words "stay forever in my" in lower case. Convert to Raster Layer.
66. Using Move Tool, place each of the words in place as I have mine (see finished tag).
67. Image/Add Borders/Add 3px border, Symmetric checked, color #201708.
68. Image/Add Borders/Add 33px border, Symmetric checked, color #e7e5c0.
69. Use Magic Wand on 33px border to activate it.
70. Flood fill with original Gradient.
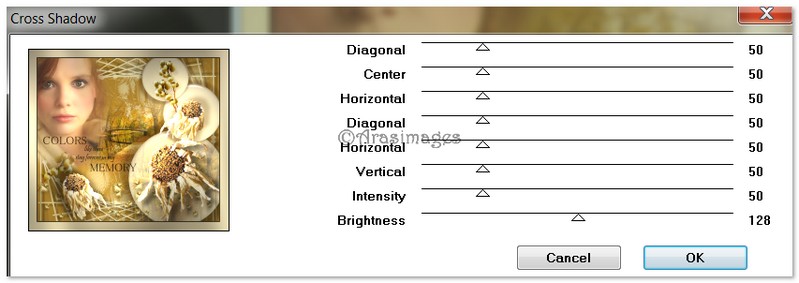
71. Effects/Graphics Plus/Cross Shadow. Use settings below.
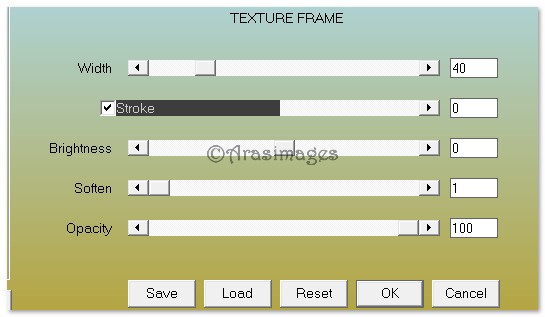
72. Effects/AAA Frames/Texture Frames. Use default settings. Apply twice.
73. Selections/Select None.
74. Image/Add Borders/Add 3px border, Symmetric checked, color #201708.
75. Sign your name or leave your watermark if you wish. Convert to Raster Layer and Merge/Merge Visible if needed.
Big hugs go to Evatexas and PamelaD who test my tutorials for me and are my valued advisors.
If you are going to use this tutorial for stationery, cards or place the tutorial/tag on another site, I would appreciate you contacting me for permission, giving Arasimages credit for the original tutorial and if possible, a link back to my site. Thank you.
Copyright © Arasimages All Rights Reserved