
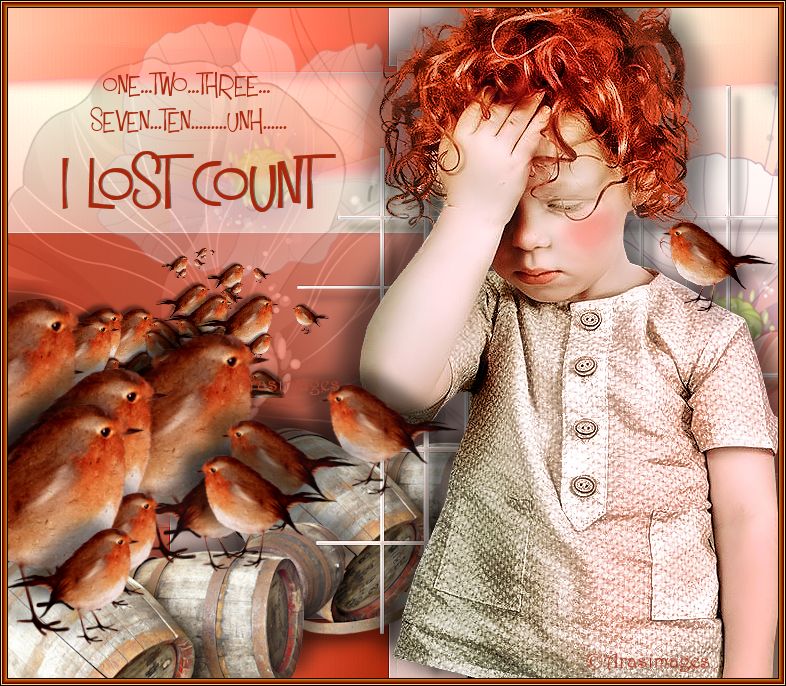
I Lost Count
For Italian and Dutch translation, click on the flags.


For this tutorial you will need the materials in the zip file below.

Unzip the materials into a working folder named I Lost Count. Open the materials in PSP, copy and close originals. I have used the Plugins Mura's Meister/Copies, C_S_(Carolain and Sensibility)/Reflection, AAA Frames/Frame Works and FM Tile/Collage Circular. It is assumed you have a working knowledge of PSP to follow these directions. I have used PSPX5 to create this tutorial but you may use an earlier version.
Thanks go to "Nikita" for her adorable little girl tube and to the unknown tubers for use of the other tubes used.
Use the bookmark below to mark your place along the way.

1. In Materials Palette, set Foreground to #efd1c9, Background to #aa2706.
2. Create a Gradient using the Foreground/Background colors, Style Linear, Angle 90, Repeats 0, Invert checked.

3. New/New Image of 780px by 680px. Flood fill with Gradient.
4. Layers/New Raster Layer. Uncheck the Invert of the Gradient and flood fill new Raster Layer.
5. Lower the Opacity of Raster 2 to 95.
6. Custom Select Raster 2 using Selections tool/Rectangle/click on Custom Selection button and use settings as seen below. Press Delete key once.

7. Effects/3D Effects/Drop Shadow. Vertical -10, Horizontal 0, Opacity 50, Blur 20, color #000000.
8. Effects/3D Effects/Drop Shadow. Vertical 10, Horizontal -0, Opacity 50, Blur 20, color #000000.
9. Selections/Select Invert.
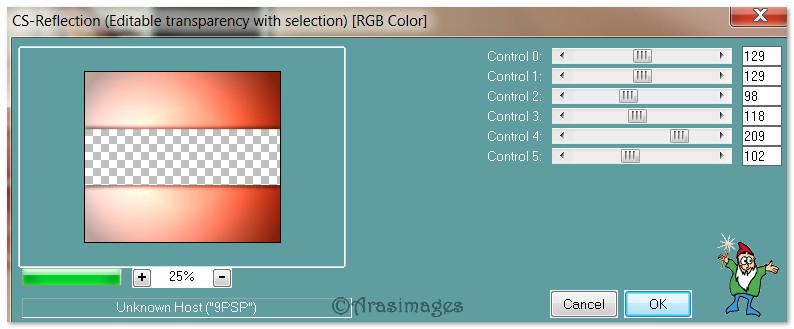
10 Effects/C_S_(Carolain and Sensibility)/Reflection. Use settings below.
11. Effects/FM Tile Tool/Collage-Circular. Apply as shown below.

12. Effects/Edge Effects/Enhance. Selections/Selection None.
13. Open Flower1.png file. Copy/Paste as New Layer.
14. Effects/Image Effects/Offset. Horizontal Offset 104, Vertical Offset 49, Custom and Transparent ticked.
15. Set Opacity to 77.
16. Open Flower3.png file. Copy/Paste as New Layer.
17. Set Blend Mode to Luminance (L). Opacity at 34.
18. Effects/Image Effects/Offset. Horizontal Offset at -91, Vertical offset at 0, Custom and Transparent ticked.
19. Open Barrels.png file. Copy/Paste as New Layer.
20. Image/Resize/Resize by 70%/Resize all layers unchecked.
21. Effects/Image Effects/Offset. Horizontal Offset at 0, Vertical offset at -183, Custom and Transparent ticked.
22. Effects/3D Effects/Drop Shadow. Vertical -11, Horizontal 15, Opacity 50, Blur 20, color #000000.
23. Effects/3D Effects/Drop Shadow. Vertical 11, Horizontal -15, Opacity 50, Blur 20, color #000000.
24. Open Barrels.png file. Copy/Paste as New Layer.
25. Image/Resize/Resize by 80%/Resize all layers unchecked.
26. Effects/3D Effects/Drop Shadow. Vertical -11, Horizontal 15, Opacity 50, Blur 20, color #000000.
27. Effects/Image Effects/Offset. Horizontal Offset at -242, Vertical offset at -304, Custom and Transparent ticked.
28. Open BackgroundCrissCross.png. Minimize on desktop.
29. New Raster Layer, flood fill with #efd1c9.
30. Layers/New Mask Layer/From Image. From drop down list, find BackgroundCrissCross.png file. Select it and click OK.

31. Merge/Merge Group. Effects/Edge Effects/Enhance.
32. Effects/3D Effects/Inner Bevel. Use settings below. HINT: You might want to save this setting if you intend to do many of my tutorials as I use this one often.

33. Effects/3D Effects/Drop Shadow. Horizontal -10, Vertical -20, Opacity 50, Blur 20, color #000000. Repeat Drop Shadow with Horizontal 10, Vertical 10, Opacity 50, Blur 10, #000000.
34. Open 1293385562_enfants_nikita.pspimage. Copy/Paste as New Layer.
35. Move little girl to right side of image.
36. Effects/3D Effects/Drop Shadow. Horizontal 10, Vertical 20, Opacity 50, Blur 30, color #000000.
37. Effects/3D Effects/Drop Shadow. Horizontal -10, Vertical -20, Opacity 50, Blur 30, color #000000.
38. Adjust/Sharpness/Sharpen.
39. Open LittleBirdieBG.pspimage. Copy/Paste as New Layer.
40. Effects/Image Effects/Offset. Horizontal offset -213, Vertical offset 20, Custom/Transparent ticked.
41. Open OrangeBirdie.png. Copy/Paste as New Layer.
42. Image/Resize/Resize by 50%, Resize all layers unchecked.
43. Effects/3D Effects/Drop Shadow. Horizontal -10, Vertical -20, Opacity 50, Blur 20, color #000000.
44. Effects/Image Effects/Offset. Horizontal offset -339, Vertical offset -146, Custom/Transparent ticked.
45. Copy/Paste OrangeBirdie.png again. Resize by 50% twice. Offset by Horizontal -279, Vertical -214, Custom/Transparent ticked.
46. Effects/3D Effects/Drop Shadow. Horizontal -10, Vertical -20, Opacity 50, Blur 20, color #000000.
47. Duplicate. Image/Mirror or Image Horizontal, (depending on the version of PSP you are using.)
48. Effects/Image Effects/Offset. Horizontal offset -358, Vertical offset 66, Custom/Transparent ticked.
49. Merge/Merge Down Copy of Raster 10. Merge/Merge Down Raster 10. The three birds are now all on Raster 9.
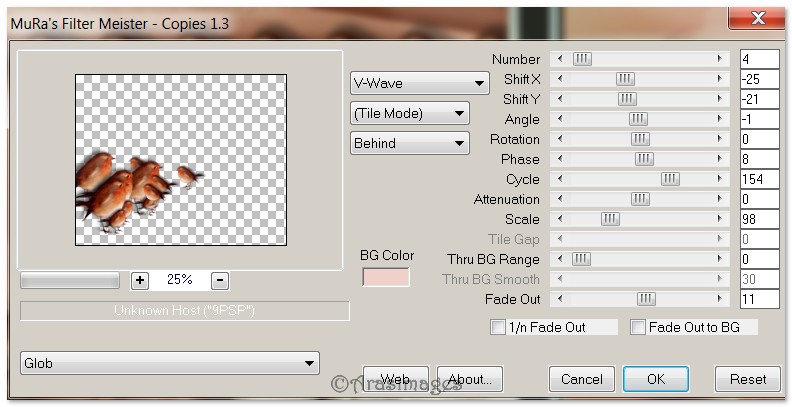
50. Effects/Mura's Meister/Copies, Background color #efd1c9. Use settings below.
51. Effects/Image Effects/Offset Horizontal offset -2, Vertical offset -24.
52. From Tool bar, select Text Tool, Mister Sirloin BTN Rare, Size 30, color #aa2706 and type the words "One...Two...Three...".

53. Convert to Raster Layer and move into place as I have mine.
54. With same Font and color, size at 30, type "Seven...Ten.........Unh". Convert to Raster Layer and put in place below first font. Use my finished image for placement.
55. With same Font and color, change size to 72 and type "I lost count". Convert to Raster Layer. Place below other two lines.
56. Effects/3D Effects/Drop Shadow, Horizontal 0, Vertical 1, Opacity 50, Blur 0, color #000000.
57. Open OrangeBirdie.png. Image/Mirror or Flip Horizontal. Resize by 20%, all layers checked!
58. Copy/Paste as New Layer. Place birdie on little girl's shoulder on the right of image.
59. Effects/3D Effects/Drop Shadow. Horizontal 10, Vertical 10, Opacity 50, Blur 20, color #000000.
60. Adjust/Sharpness/Sharpen.
61. Image/Add Borders/Add 3px border, Symmetric checked, color #aa2706.
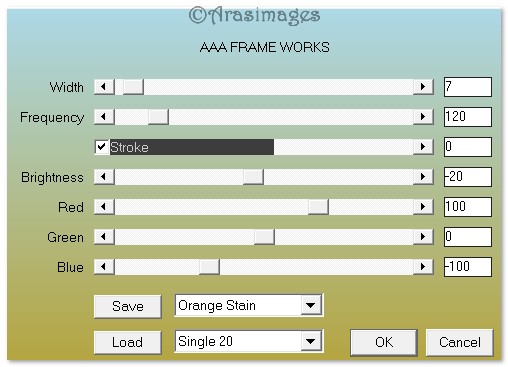
62. Effects/AAA Frames/Frame Works. Use settings below.
63. Sign your name or leave your watermark if you wish. Convert to Raster Layer and Merge/Merge Visible if needed.
Big hugs go to Evatexas and PamelaD who test my tutorials for me and are my valued advisors.
If you are going to use this tutorial for stationery, cards or place the tutorial/tag on another site, I would appreciate you contacting me for permission, giving Arasimages credit for the original tutorial and if possible, a link back to my site. Thank you.
Copyright © Arasimages All Rights Reserved