
Sea Nymph
For Italian, Dutch and Danish translation, click on the flags.


For this tutorial you will need the materials in the zip file below.

Unzip the materials into a working folder named Sea Nymph. Open the materials in PSP, copy and close originals. Place the Tiles.pspimage in your Presets Shapes Folder. Place Preset_UserDefinedFilter_ArasimagesDefineWater Preset into your Presets Folder. I have used the Plugins Mura's Seamless/Mirror Diagnal, Simple/Left Right Wrap, AFS IMPORT/sqborder2, Flaming Pear/Flexify and Eye Candy 4000/Jiggle. Also used in this tutorial is Animation Shop. It is assumed you have a working knowledge of PSP to follow these directions. I have used PSPX5 to create this tutorial but you may use an earlier version.
Thanks go to "anna.br" for her lovely woman tube and to the unknown tubers for use of the other tubes used.
Use the bookmark below to mark your place along the way.

1. In Materials Palette, set Foreground to #d5e3e9, Background to #376479.
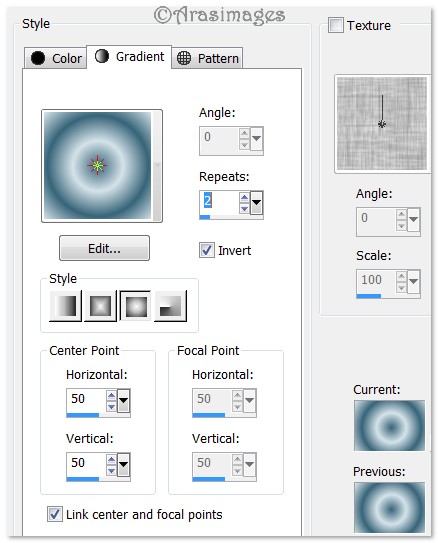
2. Create a Gradient using the Foreground/Background colors, Style Sunburst, Angle 0, Repeats 2, Invert checked. Center Point/Horizontal and Vertical both set to 50 with Link box checked. See below.
3. New/New Image of 780px by 700px. Flood fill with Gradient.
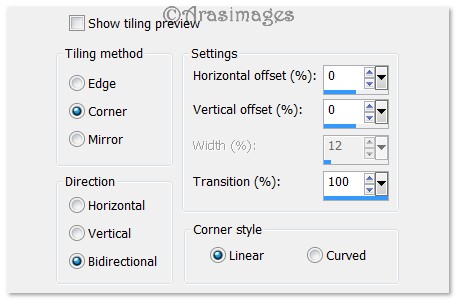
4. Effects/Image Effects/Seamless Tiling. See below.
5. Effects/Edge Effects/Enhance.
6. Effects/Simple/Left Right Wrap.
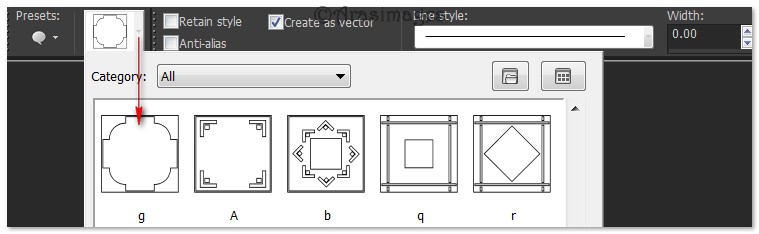
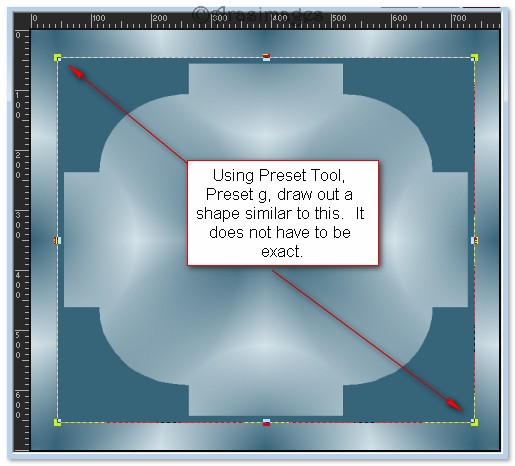
7. From Tool bar, select the Preset Shapes tool. Find g Preset Shape from the Shapelist. Draw out the shape using the View/Ruler as a guide.
8. Convert to Raster Layer.
9. Selections/Select All. Float/Defloat.
10. Open WaterSplash.jpg. Image/Flip. Copy/Paste into Selection.
11. On WaterSplash.jpg image, File/Close..do NOT save changes to file. Go back to working image.
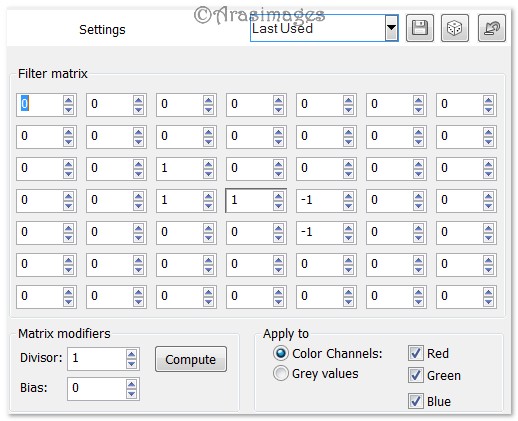
12. Effects/User Defined Filter/ArasimagesDefineFilter. See below.
13. Layers/New Raster Layer. Flood fill with color #163442.
14. Selections/Modify/Contract by 1px. Press Delete key once.
15. Selections/Select None. Merge/Merge Down.
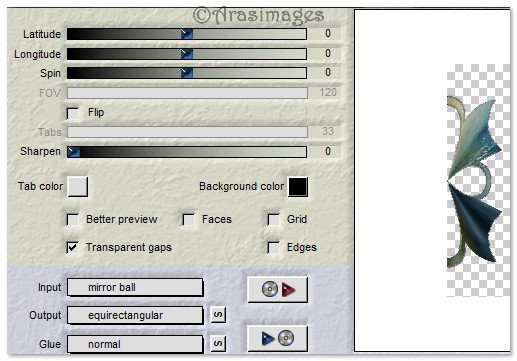
16. Effects/Flaming Pear/Flexify. See below.
17. Effects/3D Drop Shadow. Vertical 4, Horizontal 12, Opacity 50, Blur 20, color #000000.
18. Effects/3D Drop Shadow. Vertical -4, Horizontal -12, Opacity 50, Blur 20, color #000000.
19. Effects/Edge Effects/Enhance.
20. Open WaterSplash.jpg. Copy/Paste as New Layer.
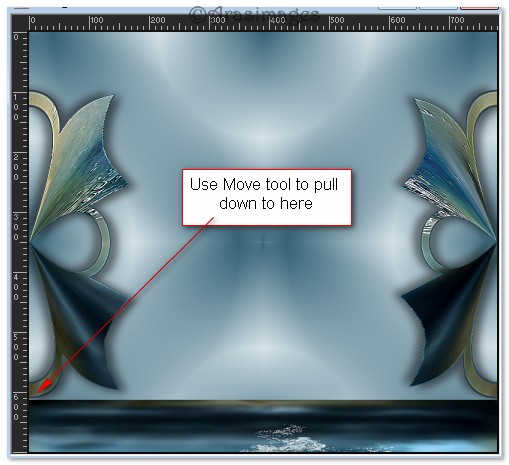
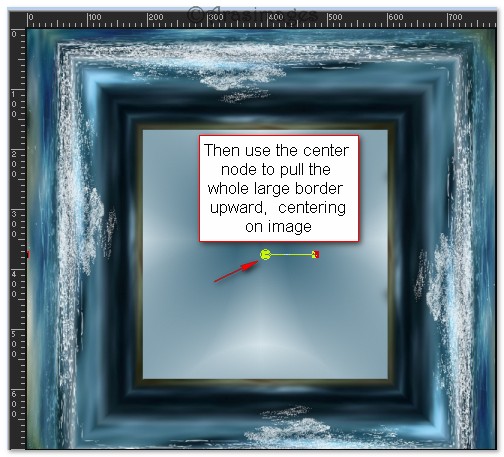
21. Use Pick tool to pull down WaterSplash layer. See below.
22. Effects/Mura's Seamless/Mirror Diagonal, Type set to 216.
23. If necessary, use Center node and bottom node of Pick Tool to move large border so that the square opening is positioned as I have shown below.
24. Set Opacity to 87. Pull Raster 3 below Raster 2.
25. Selections/Select All. Float/Defloat. Invert. OR Use Magic Wand to select center of Frame.
26. Open WaterSplash.jpg Copy/Paste into Selection.
27. Layers/New Raster Layer. Flood fill with color #163442.
28. Selections/Modify/Contract by 2px. Press Delete key once. Deselect.
29. Highlight top layer (Raster 2) to continue.
30. Open Baubles.pspimage. Copy/Paste as New Layer.
31. Move into place on left side of image.
32. Effects/3D Effects/Drop Shadow. Vertical 4, Horizontal 12, Opacity 50, Blur 20, color #000000.
33. Duplicate. Objects/Align/Right.
34. From Tool bar, select Text tool. Locate from the drop down the font Sloop Script Three, Size 110. Using color #d5e3e9, type the words "Sea Nymph".

35. Convert to Raster Layer. Place above center square of image.
36. Apply drop shadow as in Step #32.
37. Open anna.br-1142_frescor.pspimage. Copy/Paste as New Layer.
38. Image/Resize/Resize by 120%/Resize all layers unchecked.
39. Adjust/Sharpness/Sharpen. Place Nymph lady at the bottom of image.
40. Open Baubles.pspimage. Copy/Paste as New Layer.
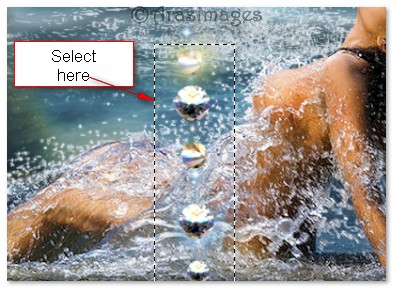
41. Using Selections tool, Rectangle/Replace, select around the larger balls. Delete. Deselect. (You may have to use eraser tool to erase some green color at one end of the linear star cluster.)
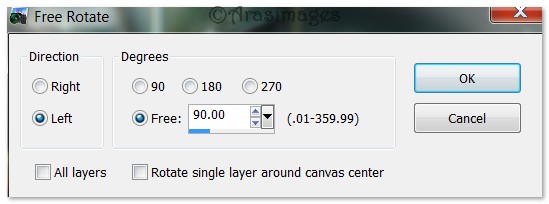
42. Image/Free Rotate. Rotate by 90 degrees, Left.
43. Place below the text.
44. Duplicate/Image/Mirror. Image/Flip. Place along bottom of text.
45. Image/Add Borders/Add 3px border, Symmetric checked, color #163442.
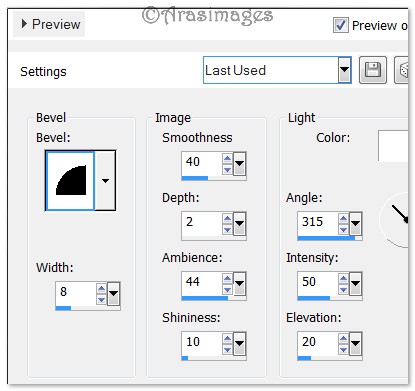
46. Effects/3D Effects/Inner Bevel. See below.
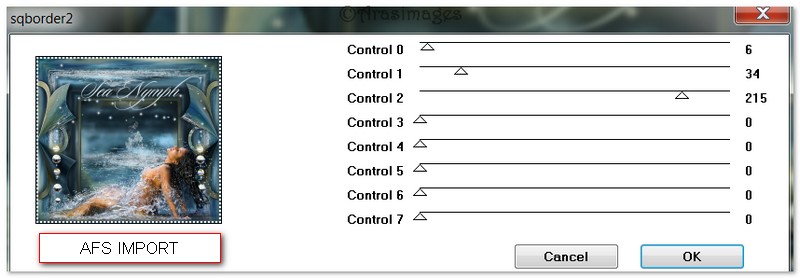
47. Effects/AFS IMPORT/sqborder2. See below.
48. Sign your name or leave your watermark if you wish. Convert to Raster Layer and Merge/Merge Visible if needed. If your image is a Background, Promote Background layer.
If you wish to make this tutorial animated, follow the directions below. Otherwise you are finished.
ANIMATION
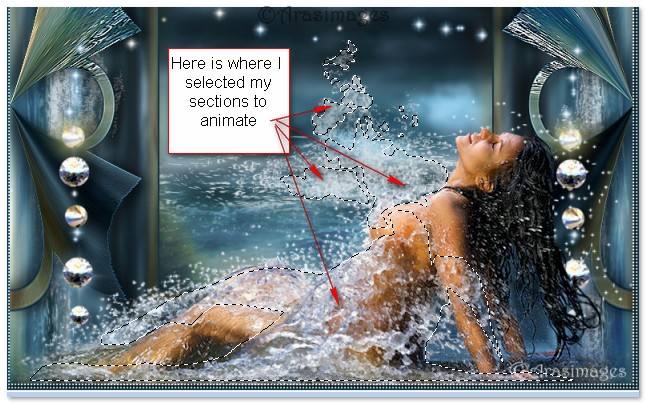
1. Using the Freehand Selection tool, set to settings as shown below/or use Freehand, draw around the water you wish to animate. Here is where I drew around my image but please feel free to do yours differently if you wish.

2. Duplicate your image 4 times, having 5 layers in all. Close off all layers except the top layer.
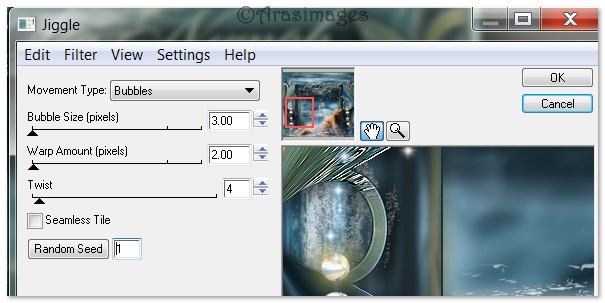
3. Effects/Eye Candy 4000/Jiggle. Use settings below and apply.
4. Close off top layer. Highlight and open next layer down. Effects/Eye Candy 4000/Jiggle. Click on Random Seed. Apply.
5. Close off this layer. Highlight and open next layer down. Effects/Eye Candy 4000/Jiggle. Click on Random Seed. Apply.
6. Close off this layer. Highlight and open next layer down. Effects/Eye Candy 4000/Jiggle. Click on Random Seed. Apply.
7. Open and highlight bottom layer. Effects/Eye Candy 4000/Jiggle. Click on Random Seed. Apply.
8. Selections/Select None.
9. Open all unopened layers. File/Save as/give your work a name (Sea Nymph) and save as file type PSP Animation Shop (*psp) in your working folder.
10. Open Animation Shop. File/Open your saved PSP Animation Shop (*psp) Sea Nymph image from your working folder.
11. Edit/Select All. Animation/Frame Properties-set at 14. (The higher the number, the slower the animation.)
12. Click on the Animation button in the top tool bar to see if your animation is working properly.
13. If it is as you wish, we will now save your work.
14. File/Save As. When the box comes up, give your work a name, type where to save it and click Save. Then click Next, Next, Next and Finish.
15. I hope you have enjoyed the journey of this tutorial and come back soon for more fun!
Thank you Eva and Pamela, for testing this and all of my tutorials for me. I appreciate you more than you know.
If you are going to use this tutorial for stationery, cards or place the tutorial/tag on another site, I would appreciate you contacting me for permission, giving Arasimages credit for the original tutorial and if possible, a link back to my site. Thank you.
Copyright © Arasimages All Rights Reserved