
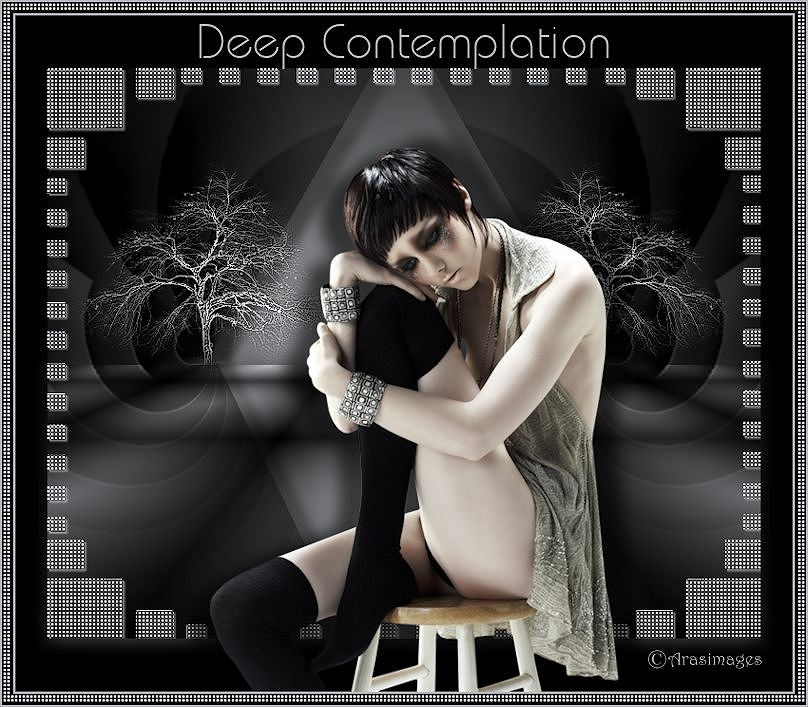
Deep Contemplation
For Italian, Dutch and Danish translation, click on the flags.


For this tutorial you will need the materials in the zip file below.

Unzip the materials into a working folder named Deep Contemplation. Open the materials in PSP, copy and close originals. Place jd-Mask118 in your PSP Masks folder and Export/Custom Brush the Lone Tree Brush into your PSP Brushes folder. I have used PSPX5 to create this tutorial but you may use an earlier version. Plugins used are Filter Factory Gallery A, Filter Factory Gallery B, (Filters Unlimited 2)/AFS IMPORT/sqborder2 and MuRa's Meister/Perspective Tiling. It is assumed you have a working knowledge of PSP to follow these directions. NOTE: Image/Mirror is now Image Horizontal in PSPX4 and PSPX5) and will flip your image in place so you will have to move it using the move tool or arrow keys. Older versions of PSP will mirror the image for you.
Thanks go to K@rine_Dreams for the lovely tube used.
Use the bookmark below to mark your place along the way.

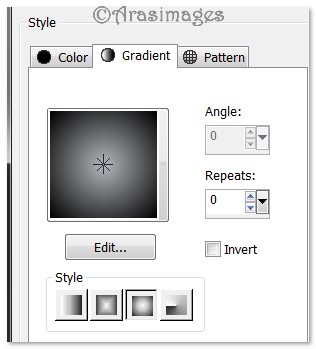
1. In Materials Palette, set Foreground to #b4b6bb, Background to #000000. To create Foreground Gradient, set Style to Sunburst, Angle and Repeats set to 0, Invert unchecked.
2. New/New Image 750px by 600px. Flood fill with Gradient.
3. Layers/New Raster Layer. Flood fill with Gradient again.
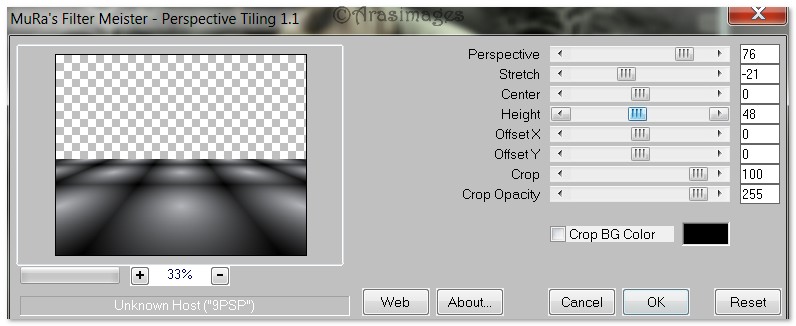
4. Effects/MuRa's Meister/Perspective Tiling. Use settings below.
5. Adjust/Sharpness/High Pass Sharpen. Radius 10, Strength 70, Blend Mode/Soft Light.
6. Layers/New Raster Layer. Flood fill with Background #000000.
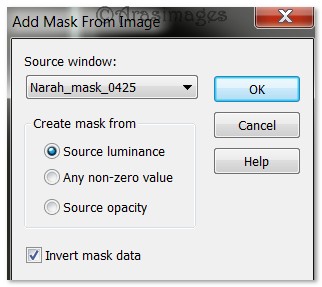
7. Open Nara_Mask_0425.jpg image. Keep open on desktop.
8. Layers/New Mask Layer/From Image. Choose the Nara_Mask from box drop down. Merge/Merge Group.
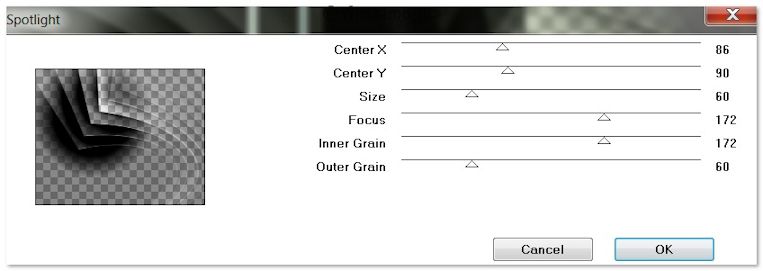
9. Effects/Filter Factory Gallery A/Spotlight. Use settings below.
10. View/Rulers checked. Using Move tool, pull Mask to right, 400px on ruler top.
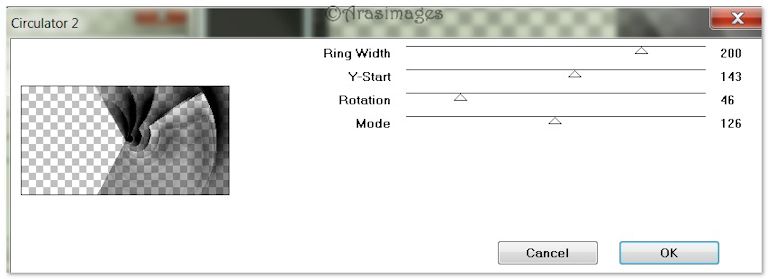
11. Effects/Filter Factory Gallery B/Circulator 2. Use settings below.
12. Effects/3D Effects/Drop Shadow. Vertical 6, Horizontal -19, Opacity 65, Blur 13, color #000000.
13. Duplicate. Image/Mirror.
14. Layers/New Raster Layer. Flood fill with Gradient.
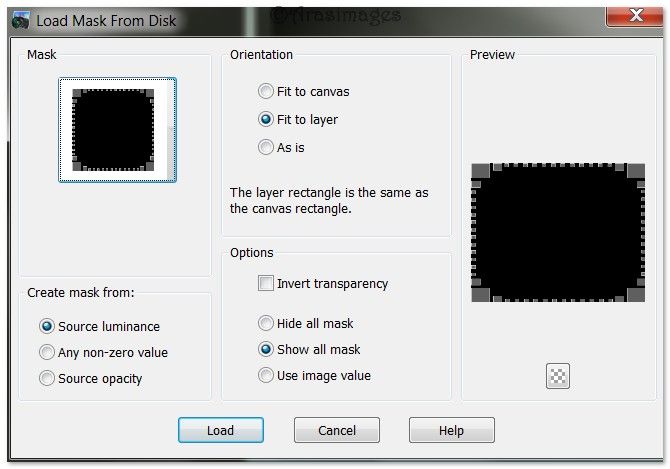
15. Layers/Load/Save Mask/Load Mask from Disk. Find jd-mask118.msk from dropdown and apply.
16. Merge/Merge Group.
17. Selections/Select all. Float/Defloat to select all of the mask layer.
18. Effects/3D Effects/Drop Shadow. Vertical 2, Horizontal 2, Opacity 60, Blur 2, color #b4b6bb.
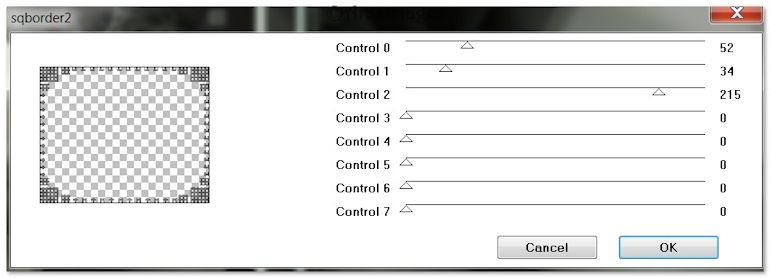
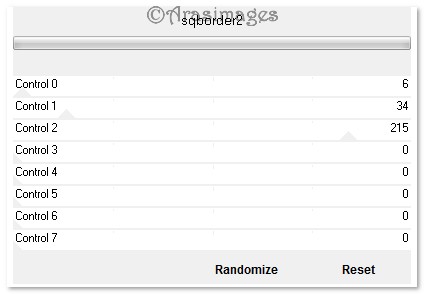
19. Effects/AFS IMPORT/sqborder2. Use settings below.
20. Effects/Edge Effects/Enhance. Effects/Edge Effects/Enhance More.
21. Selections/Select None.
22. Adjust/Sharpness/Sharpen. Set Blend Mode to Lighten. Merge/Merge Visible.
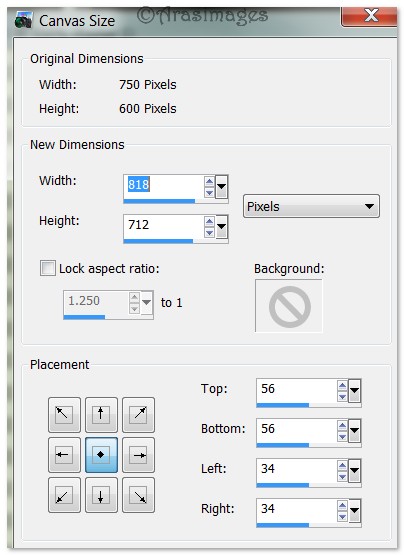
23. Image/Canvas Size. Use settings below.
24. Layers/New Raster Layer. Flood fill with #000000.
25. Layers/Arrange/Send to Bottom. Highlight top layer to continue.
26. Layers/New Raster Layer.
27. From Tool bar, locate the Paint Brush tool. From the drop down, select Lone Tree brush.
28. Use these settings below to stamp on the Lone Tree, using color #b4b6bb, stamp on left side. Use my finished tag to see where to stamp.

29. Effects/Edge Effects/Enhance More.
30. Duplicate. Image/Mirror.
31. Open K@rine_dreams_Pretty_Woman_1370_Decembre_2010.pspimage. Copy/Paste as New Layer.
32. Image/Resize/Resize by 80%, Resize all layers unchecked.
33. Pull lady to bottom of image. Objects/Align/Horizontal Center.
34. Effects/3D Effects/Drop Shadow, Vertical -10, Horizontal 24, Opacity 60, Blur 23, color #000000. Repeat with V 10, H -24, all the other settings the same.
35. Image/Add Borders/Add 2px border, Symmetric checked, color #b4b6bb.
36. Image/Add Borders/Add 10px border, Symmetric checked, color #000000.
37. Using Magic Wand, select the 10px border to activate it.
38. Effects/(Filters Unlimited 2)/AFS IMPORT/sqborder2. Use settings as seen below.
39. Effects/Edge Effects/Enhance. Selections/Select None.
40. Image/Add Borders/Add 2px border, Symmetric checked, color #000000.
41. Image/Add Borders/Add 2px border, Symmetric checked, color #b4b6bb.
42. Image/Resize/Resize by 95%/Resize all layers CHECKED.
43. From the Tool bar, select the Text tool. Select Font Brie Light, Size 48, Line style solid. Using color #b4b6bb, type the words, "Deep Contemplation". Convert to Raster Layer.

44. Place at the top of the image in large black border. Object/Align/Horizontal Center.
45. Sign your name if you wish. Merge/Merge Visible.
46. Adjust/Sharpness/Sharpen.
47. File/Save As/.jpg file or file of your choice.
Big hugs go to Evatexas and PamelaD who test my tutorials for me and are my valued advisors.
If you are going to use this tutorial for stationery, cards or place the tutorial/tag on another site, I would appreciate you contacting me for permission, giving Arasimages credit for the original tutorial and if possible, a link back to my site. Thank you.
Copyright © Arasimages All Rights Reserved