
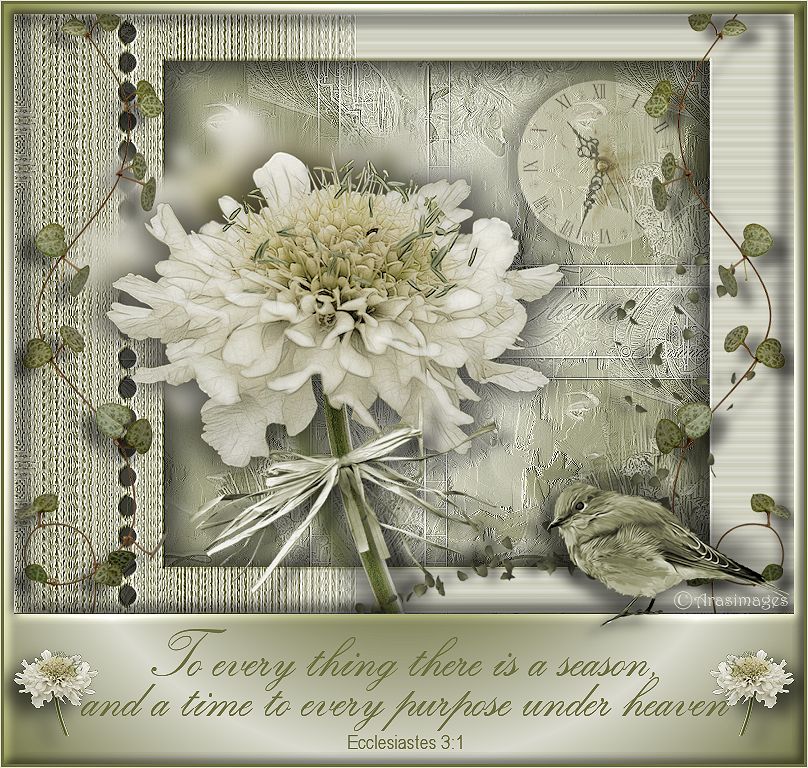
To Every Thing There Is A Season
For Italian, Danish and German translation, click on the flags.


For this tutorial you will need the materials in the zip file below.

Unzip the materials into a working folder named "To every thing there is a season". Open the materials in PSP, copy and close originals. Place Brushes included in materials into your PSP Brushes folder. I have used PSPX5 to create this tutorial but you may use an earlier version. There are no plugins used in this tutorial. It is assumed you have a working knowledge of PSP to follow these directions. NOTE: Image/Mirror is now Image Horizontal in PSPX4 and PSPX5 and will flip your image in place so you will have to move it using the move tool or arrow keys. Older versions of PSP will mirror the image for you.
Thanks go to JHanna and to the unknown tubers of scraps for the lovely tubes used.
Use the bookmark below to mark your place along the way.

1. In Materials Palette, set Foreground to #ddddd1, Background to #6c6f3d.
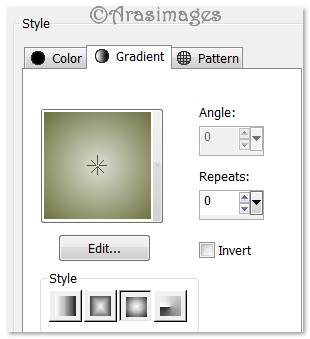
2. Create Gradient using Foreground/Background colors, Style set to Sunburst, Angle grayed out, Repeats 0, Invert unchecked.
3. New/New Image 780px by 600px. Flood fill with Background color #6c6f3d.
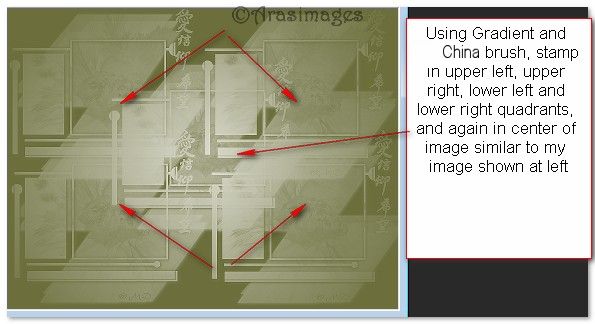
4. Using Gradient and China brush set to Size 400, stamp in all four quadrants and in middle.

5. Effects/Edge Effects/Enhance.
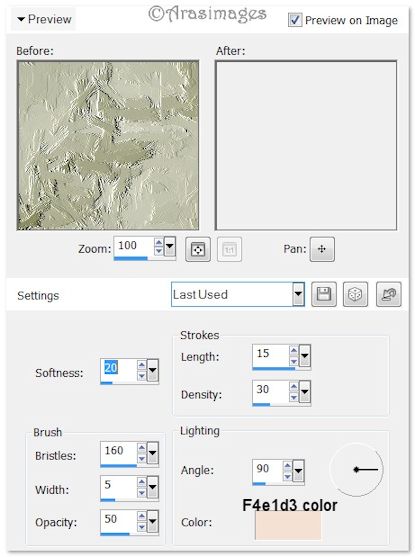
6. Effects/art Media Effects/Brush Strokes. Apply 2 times.
7. Layers/New Raster Layer.
8. Using Foreground color #ddddd1, Elegance brush set to size 500, stamp using X: and Y: settings. (With Paint Brush tool active, find X and Y settings at the bottom right corner of PSP). In upper left quadrant, use X:185, Y:165. Upper right quadrant, use X:554, Y:163. In bottom left quadrant, use X:183, Y:454 and in bottom right quadrant, use X:546, Y:453.

9. Effects/Edge Effects/Enhance.
10. Open Frame.pspimage. Copy/Paste as New Layer.
11. Adjust/Hue and Saturation/Colorize. Set Hue to 43, Saturation 38.
12. Using Pick Tool, grab Nodes both top and bottom and stretch to fit image. Enhance.
13. Effects/3D Effects/Drop Shadow. Vertical -10, Horizontal 15, Opacity 60, Blur 34, color #000000. Apply Drop Shadow again changing Vertical to 10, Horizonal to -15, Opacity, Blur and color the same.
14. Open JHanna_679a tube.pspimage. Copy/Paste as New Layer.
15. Image/Resize/Resize by 80%/Resize all layers unchecked.
16. Move flower upward to the left, having stem setting on bottom inside of Frame.
17. Adjust/Blur/Gaussian Blur, Radius set to 8.
18. Paste the flower again as New Layer. Resize to 80% as before.
19. Place the flower so stem sets on bottom of frame in image.
20. Adjust/Sharpness/Sharpen.
21. Effects/3D Effects/Drop Shadow. Vertical -1, Horizontal 15, Opacity 50, Blur 34, color #000000. Apply Drop Shadow again changing Vertical to 1, Horizonal to -15, Opacity, Blur and color the same.
22. Open RaffiaBow.pspimage. Copy/Paste as New Layer.
23. Adjust/Hue and Saturation/Colorize. Set Hue to 43, Saturation 38.
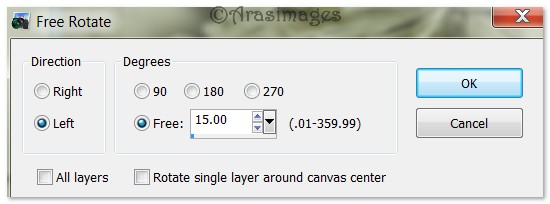
24. Image/Free Rotate. Rotate Left by 15 degrees.
25. Image/Resize/Resize by 70%/Resize all layers unchecked.
26. Place bow on stem. Image/3D Effects/Drop Shadow, Vertical 10, Horizontal 15, Opacity 50, Blur 16, color #000000.
27. Open Clock.pspimage. Copy/Paste as New Layer.
28. Image/Resize/Resize by 85%/Resize all layers unchecked.
29. Place clock in upper right corner. Set Opacity to 40.
30. Effects/3D Effects/Drop Shadow, Vertical 1, Horizontal -15, Opacity 60, Blur 16, color #000000.
31. Open LittlePetals.pspimage. Copy/Paste as New Layer.
32. Adjust/Hue and Saturation/Colorize. Set Hue to 43 and Saturation to 38.
33. Move the Petals to bottom right corner.
34. Apply Drop Shadow as in step #30.
35. Open Vine.pspimage. Copy/Paste as New Layer.
36. Image/Resize/Resize by 80%/Resize all layers unchecked.
37. Move vine to left side of image.
38. Effects/3D Effects/Drop Shadow, Vertical 10, Horizontal -15, Opacity 50, Blur 16, color #000000.
39. Duplicate. Image/Mirror or place to right side of image.
40. Image/Add Borders/Add Border of 10px on Top, Left and Right sides, 150px on bottom, Symmetric UNchecked, color #000000.
41. Activate border with Magic Wand by clicking anywhere within border.
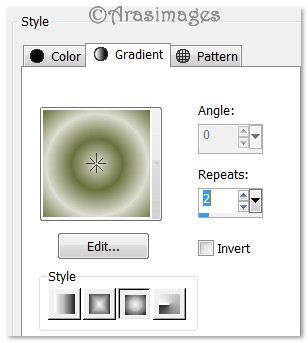
42. In Materials Palette, create Gradient with Foreground/Background colors, Style Sunburst, Angle grayed out, Repeats 2, Invert unchecked.
43. Flood fill border with Gradient.
44. Effects/3D Effects/Drop Shadow. Vertical -10, Horizontal 15, Opacity 50, Blur 24, color #000000. Repeat with Vertical at 10, Horizontal at -15, all the rest the same.
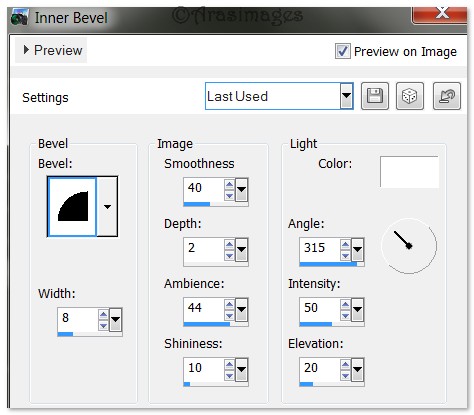
45. Effects/3D Effects/Inner Bevel. Selections/Select None.
46. Open LittleBird.pspimage. Copy/Paste as New Layer.
47. Place bird into the right bottom corner, sitting at the top of the large border.
48. Effects/3D Effects/Drop Shadow. Vertical 10, Horizontal -15, Opacity 50, Blur 16, color #000000. Repeat with Vertical -10, Horizontal 15, Opacity 50, Blur 34, color #000000.
49. Adjust/Sharpness/Sharpen.
50. From Tool bar, select the Text tool. Choose Font Artists Script, Size 72, Line Style Solid, color #6c6f3d. Type out the words "To every thing there is a season,".

51. Objects/Align/Horizontal Center. Convert to Raster Layer.
52. Using same settings as in step #50, type out the words "and a time to every purpose under heaven".
53. Objects/Align/Horizontal Center. Convert to Raster Layer.
54. Select the font Arial Narrow, Size 20, Line Style Solid, color #6c6f3d. Type out the words and numbers "Ecclesiastes 3:1".

55. Objects/Align/Horizontal Center. Convert to Raster Layer.
56. Adjust the text in all three lines. Merge/Merge down twice so all text is in one layer, then duplicate.
57. Open JHanna_679a tube.pspimage. Copy/Paste as New Layer.
58. Image/Resize/Resize by 15%/Resize all layers unchecked.
59. Move resized flower to left of text in bottom border.
60. Effects/3D Effects/Drop Shadow, Vertical 10, Horizontal -15, Opacity 60, Blur 24, color #000000.
61. Adjust/Sharpness/Sharpen.
62. Duplicate. Image/Mirror or move flower to right side to right of text.
63. Image/Add Borders/Add 3px border, Symmetric checked, color #6c6f3d.
64. Image/Add Borders/Add 1px border, Symmetric checked, color #ddddd1.
65. Sign your name or leave your watermark if you wish. Merge/Merge Visible if necessary.
66. Adjust/Sharpness/Sharpen.
67. File/Save As/.jpg file or file of your choice.
Thank you Evatexas and PamelaD for testing my tutorials and being my valued advisors.
If you are going to use this tutorial for stationery, cards or place the tutorial/tag on another site, I would appreciate you contacting me for permission, giving Arasimages credit for the original tutorial and if possible, a link back to my site. Thank you.
Copyright © Arasimages All Rights Reserved