
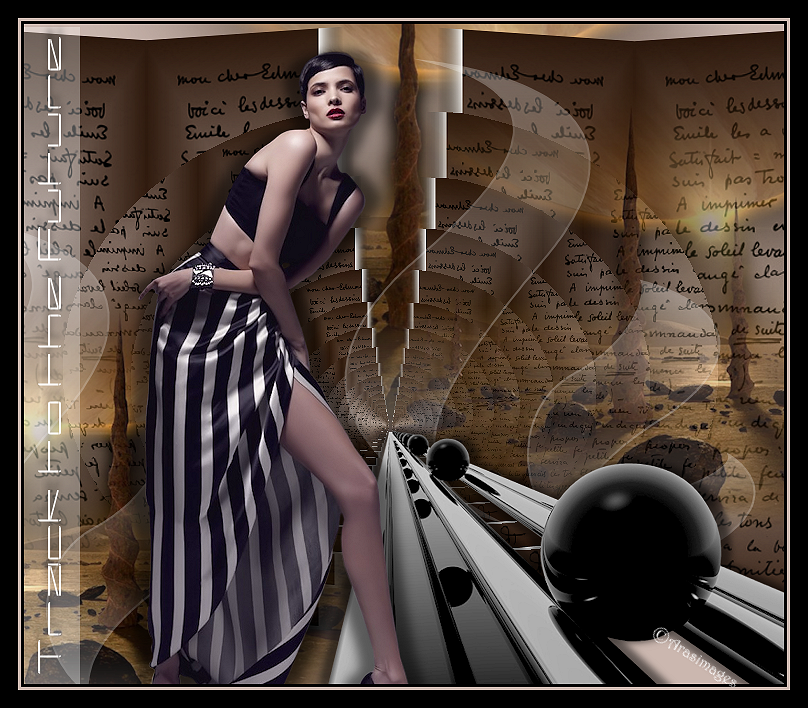
Track to the Future
For Italian and Danish translation, click on the flags.


For this tutorial you will need the materials in the zip file below.

Unzip the materials into a working folder named "Track to the Future". Open the materials in PSP, copy and close originals. Place the Brush included in the materials into your PSP Brushes folder. I have used PSPX5 to create this tutorial but you may use an earlier version. Plugin Graphics Plus/Horizontal-Mirror is used in this tutorial. It is assumed you have a working knowledge of PSP to follow these directions. NOTE: Image/Mirror is now Image Horizontal in PSPX4 and PSPX5 and will flip your image in place so you will have to move it using the move tool or arrow keys. Older versions of PSP will mirror the image for you.
Thanks go to Dakara; to Roby2765 and to PamelaD of Arasimages for the lovely tubes used.
Use the bookmark below to mark your place along the way.

1. In Materials Palette, set Foreground to #cbb7af, Background to #331c0e.
2. New/New Image 760px by 660px. Flood fill with Foreground.
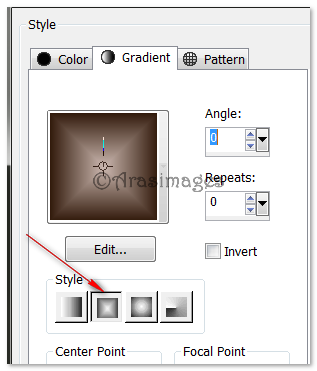
3. Create a Gradient from the Foreground/Background colors, Style Rectangular, Angle and Repeats set to 0, Invert unchecked. Center Point H 50/V 50. Link center and focal points/checked.
4. Layers/New Raster Layer. Selections/Select All.
5. Open calguismistedlandscape02082012.pspimage. Copy Mist1/Paste into Selection.
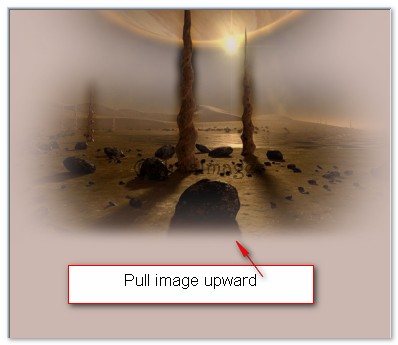
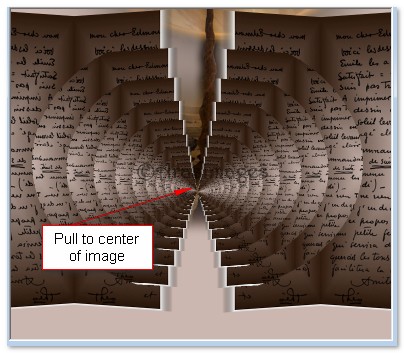
6. Selections/Select None. Use Move tool to pull image upward to approximately 440px and to the right a little.
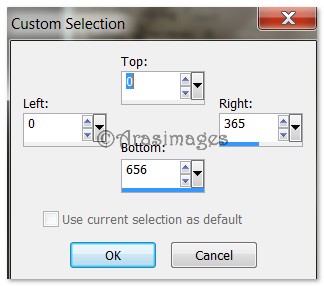
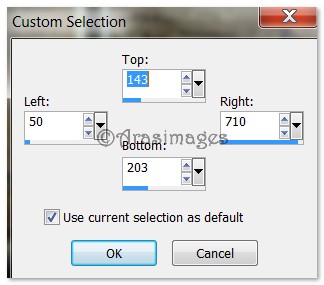
7. Layers/New Raster Layer. Selection tool/Rectangle/Custom Selection. Use settings shown below.
8. Flood fill with Gradient.
9. Effects/3D Effects/Chisel. Size set to 25, Transparent checked with color set to #ffffff.
10. Open Manuscrits_by_Elbereth_de_Lioncourt_6.png file. Copy/Paste into Selection.
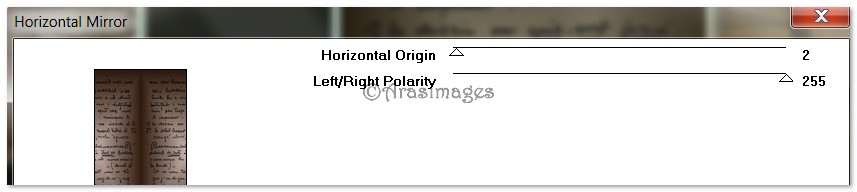
11. Effects/Graphics Plus/Horizontal Mirror. Use settings below. Selections/Select None.
12. Effects/Geometric Effects/Perspective-Horizontal. Distortion set to -16, Transparent ticked.
13. Effects/Graphics Plus/Horizontal Mirror. Change Horizontal Origin to 54. Apply.
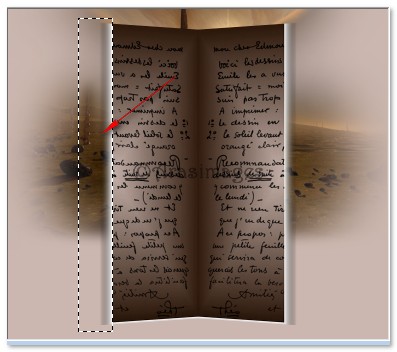
14. Using Selections tool set to Rectangle, select around the left side of the "folded" image to delete the Chisel effect. Delete. Selections/Select None.

15. Move folded image's left side halfway into main image left border; have top almost touching top of main image.
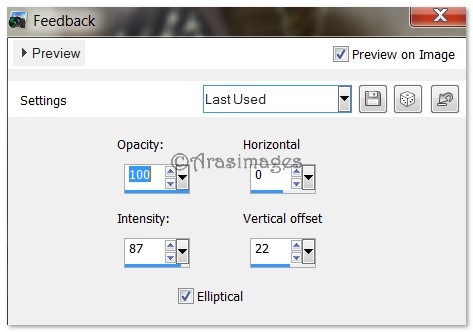
16. Effects/Reflection Effects/Feedback. Use settings below.
17. Duplicate. Image/Mirror Image. Move each side so they almost touch center points. Merge/Merge Down.
18. Open calguismistedlandscape0208212.pspimage. Copy/mist1/Paste as New Layer.
19. Image/Resize/Resize by 70%/Resize all layers unchecked.
20. Move to upper right side of image. Lower Opacity to 73.
21. Duplicate. Image/Mirror. Move into bottom left corner. Set Opacity to 100.
22. Layers/New Raster Layer.
23. From Tool bar, select the Paint Brush tool. Choose ct_2 brush. Using settings below, color #ffffff, stamp in right side and again in lower left corner. See example below.


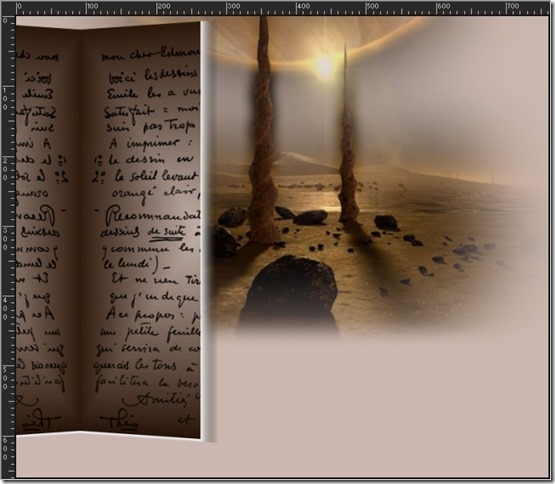
24. Open OnTrack.pspimage. Copy Monochrome layer/Paste as New Layer.
25. Image/Resize/Resize by 80%/Resize all layers unchecked.
26. Place OnTrack narrow end into background center. If you find a gap on right side, use Pick tool to stretch to meet edge.
27. Effects/3D Effects/Drop Shadow. Vertical -2, Horizontal 10, Opacity 50, Blur 10, color #000000.
28. Repeat Drop Shadow changing Vertical to 2, Horizontal to -10 leaving all other settings the same.
29. Layers/New Raster Layer.
30. Selection Tool/Rectangle/Custom Selection for Text. Use settings below.
31. Flood fill with color #ffffff. Lower Opacity to 32. Selections/Select None.
32. From Text tool, select Font Capacitor, Size 38, color #ffffff.

33. Type out the words "Track to the Future". Objects/Align/Horzontal center to help center text in box. Convert to Raster Layer.
34. Effects/3D Effects/Drop Shadow. Vertical 0, Horizontal 10, Opacity 50, Blur 10, color #000000.
35. Merge/Merge Down.
36. Image/Free Rotate. Rotate Left 90 degrees. All layers unchecked. Place along left side of image. Objects/Align/Vertical Center.
37. Open 140-2013 woman by Roby2765.pspimage. Copy/Paste as New Layer.
38. Image/Resize/Resize by 70%/Resize all layers unchecked.
39. Place woman to left bottom corner of image. Adjust/Sharpness/Sharpen.
40. Effects/3D Effects/Drop Shadow. Vertical -2, Horizontal 15, Opacity 50, Blur 15, color #000000.
41. Repeat with Vertical 2, Horizontal -15, other settings the same.
42. Image/Add Borders/Add 3px border, color #000000, Symmetric checked.
43. Image/Add Borders/Add 3px border, color #cbb7af, Symmetric checked.
44. Image/Add Borders/Add 18px border, color #000000, Symmetric checked.
45. Adjust/Sharpness/Sharpen.
46. Place your watermark or sign your name if you wish and save as a .jpg or .png file.
Thank you Evatexas and PamelaD for testing my tutorials and being my valued advisors.
If you are going to use this tutorial for stationery, cards or place the tutorial/tag on another site, I would appreciate you contacting me for permission, giving Arasimages credit for the original tutorial and if possible, a link back to my site. Thank you.
Copyright © Arasimages All Rights Reserved