
Sisters of Make-believe
For Italian, Dutch, Danish and French translation, click on the flags.


For this tutorial you will need the materials in the zip file below.

Unzip the materials into a working folder. Open the materials in PSP, copy and close originals. Open the Colorful Vector Smoke 1.pspbrush. File/Export/Custom Brush. Open the LeavesCluster.png file in your workspace. File/Export/Custom Brush. Place White Star Tub into your Picture Tubes folder. I have used PSPX5 to create this tutorial but you may use an earlier version. Plugin AFS IMPORT/sqborder2 is used in this tutorial. You will need Animation Shop if you choose to do the animation. It is assumed you have a working knowledge of PSP to follow these directions. NOTE: Image/Mirror is now Image Horizontal in PSPX4 and PSPX5 and will flip your image in place so you will have to move it using the move tool or arrow keys. Older versions of PSP will mirror the image for you.
Thanks go to JHanna and the unknown tubers of the various elements used.
Use the bookmark below to mark your place along the way.

1. In Materials Palette, set Foreground to #f8f7f2, Background to #62312c.
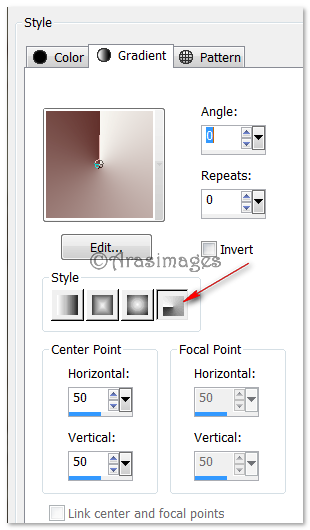
2. Create a Gradient from the Foreground/Background colors, Style Radial, Angle and Repeats set to 0, Invert unchecked.
3. New/New Image 780px by 680px. Flood fill with Gradient.
4. Adjust/Blur/Gaussian Blur, Radius set to 35.
5. Layers/New Raster Layer. Selecions/Select All.
6. Open Cottage.jpg image. Copy/Paste into Selection. Seletions/Select None.
7. Lower Opacity to 34. Effects/Edge Effects/Enhance.
8. Move Cottage to left a little. Use Pick tool to stretch it to the right side.
9. Open LightsVine.pspimage. Copy/Paste as New Layer. Move down a little.
10. Adjust/Hue and Saturation/Colorize. Set Hue to 3, Saturation to 97.
11. Effects/3D Effects/Drop Shadow. Vertical -5, Horizontal 10, Opacity 100, Blur 16, color #62312c.
12. From Tool bar, select Paint Brush tool. Choose LeavesCluster.pspbrush.
13. Layers/New Raster Layer.
14. Using Background color #62312c, Size 940, Stamp LeavesCluster in the center bottom of the image along bottom border.

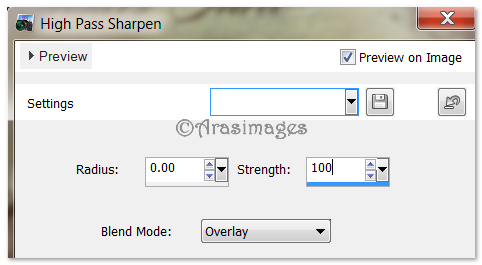
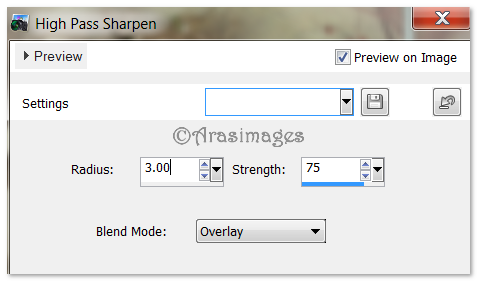
15. Adjust/Sharpen/High Pass Sharpen.
16. Duplicate LeavesCluster layer.
17. Layers/New Raster Layer.
18. From Tool bar, select Paint Brush tool. Choose Colorful Vector Smoke 1.pspbrush.

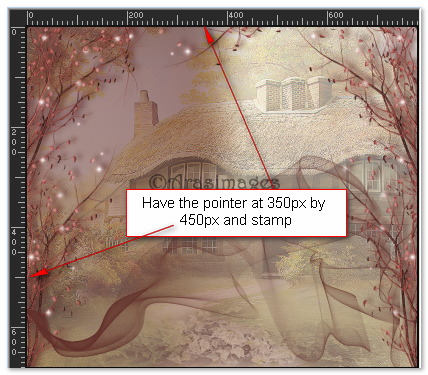
19. Using example as seen below of where to stamp, Stamp with Background color #62312c. Move down a little bit with Move tool.
20. Open JHanna_467 tube Yvonne_Flipse.png file. Copy/Paste as New Layer.
21. Image/Resize/Resize by 80%/Resize all layers unchecked.
22. Effects/3D Effects/Drop Shadow. Vertical 7, Horizontal 15, Opacity 100, Blur 36, color #62312c.
23. Move Girls down a little.
24. Adjust/Sharpness/High Pass Sharpen.
25. Open ReedBicycle.png image. Copy/Paste as New Layer.
26. Resize/Resize by 60%, Resize all layers unchecked.
27. Lower Opacity to 70.
28. Effects/3D Effects/Drop Shadow. Vertical -5, Horizontal 10, Opacity 100, Blur 16, color #623212c.
29. Effects/Edge Effects/Enhance.
30. Move ReedBicycle into bottom left corner.
31. Open Vines.png file. Copy/Paste as New Layer.
32. Adjust/Hue and Saturation/Colorize. Hue set to 3, Saturation set to 97.
33. Move Vines to top right corner of image.
34. Effects/3D Effects/Drop Shadow. Vertical -5, Horizontal 10, Opacity 100, Blur 16, color #62312c.
35. Duplicate. Image/Mirror. Image/Flip. Pull into bottom left corner a bit more.
36. Effects/Edge Effects/Enhance.
37. Open Small Flower.png file. Copy/Paste as New Layer.
38. Adjust/Hue and Saturation/Colorize. Hue set to 3, Saturation to 97.
39. Duplicate and move both flowers into right bottom corner, one slightly higher than the other.
40. Put a Drop Shadow on each one as in Step #34. Be sure top layer is highlighted to continue.
41. Paste the flower once more as a New Layer. Image/Mirror.
42. Adjust/Hue and Saturation/Colorize. Hue set to 35, Saturation to 77.
43. Apply Drop Shadow as in Step #34.
44. Lower Opacity to 83.
45. Move flower into bottom right corner to the right of other flowers.
46. Image/Add Borders/Add 3px border, color #f8f7f2, Symmetric checked.
47. Image/Add Borders/Add 23px border, color #62312c, Symmetric checked.
48. In Materials Palette, set the Gradient Repeats to 7.
49. Use Magic Wand on 23px border to activate it.
50. Flood fill with new Gradient.
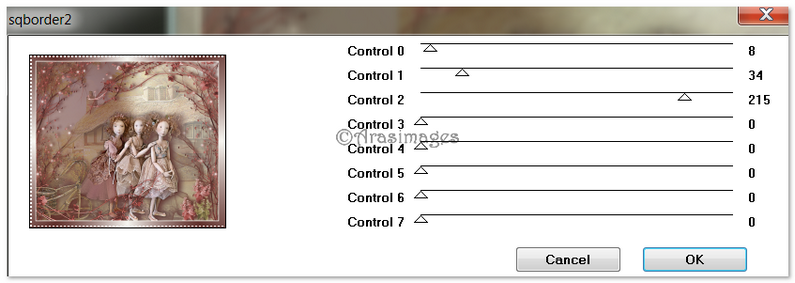
51. Keep selected. Effects/AFS IMPORT/sqborder2. Use settings below.
52. Effects/Edge Effects/Enhance. Selections/Select None.
53. Image/Add Borders/Add 3px Border, color #62312c, Symmetric checked.
54. Place your watermark or sign your name if you wish, Merge/Merge Visible. Save as a .jpg or .png file.
ANIMATION (Optional).
55. Duplicate the Merged layer 3 times, having four layers total. Close off all layers except the top layer. Activate top layer.
56. From Tool bar, select the Tube tool. Choose White Star and settings below. (Size 35).

57. Randomly click on some of the lights in the image. Do not stamp too many on each one as you change sizes and layers.
58. Close off top layer. Move to next layer down, open and activate it.
59. Change the size of the White Star to Scale 30. Stamp randomly on stars.
60. Close off Copy (2) of Merged layer. Go to next layer down, open and activate it.
61. Change the size of the White Star to Scale 25. Stamp randomly on stars.
62. Close off Copy of Merged layer and move to bottom layer. Open and highlight it.
63. Change the size of the White Star to 20. Stamp randomly on stars.
64. Open all layers. File/Save As/PSP Animation Shop (*psp) file. Name the file Sisters of Make-believe.
65. Open Animation Shop. File/Open. Open Sisters of Make-believe PSP Animation Shop file.
66. Click View/Animation to check your animation work. If all is well, continue with next step.

67. Edit/Select All.
68. Animation/Frame Properties. Reset to 15 to make sparkles slower.
69. If you are happy with your work, we will now save it. File/Save As. When the box appears, give your work a name and leave it to save as a .gif file. Click Save. As the boxes appear, click Next, Next, Next and Finish.
70. Your file is now saved and you are finished. I hope you have enjoyed this whimsical animated tutorial.
Thank you Evatexas and PamelaD for testing my tutorials and being my valued advisors and friends.
If you are going to use this tutorial for stationery, cards or place the tutorial/tag on another site, I would appreciate you contacting me for permission, giving Arasimages credit for the original tutorial and if possible, a link back to my site. Thank you.
Copyright © Arasimages All Rights Reserved