
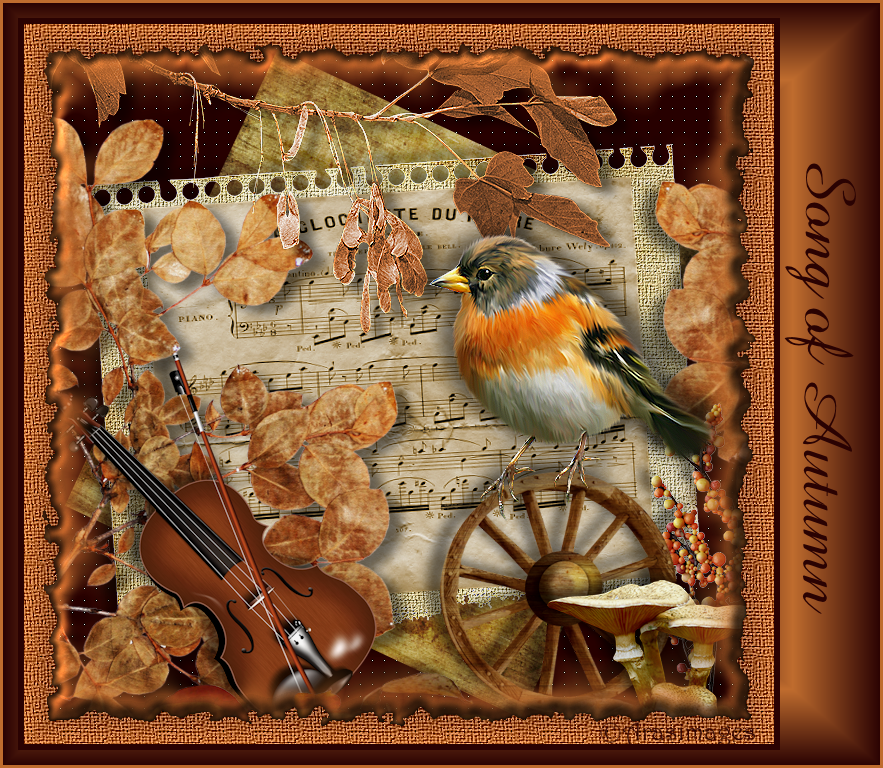
Song of Autumn
For Italian, Dutch, Danish and German translation, click on the flags.


For this tutorial you will need the materials in the zip file below.

Unzip the materials into a working folder. Open the materials in PSP, copy and close originals. Place the font Amaze into your PSP/Fonts folder. Plugins used in this tutorial are Filters Unlimited 2/Paper Textures, AlienSkin Xenofex2/Burnt Edges and Penta/color dot.
Use the bookmark below to mark your place along the way.

1. In Materials Palette, set Foreground to #bf6c2e, Background to #2a0202.
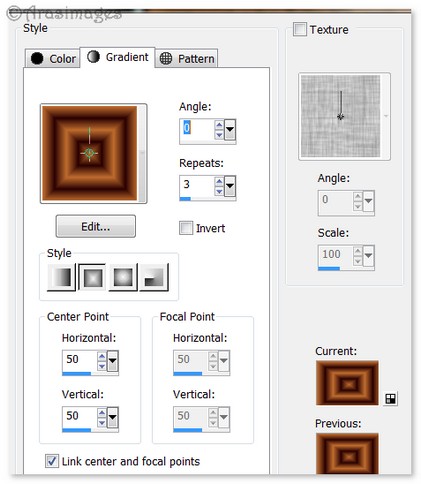
2. Create a Gradient using Foreground/Background colors, Style Rectangular, Angle 0, Repeats 3, Invert unchecked, Link center and focal points, Center Points set to 50, Focal Point grayed out.
3. New/New Raster Layer 750px by 720px. Flood fill with Gradient.
4. Layers/New Raster Layer. Flood fill with Background #2a0202.
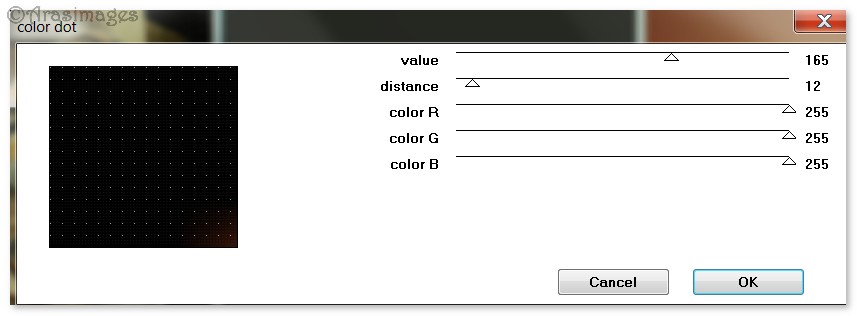
5. Effects/Penta/color dot. See settings below.
6. Effects/Edge Effects/Ehance.
7. Open RaggedBG.jpg image. Copy/Paste as New Layer.
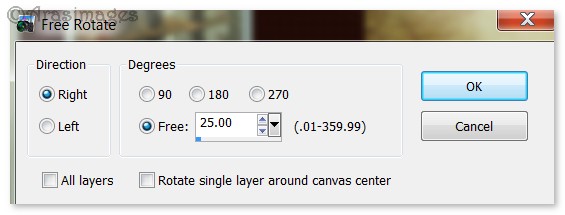
8. Image/Free Rotate. Rotate Right by 25 degrees.
9. Open TornPaper.png image. Copy/Paste as New Layer.
10. Effects/Filters Unlimited 2.0/Paper Textures/Canvas Medium. Intensity set to 90, Lightness set to 62. Apply.
11. Effects/Edge Effects/Enhance. Drop Opacity down to 95.
12. Effects/3D Effects/Drop Shadow. Vertical -8, Horizontal -13, Opacity 50, Blur 15, color #000000.
13. Open MusicSheet.png image. Copy/Paste as New Layer. Place over TornPaper image.
14. Adjust/Hue and Saturation/Colorize. Set Hue to 28, Saturation to 90.
15. Adjust/Sharpness/Sharpen.
16. Open BrownLeafStem.png image. Copy/Paste as New Layer. Move to left side of image. (see my finished image for placement).
17. Effects/3D Effects/Drop Shadow. Vertical 8, Horizontal 13, Opacity 50, Blur 15, color #000000.
18. Duplicate. Image/Mirror. Pull into right side of working image so only part of the leaves show. (See my finished image for placement).
19. Open Berries.png image. Copy/Paste as New Layer. Adjust/Sharpness/Sharpen. Move to bottom right corner.
20. Effects/3D Effects/Drop Shadow. Vertical -8, Horizontal -13, Opacity 50, Blur 15, color #000000.
21. Open BrownWheel.png image. Copy/Paste as New Layer. Move to bottom right corner.
22. Effects/3D Effects/Drop Shadow. Vertical -8, Horizontal -13, Opacity 50, Blur 15, color #000000.
23. Open Violin.png file. Copy/Paste as New Layer. Move into bottom left corner.
24. Repeat Drop Shadow as in Step #22.
25. Open ScatteredLeaves.png image. Copy/Paste as New Layer. Move to lay across the bottom of working image.
26. Repeat Drop Shadow as in Step #22.
27. Open TrioToadstools.png image. Copy/Paste as New Layer.
28. Move into bottom right corner. Adjust/Sharpness/Sharpen.
29. Repeat Drop Shadow as in Step #22. Repeat again with Vertical at 8, Horizontal at 13, all the other settings the same.
30. Open HangingLeaves.png image. Copy/Paste as New Layer.
31. Effects/Edge Effects/Enhance. Move into top left corner and across top border.
32. Effects/3D Effects/Drop Shadow. Vertical 8, Horizontal 13, Opacity 50, Blur 15, color #000000.
33. Open BeautifulBird.png image. Copy/Paste as New Layer.
34. Move bird to sit on top of wheel. Effects/Edge Effects/Enhance.
35. Effects/3D Effects/Drop Shadow. Vertical -1, Horizontal 21, Opacity 50, Blur 24, color #000000.
36. Effects/3D Effects/Drop Shadow. Vertical -2, Horizontal -14, Opacity 50, Blur 24, color #000000.
37. Close off bottom Layer 1. Merge/Merge Visible.
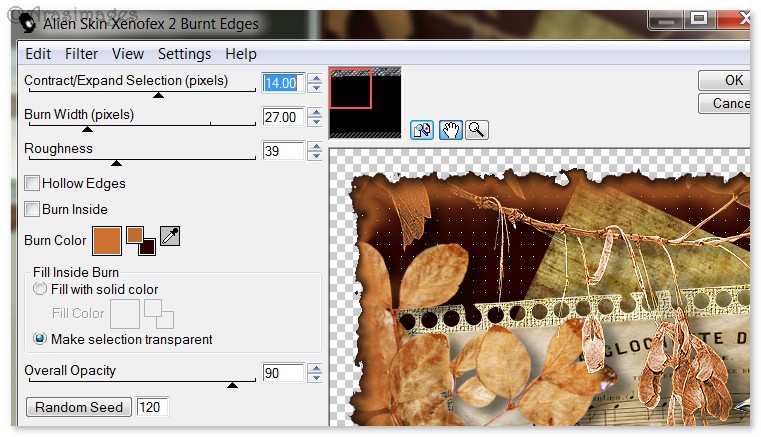
38. On Merged layer, Effects/AlienSkinXenofex2/Burnt Edges. Use settings as seen below.
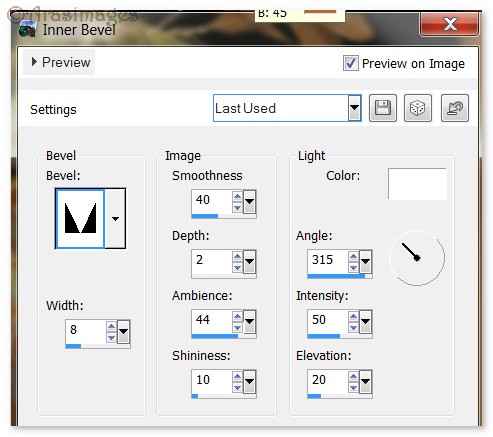
39. Effects/3D Effects/Inner Bevel. Apply twice. Use settings as seen below.
40. Open Raster Layer 1 and highlight it. Effects/Filters Unlimited/Paper Textures/Canvas, Medium. Intensity set to 90, Lightness set to 62.
41. Effects/Edge Effects/Enhance.
42. Image/Add Borders/Add 6px border, Symmetric checked, color #2a0202.
43. Image/Add Borders/Add border of 15px top, bottom and left side, 100px right side, Symmetric unchecked, color #bf6c2e.
44. With Magic Wand, select the wide border. Change Gradient Repeats to 4. Flood fill with Gradient. Selections/Select None. (CTRL+D)
45. Image/Add Borders/Add 3px border, Symmetric checked, color #bf6c2e.
46. From Tool bar, select Font Amaze, Size 72. Using settings below and color #2a0202, type out the words "Song of Autumn". Convert to Raster Layer. Using Pick tool, rotate text to vertical position, then move to fit in largest border on right side of image.

47. Objects/Align/Vertical Center.
48. Add your name or watermark if you wish. Merge/Merge Visible if needed. Save as .jpg or .png file named Song of Autumn.
Thank you PamelaD and Evatexas, for your testing of my tutorials.
If you are going to use this tutorial for stationery, cards or place the tutorial/tag on another site, I would appreciate you contacting me for permission, giving Arasimages credit for the original tutorial and if possible, a link back to my site. Thank you.
Copyright © Arasimages All Rights Reserved