
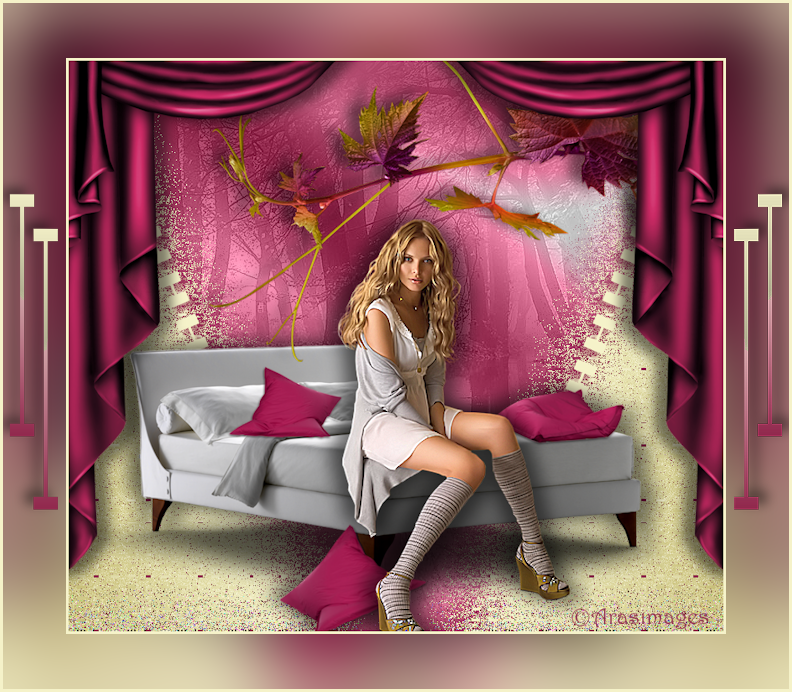
Magenta Woodland
For Italian, Dutch and Danish translation, click on the flags.


For this tutorial you will need the materials in the zip file below.

Unzip the materials into a working folder. Open the materials in PSP, copy and close originals. If you do not have the Style line Round End-Gaps in your Styled Lines, place the Corel_13_014 in your PSP/Styled Lines folder. Plugins used in this tutorial are FM Tile Tools/Carve Blob 1 and AFS IMPORT/Sqborder2.
Thanks go to Roby, Krysztof Sebastian-photosight_ru _colorel, emka_Autumntwilight for element 18 and to the unknown creators of the other tubes which were used in this tutorial.
Use the bookmark below to mark your place along the way.

1. In Materials Palette, set Foreground to #f5f2c9, Background to #91284d.
2. New/New Raster Layer 780px by 680px. Flood fill with Background #91284d.
3. Layers/New Raster Layer. Flood fill with Background #91284d.
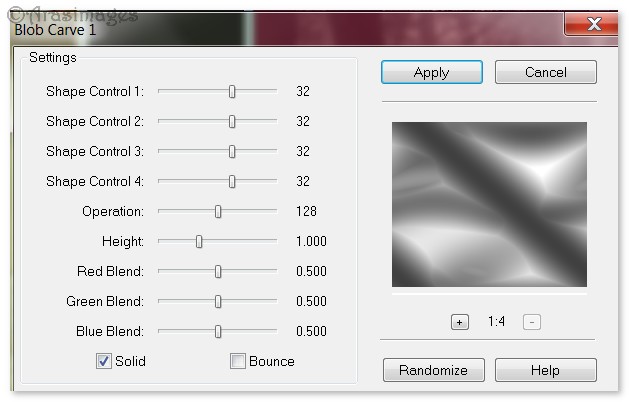
4. Effects/FM Tile Tools/Blob Carve 1. Apply.
5. Set Blend Mode to Luminance (Legacy).
6. Open Krysztof Sebastian_photosight_ru_colorel.pspimage. Copy/Paste as New Layer.
7. Set Blend Mode to Luminance (Legacy). Set Opacity to 28.
8. Effects/Edge Effects/Enhance.
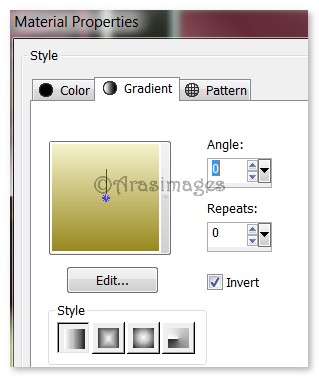
9. In Materials Palette, change Background to #988829. Create a Gradient using Foreground/Background colors, Style Linear, Angle 0, Repeats 0, Invert checked, all other settings not applicable.
10. Layers/New Raster Layer. Flood fill with Gradient.
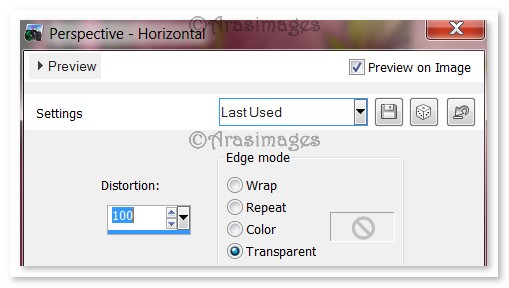
11. Effects/Geometric Effects/Perspective Horizontal.
12. Image/Free Rotate. Rotate Left by 90 degrees.
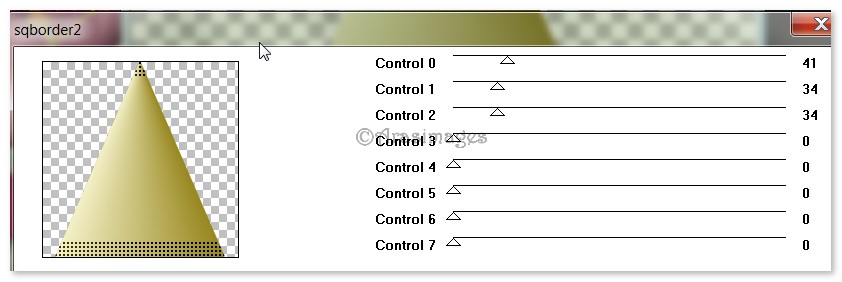
13. Effects/AFS IMPORT/sqborder2.
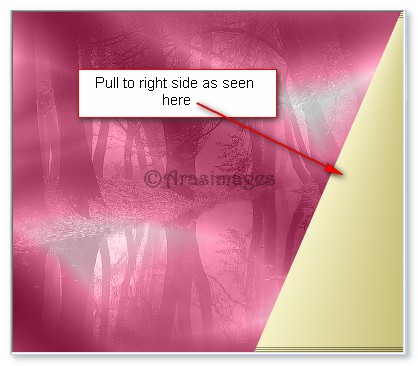
14. Pull to right side of image as seen below.
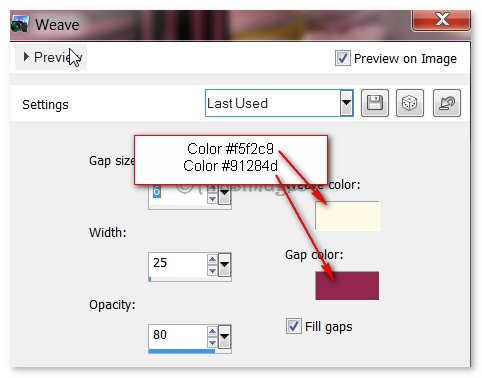
15. Effects/Texture Effects/Weave. Use settings below (Gap 6, Width 25, Opacity 80).
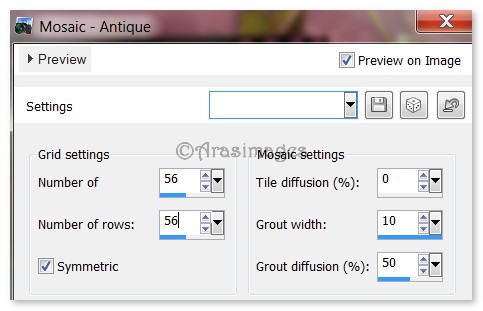
16. Effects/Texture Effects/Mosiac-Antique. Use settings below.
17. Effects/3D Effects/Drop Shadow. Vertical -5, Horizontal -15, Opacity 50, Blur 0, color #91284d.
18. Duplicate. Image/Mirror.
19. In Materials Palette, change the Foreground from Gradient to color #f5f2c9.
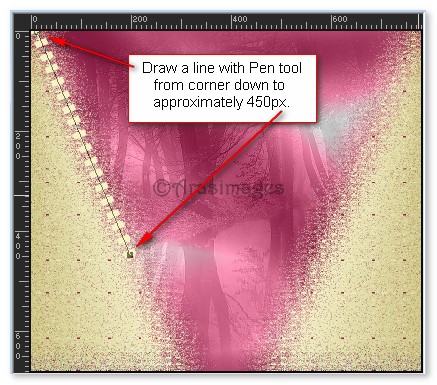
20. From the Tool bar, select the Pen tool. Have the settings as seen below in examples 1 and 2 using Line Style Round End-Gaps. From near the top left corner of image, start drawing a line on an angle down to 450px, as seen in example. Convert to Raster Layer.


21. Effects/3D Effects/Drop Shadow. Vertical 5, Horizontal 8, Opacity 50, Blur 8, color #91284d.
22. Duplicate. Image/Mirror.
23. Open 144-2013 woman by Roby2765.pspimage. Copy Raster 2 layer/Paste as New Layer. (Leave image open on workspace).
24. Pull down toward bottom. Apply a Drop Shadow of Vertical -5, Horizontal -15, Opacity 50, Blur 30, color #000000. Repeat using Vertical of 5, Horizontal of 15, all other settings the same.
25. Copy Tube woman by Roby2765 layer/Paste as New Layer.
26. Image/Resize/Resize by 110%/Resize all layers unchecked.
27. Adjust/Sharpness/Sharpen. Adjust/Sharpenss/Sharpen More. Move woman to sit on end of bed.
28. Apply Drop Shadows as in Step #24.
29. Open emka_Autumn Twilight_element18.pspimage. Copy/Paste as New Layer.
30. Image/Flip. Image/Resize/Resize by 80%/Resize all layers unchecked.
31. Adjust/Sharpness/Sharpen. Move to top center and corner above woman.
32. Effects/3D Effects/Drop Shadow. Vertical -5, Horizontal -15, Opacity 50, Blur 20, color #000000.
33. Open MagentaDrape.pspimage. Copy/Paste as New Layer.
34. Move into upper left corner and side.
35. Effects/3D Effects/Drop Shadow. Vertical 5, Horizontal 15, Opacity 50, Blur 20, color #000000.
36. Duplicate. Image/Mirror.
37. Image/Add Borders/Add 3px border, Symmetric checked, color #f5f2c9.
38. Duplicate image. On bottom layer, Adjust/Blur/Gaussian blur, Radius set to 36.
39. Move to top layer. Image/Resize/Resize by 84%/Resize all layers unchecked.
40. Open Magenta Bars.pspimage. Copy/Paste as New Layer.
41. Move to left border. Objects/Align/Vertical Center.
42. Duplicate. Image/Mirror.
43. Image/Add Borders/Add 3px border, Symmetric checked, color #f5f2c9.
44. Sign your name or leave your watermark if you wish. Merge/Merge Visible if needed.
Thanks go to my wonderful testers, PamelaD and Evatexas, for their testing of my tutorials.
If you are going to use this tutorial for stationery, cards or place the tutorial/tag on another site, I would appreciate you contacting me for permission, giving Arasimages credit for the original tutorial and if possible, a link back to my site. Thank you.
Copyright © Arasimages All Rights Reserved