

Winter Is Here
For Italian, Dutch and Danish translation, click on the flags.


For this tutorial you will need the materials in the zip file below.

Unzip the materials into a working folder. Open the materials in PSP, copy and close originals with watermarks intact, using the copies in the tutorial. Place the Silverpunk Pattern in your PSP/Patterns folder. Place the Andromeda ArasimagesPresetSnow Preset into the PSP Files/Plugins/ Andromeda/02Full Canas/20Floors folder. The plugins used in this tutorial are Flaming Pear/Flexify, Andromeda/Perspective and VanDerLee/Snow. You will also need Animation Shop. It is assumed you have a working knowledge of PSP to follow these directions.
Thanks go to Nikita and to the unknown tubers/artists for the lovely tubes used. If any of these are yours, please contact me so I can give you proper credit by name.
Use the bookmark below to mark your place along the way.

1. In Materials Palette, set Foreground to #fbfdf3, Background to #f00003.
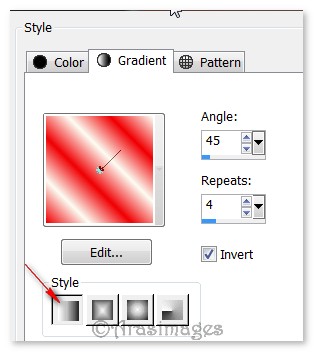
2. Create a Gradient from the Foreground/Background colors, Style Linear, Angle 45, Repeats 4, Invert checked. All other settings not applicable.
3. New/New Raster Layer 760px by 700px. Flood fill with Gradient.
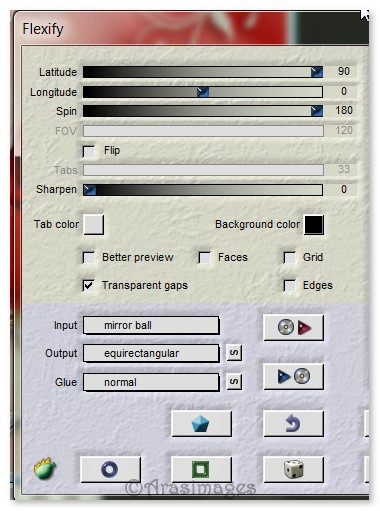
4. Effects/Flaming Pear/Flexify. Use settings as seen below.
5. Adjust/Blur/Gaussian Blur, Radius set to 15.
6. Layer/New Raster Layer. Flood fill with color #fdfbf3.
7. Open Narah_mask_0530.jpg. Leave open on work space.
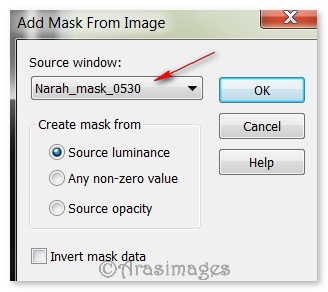
8. Layers/New Mask Layer/From Image. In box drop down, choose Narah_mask_0530. Click OK.
9. Merge/Merge Group.
10. Effects/Andromeda/Perspective. Click Preset, select ArasimagesPresetSnow and use its settings.

11. Open 0_70e82_cfd47d2e_L.png. Adjust/Hue and Saturation/Colorize. Set Hue to 255 and Saturation to 255.
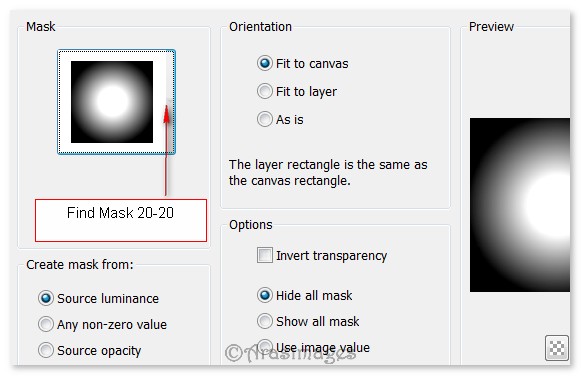
12. Working on the colorized trees image/Layers/Load/Save Mask/Load Mask from Disk. Select 20-20 Mask. Click Load. Merge/Merge Group.
13. Copy the colorized trees image/Paste as New Layer. Move to right side of image above the snow line.
14. Drop Opacity to 51. Duplicate. Image/Mirror.
15. Open 12930417598_fleurs_nikita.png. Copy/Paste as New Layer.
16. Move to bottom and to the left a bit. Use Selection tool set to Rectangle/Replace/Feather 0. Select watermark/Delete. CTRL+D.
17. Effects/3D Effects/Drop Shadow, Vertical 7, Horizontal -7, Opacity 50, Blur 20, color #000000.
18. Effects/Edge Effects/Enhance.
19. Open 13508436276_noel_nikita.png. Copy/Paste as New Layer.
20. Move Cardinal down and to the right a little. Select watermark like you did in step #16 and delete.
21. Adjust/Sharpness/Sharpen.
22. Effects/3D Effects/Drop Shadow, Vertical 7, Horizontal -7, Opacity 50, Blur 20, color #000000.
23. Open 0_cd1ab_ac86e2d9_XL.png. Copy/Paste as New Layer.
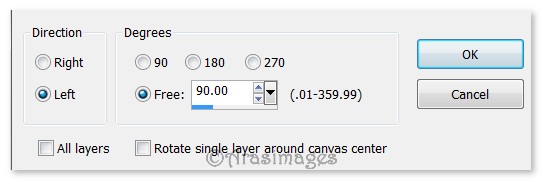
24. Image/Free Rotate. Rotate Left by 90 degrees.
25. Image/Resize/Resize by 97%/Resize all layers unchecked.
26. Move resized image to the top. Effects/Edge Effects/Enhance.
27. Effects/3D Effects/Drop Shadow, Vertical 7, Horizontal -7, Opacity 50, Blur 20, color #000000.
28. Image/Add Borders/Add 3px borders, Symmetric checked, color #f00003.
29. Image/Add Borders/Add 5px borders, Symmetric checked, color #fbfdf3.
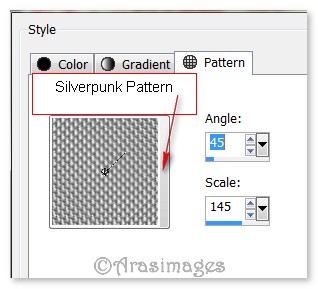
30. Activate the 5px border with the Magic Wand. Tolerance and Feather 0. Flood fill with Pattern Silverpunk.
31. Effects/Edge Effects/Enhance.
32. Image/Add Borders/Add 3px borders, Symmetric checked, color #f00003.
33. Sign your name or leave your watermark if you wish. Save as a .jpg or .png file in your working folder.
For animation, follow the directions below this line: On your saved Winter is Here image, Selections/Select All. Selections/Modify/Contract by 11px. Keep active.
34. Duplicate 4 times having 5 layers in all. Close off all but the top layer.
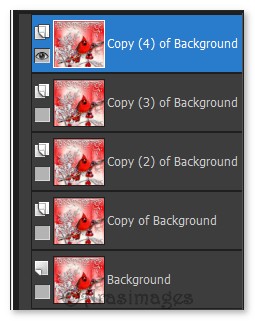
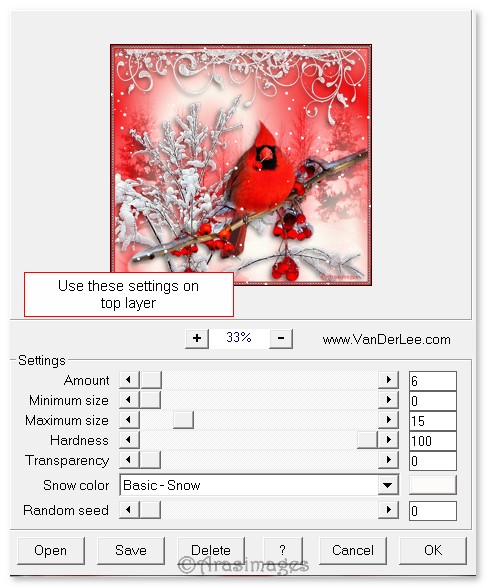
35. Effects/VanDerLee/Snowflakes. Use settings below on Copy (4) of Background layer. Click OK.
36. Close off top layer. Move to next layer down. Open and highlight it.
37. Effects/VanDerLee/Snowflakes. Using the same snow settings, change the Amount to 9 and the Random seed to 12. Click OK.
38. Close off Copy (3) of Background. Move to next layer down. Open and highlight it.
39. Effects/VanDerLee/Snowflakes. Using the same snow settings, change the Amount to 11 and the Random seed to 18. Click OK.
40. Close off Copy (2) of Background. Move to next layer down. Open and highlight it.
41. Effects/VanDerLee/Snowflakes. Using the same snow settings, change the Amount to 12 and the Random seed to 20. Click OK.
42. Close off Copy of Background. Move to bottom layer. Open and highlight it.
43. Effects/VanDerLee/Snowflakes. Using the same snow settings, change the Amount to 15, Random seed to 22. Click OK.
44. Selections/Select None. Open all unopened layers.
45. File/Save As/Save file as Animation Shop (*psp) naming it Winter is Here.
46. Open Animation Shop. File/Open Winter is Here Animation Shop (*psp) file.
47. Edit/Select All. Animation/Frame Properties, set to 15.
48. Check your animation by clicking on the Animation button at the top. If you are satisfied with it, then you will now save.
49. File/Save As. A box will come up where you will give the File name: Winter is Here. Save as type (*gif), click Save. As the boxes continue to come up, on each one simply click Next, Next, Next and then Finish. All done!
I give my testers, PamelaD and Evatexas, much credit for their testing of this tutorial. My site would not be the same without their constant assistance.
If you are going to use this tutorial for stationery, cards or place the tutorial/tag on another site, I would appreciate you contacting me for permission, giving Arasimages credit for the original tutorial and if possible, a link back to my site. Thank you.
Copyright © Arasimages All Rights Reserved