
Curiosity
For Italian, Dutch, Danish and Spanish translation, click on the flags.


For this tutorial you will need the materials in the zip file below.

Unzip the materials into a working folder you have created on your desktop named Curiosity. I have used the plugins AAA Frames/Textured, UnlimitedII/Paper Textures and Square borders. I have also used Animation Shop which you can get for free online. Export gh_texture11 brush in your PSP/Brushes folder. Place ArasimagesBottomSelection in your PSP/Selections folder. It is assumed you have a working knowledge of PSP to follow these directions. I have used PSPX6 to create this tutorial but other versions of PSP will work although older versions will not have the Color Changer required for some of my tutorials.
Thanks go to Nikita, to Colorel, to Silvie and to the unknown scrap tubers for the great tubes used in this tutorial.
Use the bookmark below to mark your place along the way.
1. In Materials Palette, set Foreground to #ffffff, Background to #6d948a.
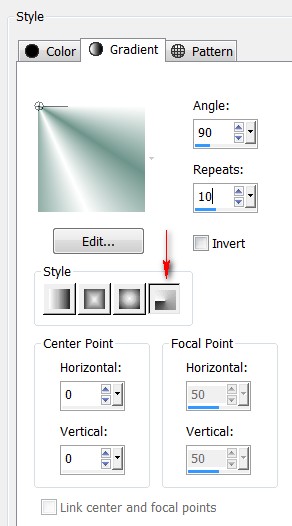
2. Create a Gradient using Style Radial, Angle 90, Repeats 10, Invert unchecked, Center Points at 0, Focal Points grayed out.
3. New/New Image 800px by 600px. Flood fill with Gradient.
4. Adjust/Blur/Gaussian Blur. Radial set to 30.
5. Open downloads_paysages_1250147445_paysages.pspimages. Copy/Paste as New Layer.
6. Pull to the right side of image so left edge is about in the middle. Lower Opacity to 77.
7. Duplicate. Image/Mirror. Merge/Merge Down.
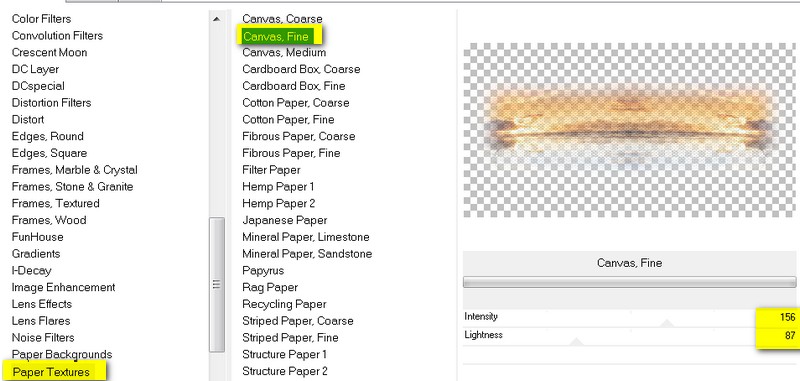
8. Effects/Filters UnlimitedII/Paper Textures/Canvas, Fine.
9. Adjust/Sharpness/Sharpen.
10. Layers/New Raster Layer.
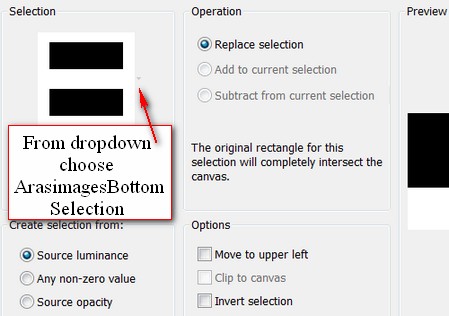
11. Selections/Load/Save Selection/Load Selection from Disk. From Dropdown choose ArasimagesBottomSelection. Load.
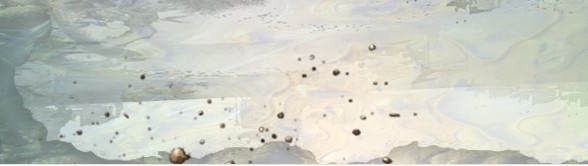
12. Open ground-texture-02.jpg. Copy/Paste into Selection.
13. Set Opacity to 38, Blend Mode to Multiply.
14. Layers/New Raster Layer.
15. Open lota3colorel.jpg. Copy/Paste into Selection.
16. Set Opacity to 64, Blend Mode to Luminance (L). Selections/Select None.
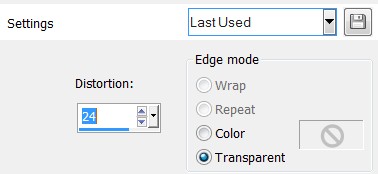
17. Effects/Geometric Effects/Perspective-Horizontal.
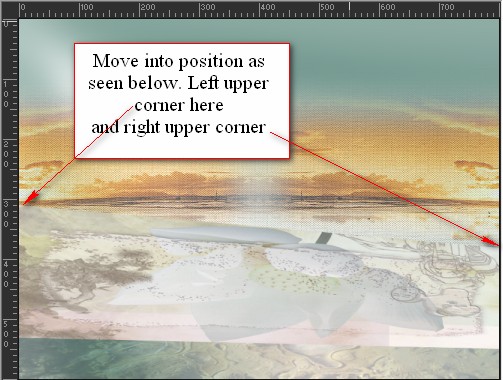
18. Image/Flip. Move into position as seen below.
19. From Tool bar, select the Paint Brush Tool. Select gh_texture11 brush. Set Size to 100. Using the Foreground color #ffffff, Background color #9ea482,left click and right click randomly along the top and bottom edges of Raster 4 to blend the edges. Just click randomly, you do not have to be too specific.

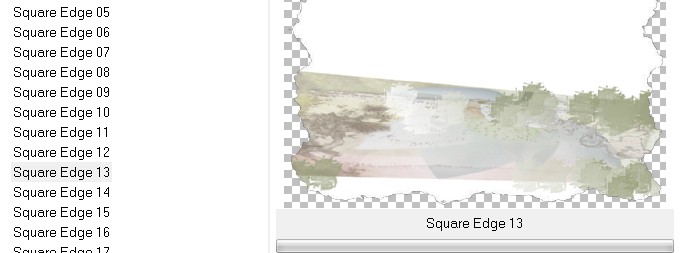
20. Effects/Filters Unlimited II/Edges, Square, Square Edge 13. OK.
21. Effects/3D Effects/Drop Shadow. Vertical 7, Horizontal -7, Opacity 30, Blur 24, color #000000.
22. Effects/3D Effects/Drop Shadow. Vertical -7, Horizontal 7, Opacity 30, Blur 24, color #000000.
23. Open 0_77d88_aeb0dd2d_XL.png. (Stones). Copy/Paste as New Layer.
24. Pull down to bottom of image so only part of the stones are showing.
25. Open 0_9b4d3_ba00098c_M.Png. (Seeds). Copy/Paste as New Layer.
26. Effects/3D Effects/Drop Shadow. Vertical 12, Horizontal -12, Opacity 50, Blur 32, color #000000.
27. Effects/Image Effects/Offset. H 38, V -243....We may have to adjust these later.
28. Adjust/Sharpness/Sharpen.
29. Open Deer_26.12.2013.pspimage. Copy/Paste as New Layer. Image/Resize/Resize by 80%/Resize all layers unchecked.
30. From the Tool bar, select the Clone Tool. Have settings as seen below, Aligned mode checked.

31. Scroll the working image to at least 200% and clone the top of the deer's back so it looks like it is not cut off. HINT: I prefer to right click, then left click in spots rather than to left click/drag after right clicking.
32. Adjust/Sharpness/Sharpen.
33. Effects/3D Effects/Drop Shadow. Vertical 12, Horizontal -12, Opacity 50, Blur 32, color #000000.
34. Place deer so its hind leg is along the right border of image and back/hooves are about equadistant from top and bottom of image.
35. Open 0_bc14d_f9b37156_L.pspimage. (Fern). Copy/Paste as New Layer.
36. Place in upper left corner.
37. Open 0_955da_f4317084_XL.png. Copy/Paste as New Layer.
38. Image/Resize/Resize by 74%/Resize all layers unchecked.
39. Effects/3D Effects/Drop Shadow. Vertical 12, Horizontal -12, Opacity 50, Blur 32, color #000000.
40. Place hanging flower 0_955da_f4317084_XL.png in upper left corner and down left side.
41. Duplicate. Image/Mirror.
42. Image/Resize/Resize by 57%/Resize all layers unchecked.
43. Pull duplicated layer of flower below the deer layer.
44. Place flower in upper right corner. Go back to top layer to continue.
45. Open 0_6e770_84b7b8ea.XL.png. (large leaves). Copy/Paste as New Layer.
46. Image/Flip. Place in upper left corner over hanging flowers.
47. Effects/3D Effects/Drop Shadow. Vertical 12, Horizontal -12, Opacity 50, Blur 24, color #000000.
48. Paste large leaves as New Layer once more.
49. Image/Resize/Resize by 86%/Resize all layers unchecked.
50. Effects/3D Effects/Drop Shadow. Vertical 12, Horizontal -12, Opacity 50, Blur 24, color #000000.
51. Place large resized leaves into bottom right corner over deer legs between ground squirrel and seeds.
52. Duplicate. Image/Mirror.
53. Adjust leaves to meet beneath ground squirrel if necessary.
54. Open 0-6e773-8b729d46-XL.png. Copy/Paste as New Layer.
55. Effects/3D Effects/Drop Shadow. Vertical 12, Horizontal -12, Opacity 50, Blur 24, color #000000.
56. Place leaves along right side of image over deer, having stem resting on horizontal leaf branch.
57. Open 0_7f727_ff520b38M.png. (Flower). Copy/Paste as New Layer.
58. Place in bottom right corner.
59. Adjust/Sharpness/Sharpen. Apply drop shadow as in Step #55.
60. Image/Add Borders/Add 2px border, Symmetric checked, color #345048.
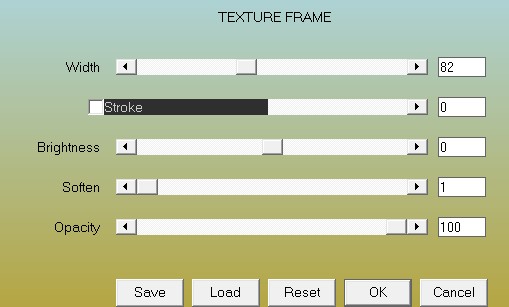
61. Effects/AAA Frames/Texture Frame.
62. Apply your name or watermark if you wish...save as .png or .jpg file called Curiosity.
63. For Animation, open Animation Shop.
64. File/Open Curiosity.png. Duplicate it one time so you end up with 2 frames.
65. Click inside the first frame, Edit/Select All.
66. File/Open 0_10d7bc_880f254b_L.gif. (Birds). Click the first frame to highlight it. Edit/Select All.
67. Animation/Resize Animation. Choose Resize by 50%. Right click on the top bar of the .gif file/Copy.
68. Go to the main image called Curiosity and right click inside the first frame. Paste/Into Selected Frame. Set the birds in place near bottom right corner by left clicking.
69. Animation/Frame Properties...set the speed to 12.
70. Click on the View Animation button in the top tool bar and if you are satisfied with your work, we will now save it.
71. File/Save As. When the box comes up, give your work its name (Curiosity) and where to save it (In your Curiosity folder). Leave the .gif part as is. Click Save. As the boxes come up, just click on Next, Next, Next and then Finish. Your image is now saved as a .gif file in your working folder.
This tutorial was tested by PamelaD and Evatexas. Thanks ladies!
If you are going to use this tutorial for stationery, cards or place the tutorial/tag on another site, I would appreciate you contacting me for permission, giving Arasimages credit for the original tutorial and if possible, a link back to my site. Thank you.
Copyright © Arasimages All Rights Reserved