
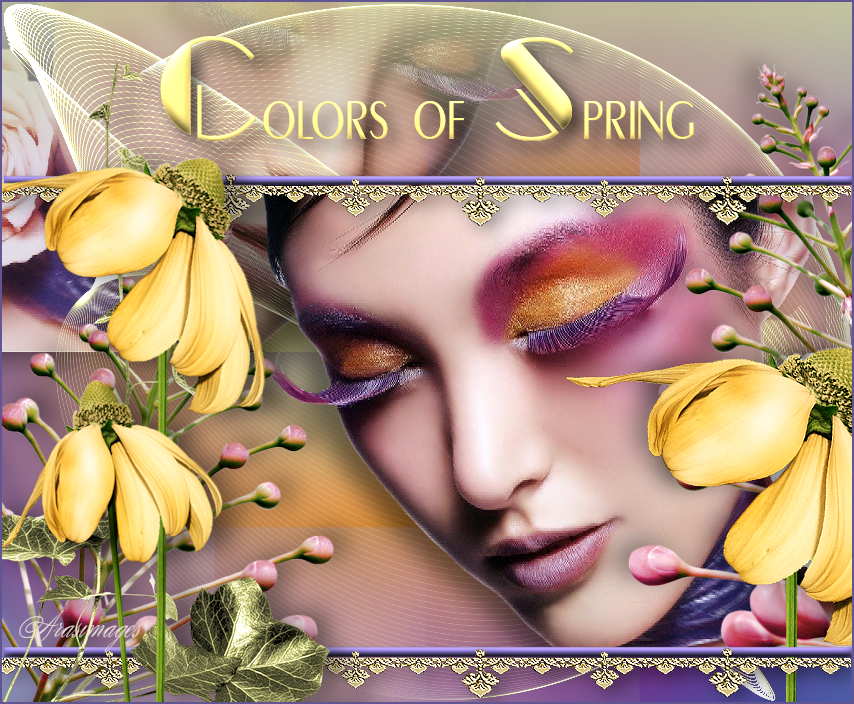
Colors of Spring
For Italian, Russian, Dutch, Danish, German and French translation, click on the flags.


For this tutorial you will need the materials in the zip file below.

Unzip the materials into a working folder you have created on your desktop named Colors of Spring. Please duplicate and close originals. Place the Font Cravat Display SSi in your PSP/Fonts folder. Place Selection in your PSP/Selections folder. Place the hat.cfg file in your DragonFly/SinedotsII folder. I have used the plugins Dragonfly/SinedotsII and Harry's Power Grads/Double Sphere Gradients. It is assumed you have a working knowledge of PSP to follow these directions. I have used PSPX6 for this tutorial.
Thanks go to Cibi and the unknown tubers for the beautiful tubes used in this tutorial.
Use the bookmark below to mark your place along the way.
1. In Materials Palette, set Foreground to #ddbfb3, Background to #615691.
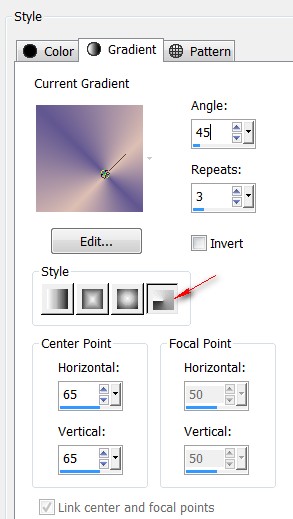
2. Im Materials Palette, set to Gradient, Style Radial, Angle 45, Repeats 3, Center Points both to 65, Focal Point grayed out and Link center and focal points unchecked.
3. New/New Image 850px by 700px. Flood fill with Gradient.
4. Adjust/Blur/Gaussian Blur, Radius set to 28.
5. Layers/New Raster Layer. Flood fill with Foreground color #ddbfb3.
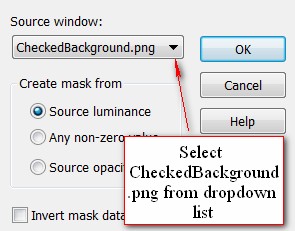
6. Open CheckedBackground.png in your workspace. Back to your work in progress. Layers/New Mask Layer/From Image. Merge/Merge Group.
7. Effects/Edge Effects/Enhance.
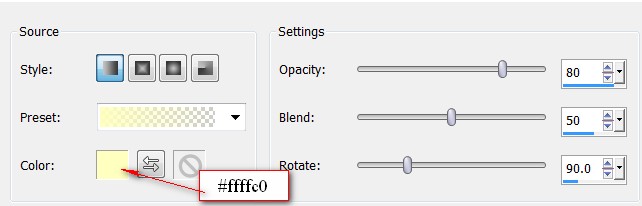
8. Effects/Harry's Power Grads/Double Sphere Gradients. Drop Opacity to 80.
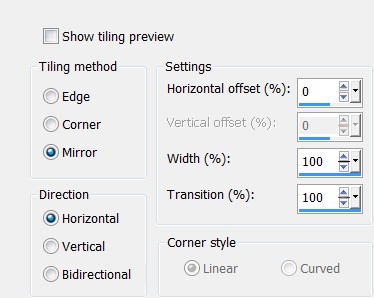
9. Effects/Image Effects/Seamless Tiling.
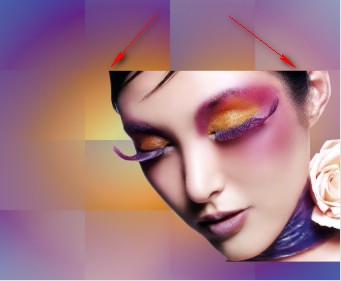
10. Open LadyRoseCibiBijoux.pspimage. Copy/Paste as New Layer.
11. Move lady toward right side so the top of her image meets the bottom of the top squares.
12. Adjust/Sharpness/Sharpen.
13. Effects/3D Effects/Drop Shadow. Vertical 8, Horizontal -20, Opacity 50, Blur 35, color #000000.
14. Duplicate. Image/Mirror. Move lady into upper left corner. Drop Opacity to 80.
15. Pull duplicated layer below Raster 2 layer. Keep copy of Raster 2 layer highlighted to continue.
16. Layers/New Raster Layer.
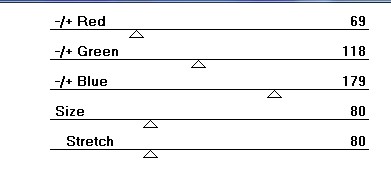
17. Effects/Photo Effects/Graduated Filter.
18. Layers/New Raster Layer.
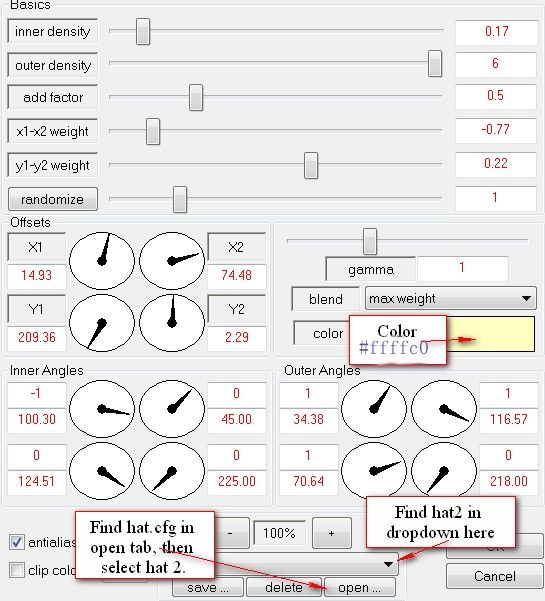
19. Effects/DragonFly/SinedotsII/hat.cfg/hat2.
20. Highlight Raster 2 of woman to continue.
21. Open PinkCluster.png. Copy/Paste as New Layer.
22. Move down into bottom left corner.
23. Effects/3D Effects/Drop Shadow. Vertical -5, Horizontal 14, Opacity 40, Blur 35, color #000000.
24. Duplicate. Image/Mirror. Pull cluster to right side and upward.
25. Open LrgYellowFlower.png. Copy/Paste as New Layer.
26. Pull LrgYellowFlower over the pink rose on right side of image.
27. Effects/3D Effects/Drop Shadow. Vertical -5, Horizontal -14, Opacity 40, Blur 35, Color #000000.
28. Adjust/Sharpness/Sharpen.
29. Layers/New Raster Layer.
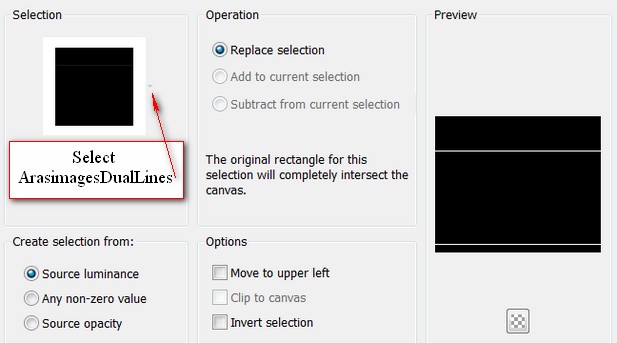
30. Selections/Load/Save Selection/Load Selection from Disk. Select the Selection ArasimagesDualLines. Load.
31. Flood fill Selection lines with Background color #615691.
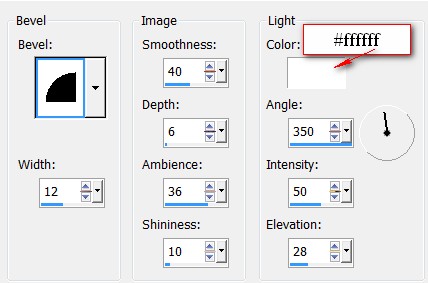
32. Effects/3D Effects/Inner Bevel. Selections/Select None.

33. Open encaje2-soleil-12-12-2007.pspimage. Copy/Paste as New Layer.
34. Image/Free Rotate Right by 90 Degrees.
35. Image/Resize/Resize by 85%/Resize all layers unchecked.
36. Pull lace upward so it is beneath the top bar as I have mine.
37. Adjust/Sharpness/Sharpen.
38. Adjust/Hue and Saturation/Colorize. Hue 33, Saturation 139.
39. Effects/3D Effects/Drop Shadow. Vertical 5, Horizontal 7, Opacity 40, Blur 26, Color #000000.
40. Duplicate. Pull downward to set beneath the bottom DualLine.
41. Open Leaves.png. Copy/Paste as New Layer.
42. Move leaves into bottom left corner with vine going upward.
43. Adjust/Sharpness/Sharpen.
44. Effects/3D Effects/Drop Shadow. Vertical 5, Horizontal 20, Opacity 40, Blur 35, Color #000000.
45. Open LrgDoubleYellowFlower.png. Copy/Paste as New Layer.
46. Image/Resize/Resize by 85%/Resize all layers unchecked.
47. Move into bottom left corner.
48. Effects/3D Effects/Drop Shadow. Vertical 5, Horizontal 20, Opacity 40, Blur 35, Color #000000.
49. From Tool bar, select the Text tool. Find Cravat DisplaySSi, Size set to 150, color #f8e07d, line solid. Type the letter "C". Change the size to 72 and type out "olors of". Change size back to 150 and type the letter "S", change back to size 72 and type the letters "pring". Convert to Raster Layer.

50. Selections/Select All. Selections/Float. Selections/Defloat.
51. Effects/3D Effects/Inner Bevel. Selections/Select None.
52. Effects/3D Effects/Drop Shadow. Vertical 9, Horizontal 9, Opacity 60, Blur 21, Color #000000.
53. Image/Add Borders/Add 2px border, Symmetric checked, color #615691.
54. Sign your name or leave your watermark if you wish. Save as .png or .jpg file.
This tutorial was tested by PamelaD and Evatexas. Thanks ladies!
If you are going to use this tutorial for stationery, cards or place the tutorial/tag on another site, I would appreciate you contacting me for permission, giving Arasimages credit for the original tutorial and if possible, a link back to my site. Thank you.
Copyright © Arasimages All Rights Reserved