
Ethiopian Pathways
For Italian, Dutch and Danish translation, click on the flags.


For this tutorial you will need the materials in the zip file below.

Unzip the materials into a working folder you have created on your desktop named Ethiopian Pathways. Please duplicate and close original tubes. Place the Selection in your PSP/Selections folder. I have used the plugins Kiwi's Oelfilter/Gluk mal, Misted Nights/Frosted Glass, Simple/Top Left Mirror, Greg's Factory Output/Gradient Blocks and Photo Tools/PhotoEdger-Color in this tutorial. It is assumed you have a working knowledge of PSP to follow these directions. I have used PSPX6 for this tutorial but other versions may be used.
Thanks go to Maryse for the beautiful Ethiopian mother and child and to Evatexas from Arasimages for her lovely scenery tube used in this tutorial.
Use the bookmark below to mark your place along the way.

1. In Materials Palette, set Foreground to #aba156, Background to #3b6d6c.
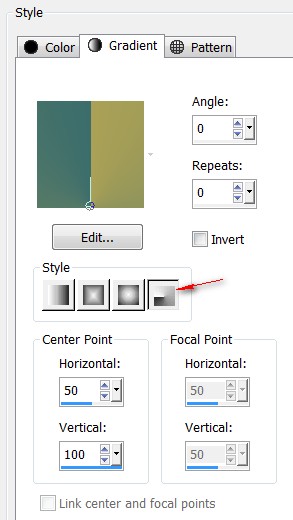
2. In Materials Palette, set to Gradient, Style Radial, Repeats 0, Angle 0, Invert unchecked. Center point: Horizontal 50/Vertical 100; Focal Point H/V grayed out. Link center and focal points unchecked.
3. New/New Image 900px by 550px. Flood fill with color #015e6a.
4. Layers/New Raster Layer. Flood fill with Gradient.
5. Effects/.V Oelfilters/Gukmal.

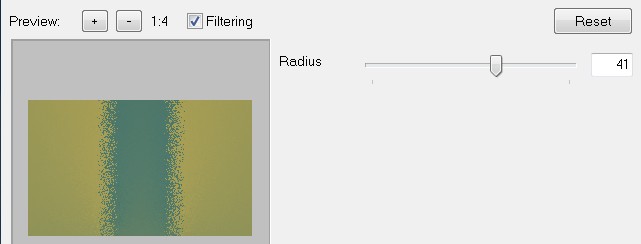
6. Effects/Mystic Nights/Frosted Glass.
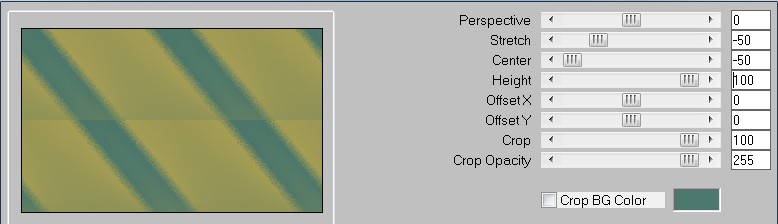
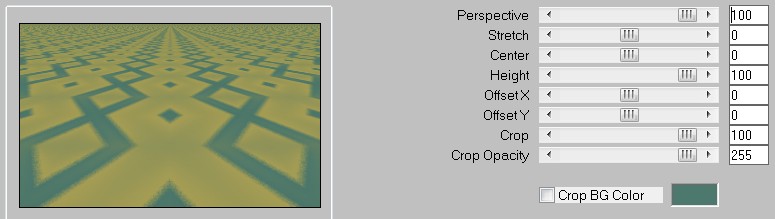
7. Effects/Mura's Meister/Perspective.
8. Effects/Simple/Top Left Mirror. Default settings.
9. Effects/Mura's Meister/Perspective.
10. Effects/Edge Effects/Enhance.
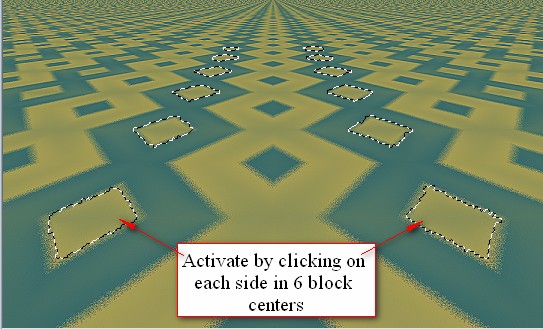
11. Using Magic Wand with settings as seen below, select six blocks on each side.

12. Layers/New Raster Layer. Flood fill with color #015e6a.
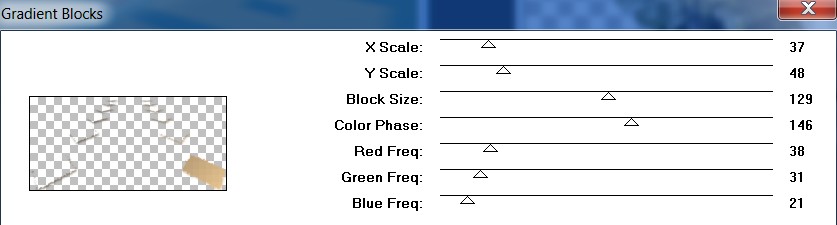
13. Effects/ Greg's Factory Output/Gradient Blocks.
14. Effects/3D Effects/Drop Shadow. Vertical 6, Horizontal 4, Opacity 75, Blur 11, color #000000.
15. Selections/Select None.
16. Highlight Raster 2 layer of diamonds. Using Pick Tool, set Mode to Scale, grab center node, pull downward to 200px.
17. Highlight Gradient Blocks layer. Using Pick Tool, set Mode to Scale, grab top node, pull downward to 200px.
18. Reset to Move Tool.
19. Layers/New Raster Layer.
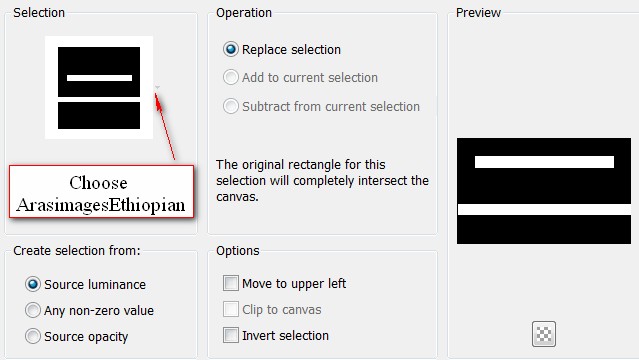
20. Selections/Load/Save Selection, Load Selection from Disk. From the drop down, choose ArasimagesEthiopian Selection. Load.
21. Flood fill Selections with #015c6a.
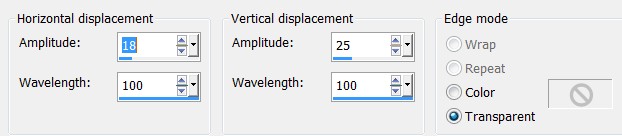
22. Effects/Distortion Effects/Wave.
23. Selections/Invert. Press Delete key once to eliminate bars from Foating layer.
24. Selections/Invert again.
25. Effects/3D Effects/Drop Shadow. Vertical 10, Horizontal 10, Opacity 50, Blur 30, color #000000.
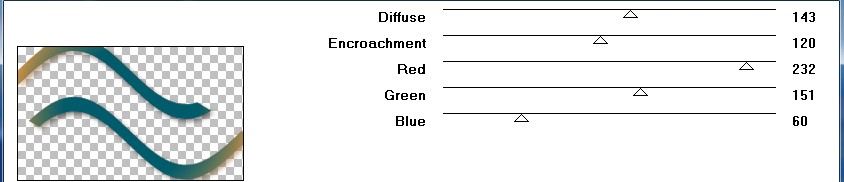
26. Effects/Photo Tools/Frosted Edger-Color. Drop Opacity to 80.
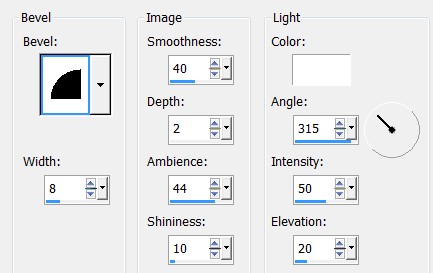
27. Effects/3D Effects/Inner Bevel.
28. Open Nature 20 HQimage.pspimage. Copy/Paste as New Layer. Make sure horizon is at 200px.
29. Selections/Invert. Press Delete key once.
30. Selections/Select None.
31. Again, paste HQimage.pspimage as New Layer. Image/Mirror.
32. Image/Resize/Resize by 60%/Resize all layers unchecked.
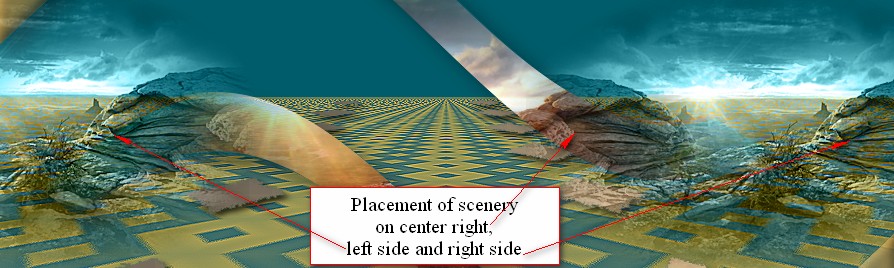
33. Move to center right of image. Blend Mode/Luminance (L). Horizon at 200px.
34. Duplicate. Image/Mirror.
35. Move to right side of image so horizon is even with 200px. Merge/Merge Down.
36. Adjust/Sharpness/Sharpen More.
37. Duplicate. Move image to left side of border. (Adjust scenery layers as seen below).
38. Open MR_Ethiopian woman and and her child.pspimage. Copy/Paste as New Layer.
39. Image/Resize/Resize by 73%/Resize all layers unchecked.
40. Using Selections tool, rectangle, select around the watermark of Maryse and press Delete key. Deselect.
41. Effects/3D Effects/Drop Shadow. Vertical 10, Horizontal 18, Opacity 60, Blur 40, color #000000. Repeat with Vertical -10, Horizontal -18.
42. Move mother and child to the left side of image.
43. Adjust/Sharpness/Sharpen 2X.
44. Change the background color of the Materials Palette to #fbf7fb.
45. Image/Add Borders/Add 2px border, Symmetric checked, color #fbf7fb.
46. From Tool bar, select the Text tool. Use font Nuptial BT/ (TT0981M_1), Size 120, Line Style Solid, color #fbf7fb, type the letter "C". Change size to 48 and type the words"hoose well the path". Convert to Raster Layer.

47. Change the font to Vijaya, size 36, all other settings as in example above and type the words "you will travel". Convert to Raster Layer.
48. Again use the font Nuptial BT, size 120 and all other settings the same as above, type the letter "F". Change size to 48 and type the words "or the journey is long". Convert to Raster Layer.
49. Change the font to Vijaya, size 36, all other settings as in example above and type the words "and the unknown awaits". Convert to Raster Layer.
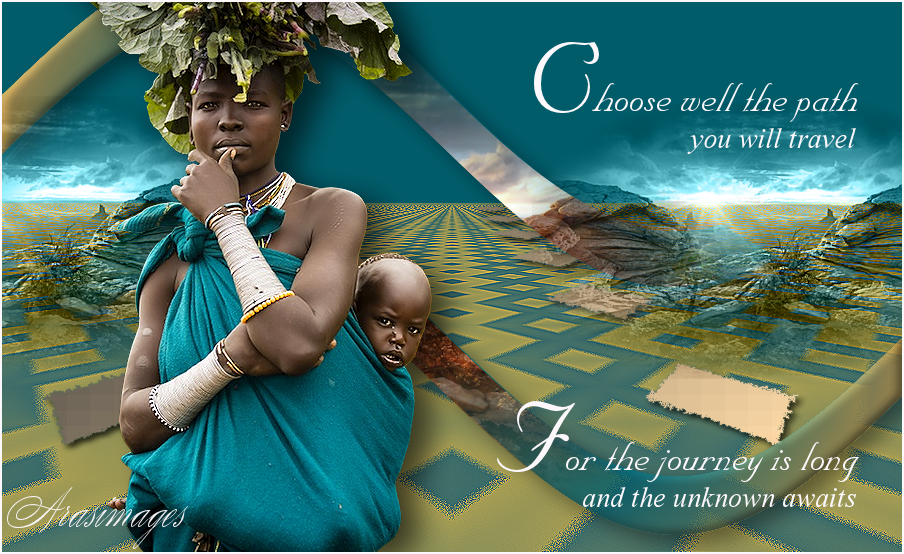
50. Using move tool, move all text into place as seen in original tutorial tag I have made.
51. Sign your name or leave your watermark if you wish. Merge/Merge Visible if necessary. Save as .png or .jpg file.
This tutorial was tested by PamelaD and Evatexas. Thanks ladies!
If you are going to use this tutorial for stationery, cards or place the tutorial/tag on another site, I would appreciate you contacting me for permission, giving Arasimages credit for the original tutorial and if possible, a link back to my site. Thank you.
Copyright © Arasimages All Rights Reserved