
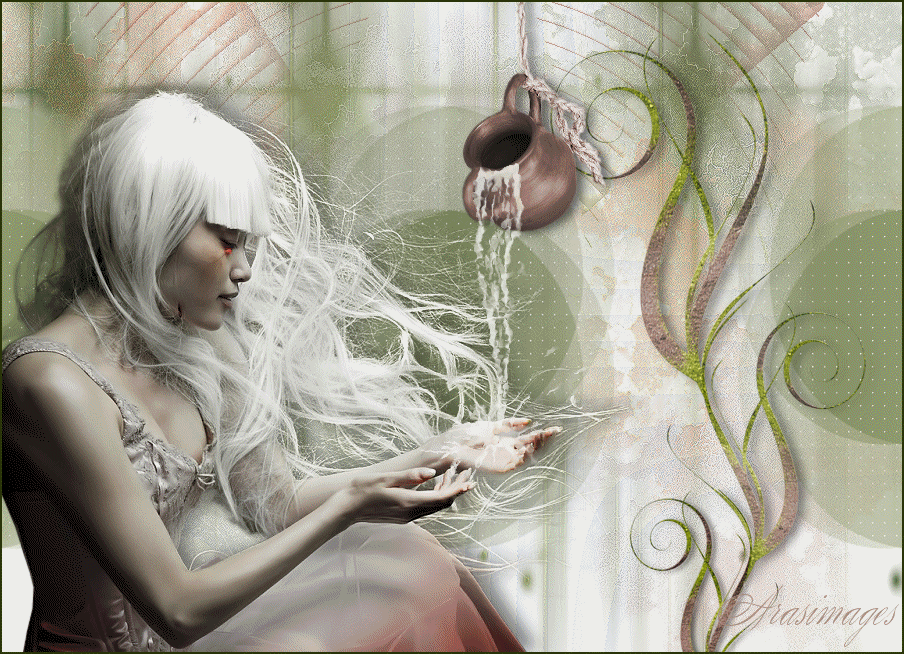
Pour it Out
For Italian, Dutch, Danish and French translation, click on the flags.


For this tutorial you will need the materials in the zip file below.

Unzip the materials into a working folder you have created on your desktop named Pour it Out. Please duplicate and close original tubes. Place theMasks in your PSP/Masks folder. Export the texture42.pspimage into your PSP/Brushes as a brush. Place the Gradients in your PSP/Gradients folder. I have used the plugins Eye Candy 3.1/Jiggle, AFS_IMPORT/Real Radm, Mura's Meister/Pole Transform, MV'sPlugins/Pano Warp and Oliver's Filters/Tunnel in this tutorial. It is assumed you have a working knowledge of PSP to follow these directions. I have used PSPX6 for this tutorial but other versions may be used.
Thanks go to Maryse and to Nikita for the beautiful tubes used in this tutorial.
Use the bookmark below to mark your place along the way.

1. In Materials Palette, set Foreground to #f4f4f2, Background to #a98882.
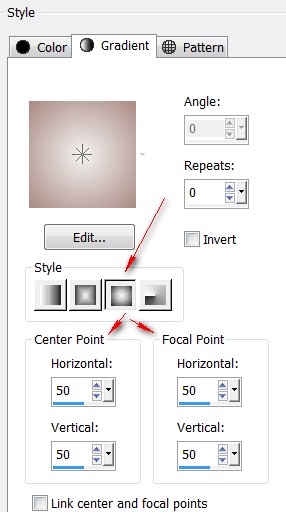
2. In Materials Palette, set to Gradient, Style Sunburst, Repeats 0, Angle 0, Invert unchecked. Center points: Horizontal 50/Vertical 50; Focal Points: Horizontal 50/Vertical 50. Link center and focal points unchecked.
3. New/New Image 900px by 650px. Flood fill with Foreground color #f4f4f2.
4. Effects/Texture Effects/Blinds.
5. Effects/Filters Unlimited 2/AFS_Import/Real Radm. Use default settings.
6. Effects/Edge Effects/Enhance.
7. Layers/New Raster Layer.
8. In Materials Palette Foreground, select sq_Sweet Pea Gradient. Leave the settings the same as in Step #2.
9. Flood fill new layer with gradient.
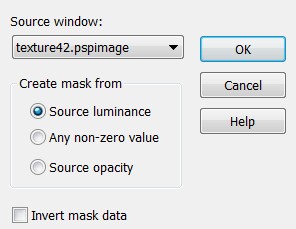
10. Open texture42.pspimage. Layers/New Mask Layer/From Image. Select from Source Window drop down the texture42.pspimage.
11. Merge/Merge Group.
12. Effects/Mura'sMeister/Pole Transform.
![]()
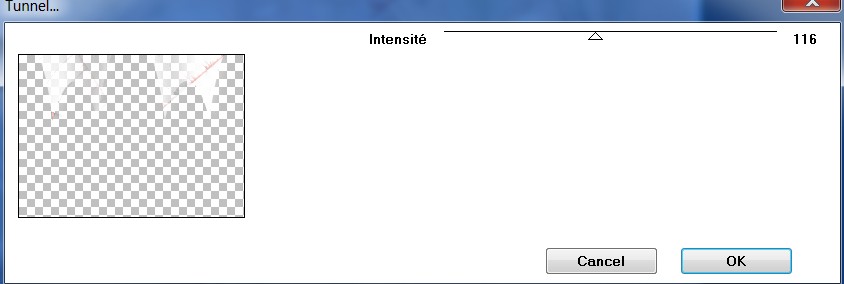
13. Effects/Oliver's Filters/Tunnel.
14. Adjust/Sharpeness/Sharpen. Drop Opacity to 60. Set Blend Mode to Multiply.
15. Layers/New Raster Layer. In Materials Palette, change Foreground to earth 1_gradient. Leave settings the same as in Step #2. Flood fill Layer.
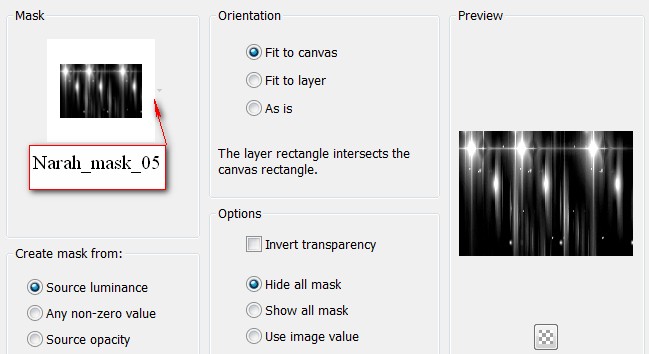
16. Layers/Load/Save Mask/Load Mask from Disk. From drop down, select Narah_Mask_0537. Load.
17. Merge/Merge Group.
18. Effects/Edge Effects/Enhance.
19. Layers/New Raster Layer.
20. From Tool bar, select Paint Brush tool. From Presets, select texture42.brush.

21. In Materials Palette, change Background to Metal Copper gradient leaving settings the same.
22. Using left click, Foreground earth 1 gradient, settings left the same as before, click in bottom left corner and upper right corner.
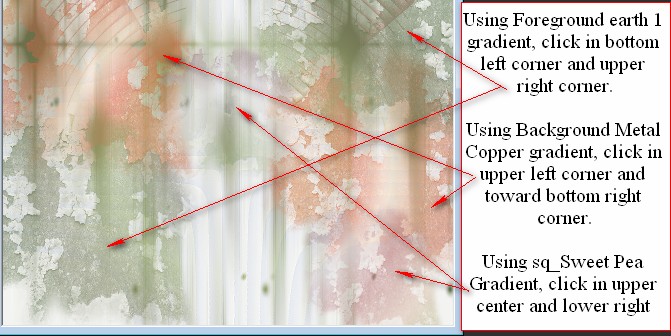
23. Using right click, Background Metal Copper gradient, settings left the same as before, click in upper left corner and toward bottom right corner.
24. In Materials Palette, change Background Gradient to sq_Sweet Pea Gradient, settings left same as before. Lower Size to 300, right click toward center top and in bottom right corner.
25. Effects/Edge Effects/Enhance. Lower Opacity to 50.
26. Layers/New Raster Layer. Flood fill with color #7a875d.
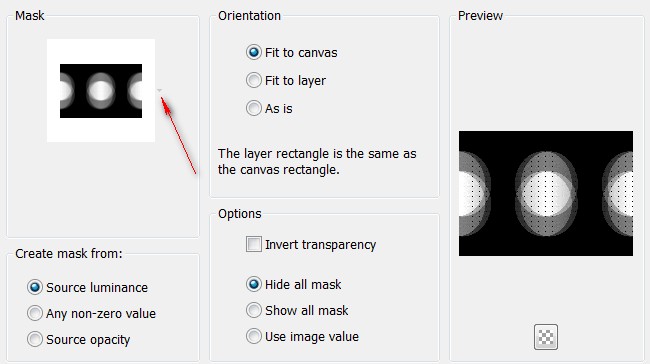
27. Layers/Load/SaveMask/Load Mask from Disk. Choose Narah_Mask_0575. Load.
28. Merge/Merge Group.
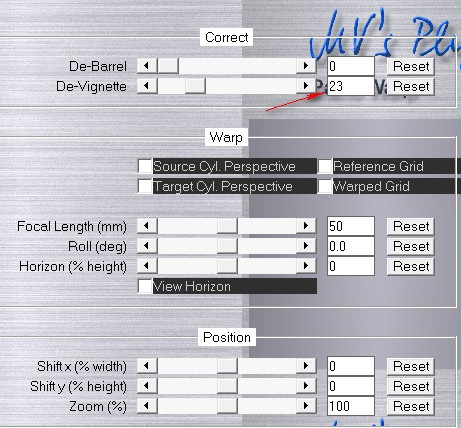
29. Effects/MV'sPlugins/Panowarp.
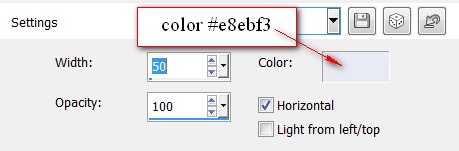
30. Effects/3D Effects/Drop Shadow. Vertical 2, Horizontal 7, Opacity 57, Blur 14, color #f4f4f2.
31. Open GreenDecor.pspimage.
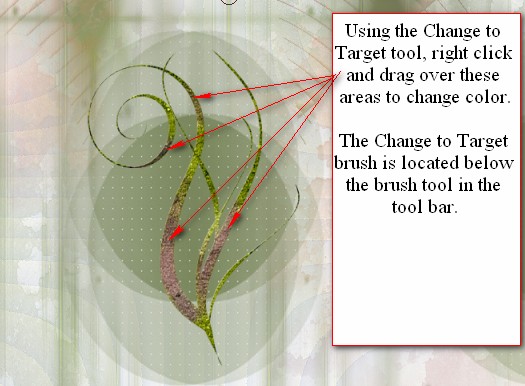
32. Activate the Change to Target brush from the tool bar, using color #a98882 in Background, right click and drag on the GreenDecor to change the color in spots. Do not recolor the entire swirl. See my example of the settings and where I have recolored.

33. Copy/Paste as New Layer. Drop Opacity of GreenDecor to 75.
34. Effects/3D Effects/Drop Shadow. Vertical 2, Horizontal 7, Opacity 57, Blur 14, color #000000.
35. Move to right and up a little toward top of image.
36. Paste again as New Layer. Image/Mirror. Recolor as in Step #32.
37. Image/Resize/Resize by 75%/Resize all layers unchecked.
38. Repeat Drop Shadow as in Step #34. Move below and right of the larger GreenDecor layer. Set Opacity to 75.
39. Duplicate the largest layer of GreenDecor. Resize by 56%. Set Opacity to 100.
40. Move toward bottom border of image. (See my finished image for example). Adjust layers if needed. Highlight top layer to continue.
41. Open 134581684_femmes.pspimage. Copy/Paste as New Layer.
42. Select around Nikita's watermark with Selection Tool set to Rectangle. Press Delete key. CTRL+D.
43. Effects/3D Effects/Drop Shadow. Vertical -4, Horizontal 12, Opacity 46, Blur 22, Color #000000.
44. Adjust/Sharpness/Sharpen. Move woman into bottom left corner.
45. Open nikita_reveries_d_10_04.08.pspimage. Copy/Paste as New Layer.
46. Image/Mirror. Image/Resize/Resize by 70%/Resize all layers unchecked.
47. Adjust/Hue and Saturation/Colorize. Hue set to 7, Saturation set to 47.
48. Effects/3D Effects/Drop Shadow. Vertical 2, Horizontal 7, Opacity 57, Blur 14, color #000000.
49. Move jar toward top so it is above her hands. Drop Opacity down to 93.
50. Add your name or watermark on a new layer if you wish.
51. Open Pour_it_Out_Animation.png file. Copy/Paste as New Layer. Drop Opacity to 80.
52. Place it so water appears to be pouring out of the jar into lady's hand.
53. Scroll your working image to 400% for easier selection. Using the Magic Wand, Tolerance set to 26, Mode to Add Shift, click on white part of water at the top to activate it. Click the floating pixels within the water to make sure all water is selected. Also click the splashes to the right of main water by her hand.
![]()
54. Image/Add Borders/Add 2px border, Symmetric checked, color #2a3a02.
55. Duplicate image 3X, having 4 layers total.
56. Close off all layers except top layer and have top layer highlighted.
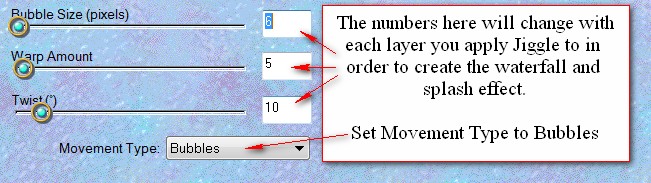
57. Effects/Eye Candy 3.1/Jiggle. Set to Bubble, Size 6/Warp 5/Twist 10. Apply. Close off this layer.
58. On next layer down, open and repeat with Size 18/Warp 9/Twist 19. Close off this layer.
59. On next layer down, open and repeat with Size 8/Warp 7/Twist 8. Close off this layer.
60. On bottom layer, open and repeat with Size 5/Warp 6/Twist 3. Selections/Select None.
61. Open all layers, File/Save As/PSP Animation Shop (*psp).
62. Open Animation Shop. File/Open the animated tag you just finished. Click on the View Animation button in top tool bar to check the animation. If it isn't as you like, go back to PSP and redo the Eye Candy 3.1/Jiggle to numbers of your choice, save as PSP Animation Shop(*psp) and check again.
63. Edit/Select all/Animation/Frame Properties. Leave Frame Properties set to 10 if using my settings above. Click on the View Animation button in the top tool bar to check if your finished tag is pleasing to you. If it is, then we will save.
64. File/Save As. When the box comes up, give your work a name (Pour it Out), indicate where to save it (your working folder) and click Save. Then click Next...Next...Next...Finish.
This tutorial was tested by PamelaD and Evatexas. Thanks ladies!
If you are going to use this tutorial for stationery, cards or place the tutorial/tag on another site, I would appreciate you contacting me for permission, giving Arasimages credit for the original tutorial and if possible, a link back to my site. Thank you.
Copyright © Arasimages All Rights Reserved