
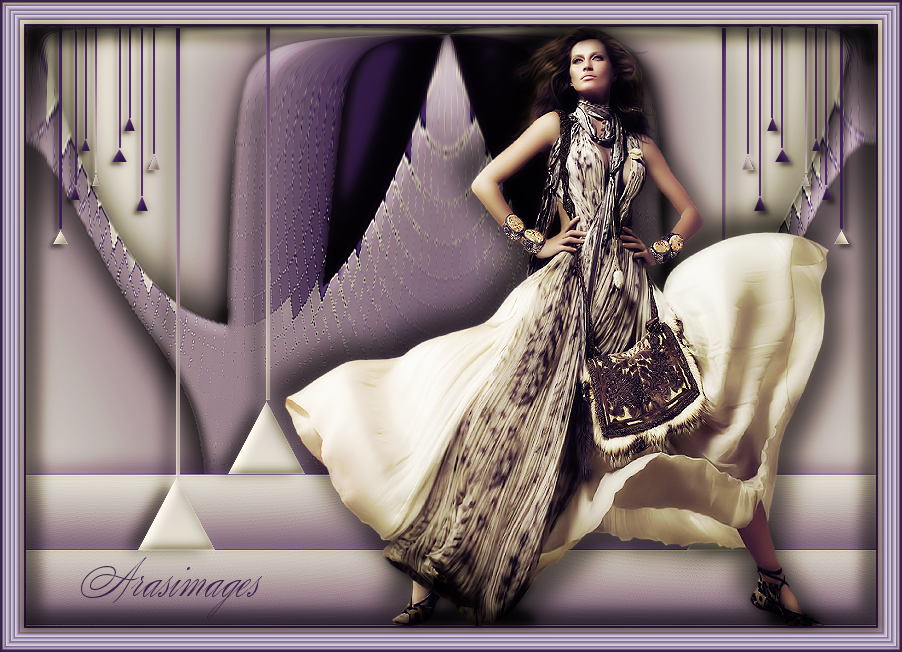
Purple Elegance
For Italian, Dutch, Danish and French translation, click on the flags.
For this tutorial you will need the materials in the zip file below.
Unzip the materials into a working folder you have created on your desktop named Purple Elegance. Please duplicate and close original tube. Place the Selections in your PSP/Selections folder. I have used the plugins Distort/Turn Your Inside Out, AAA Frames/Frame Works, Flaming Pear/Flexify and Xero/Radiance in this tutorial. It is assumed you have a working knowledge of PSP to follow these directions. I have used PSPX6 for this tutorial but other versions may be used.
Thanks go to tuber de Grisi for the beautiful lady tube used in this tutorial.
Use the bookmark below to mark your place along the way.

1. In Materials Palette, set Foreground to #c4b79b, Background to #351c48.
2. In Materials Palette, set to Gradient, Style Linear, Repeats 0, Angle 0, Invert unchecked. Center points: Horizontal 50/Vertical 50; Focal Points: Horizontal 50/Vertical 50. Link center and focal points unchecked.
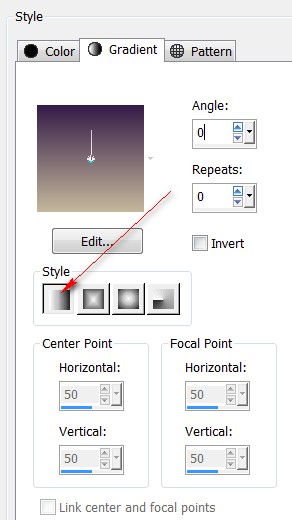
3. New/New Image 850px by 600px. Flood fill with Gradient.
4. Effects/Distort/Turn Your Inside Out. Tightness set to 255.
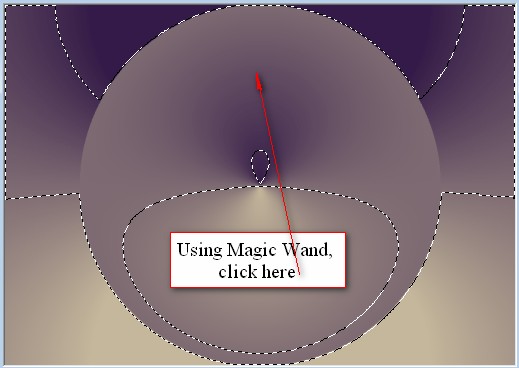
5. Using Magic Wand, click in upper center to activate portions of the layer.

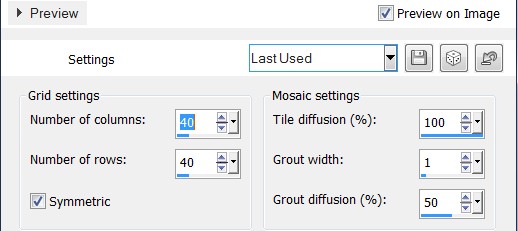
6. Effects/Texture Effects/Mosiac-Antique.
7. Effects/Edge Effects/Enhance.
8. Effects/3D Effects/Drop Shadow. Vertical -9, Horizontal 16, Opacity 65, Blur 50, color #000000.
9. Effects/3D Effects/Drop Shadow. Vertical 9, Horizontal -16, Opacity 65, Blur 50, color #000000.
10. Effects/Inner Bevel.
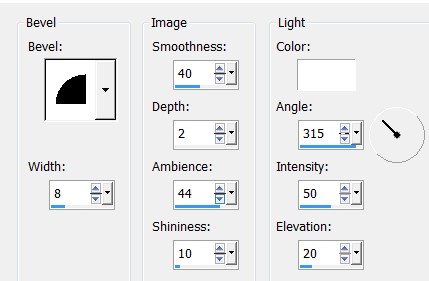
11. Selections/Select None.
12. Effects/Flaming Pear/Flexify.
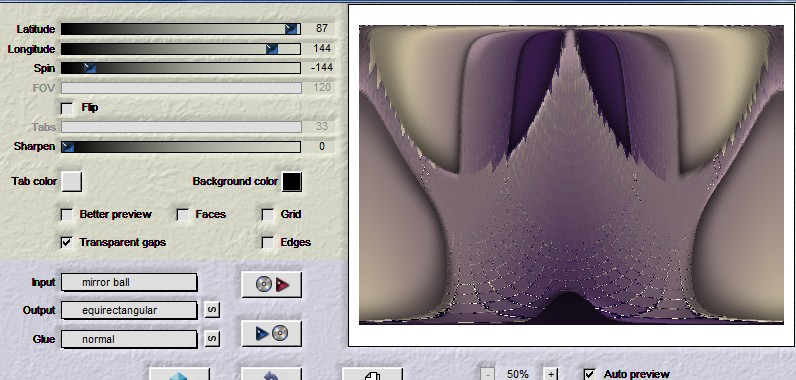
13. In Materials Palette, click on small double arrows to swap colors of Gradient.
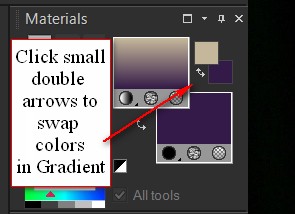
14. Layers/New Raster Layer. Flood fill with Gradient.
15. Adjust/Blur/Radial Blur.

16. Effects/Edge Enhance/Enhance More.
17. Using Pick tool grab the node at the center top and pull down to 450px.
18. Effects/Texture Effects/Blinds, color #351c48.

19. Effects/3D Effects/Drop Shadow. Vertical 7, Horizontal 0, Opacity 50, Blur 30, color #351c48.
20. Adjust/Sharpness/Sharpen.
21. Again click small double arrows in Materials Palette to swap colors of Gradient as in Step #13.
22. Layers/New Raster Layer.
23. Selections/Load/Save Selections/Load Selections from Disk. From drop down, select ArasimagesHangingTriangles. Load.
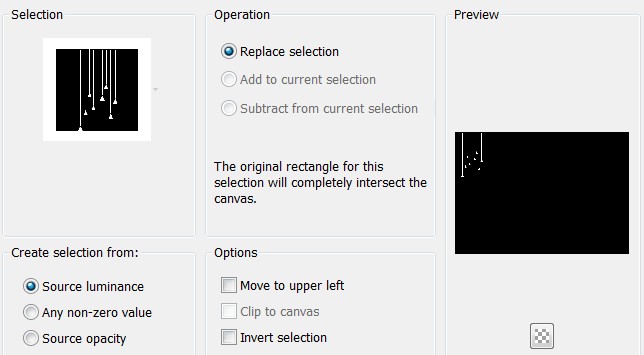
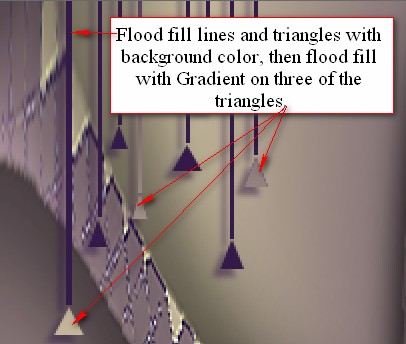
24. Scroll image to 150% for better view. Flood fill HangingTriangles with background color, then with Gradient on three of the triangles.
25. Effects/Inner Bevel.

26. Effects/3D Effects/Drop Shadow. Vertical 4, Horizontal -4, Opacity 50, Blur 6, color #000000.
27. Selections/Select None.
28. Adjust/Sharpness/Sharpen.
29 . Duplicate. Image/Mirror.
30. Layers/New Raster Layer.
31. Selections/Load/Save Selections/Load Selections from Disk. From drop down, select ArasimagesLrgHangingTriangle. Load.
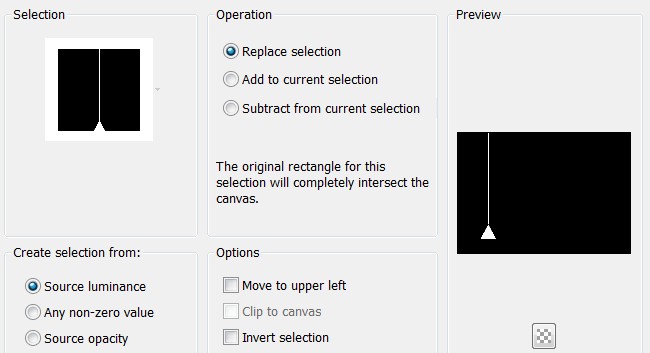
32. Flood fill with original Gradient as in Step #2.
33. Effects/Inner Bevel as in Step #25.
34. Effects/3D Effects/Drop Shadow. Vertical 0, Horizontal -10, Opacity 60, Blur 21, color #000000.
35. Adjust/Sharpness/Sharpen. Selections/Select None.
36. Duplicate. Image/Mirror. Duplicate again and pull to the right and up on the top bar.

37. Open Grisi_Woman_39.pspimage. Copy/Paste as New Layer.
38. Adjust/Sharpness/Sharpen.
39. Effects/3D Effects/Drop Shadow. Vertical 16, Horizontal 16, Opacity 50, Blur 35, color #000000.
40. Repeat Drop Shadow with V at -16 and H at -16, all other settings the same.
41. Move woman to right side of image.
42. Image/Add Borders. Add 2px border, Symmetric checked, color #351c48.
43. Image/Add Borders. Add 22px border, Symmetric checked, color #c4b79b.
44. Using Magic Wand, select the 22px border. Layers/New Raster Layer.
45. In Materials Palette, Gradient, check the Invert box. Flood fill the 22px border with Gradient.
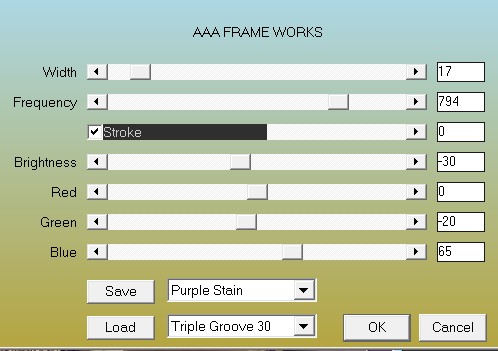
46. Effects/AAA Frames/Frame Works.
47. Drop Opacity to 54.
48. Effects/3D Effects/Drop Shadow. Vertical 18, Horizontal 18, Opacity 75, Blur 18, color #000000.
49. Repeat with V at -18, H at -18, all other settings the same.
50. Selections/Select None.
51. Image/Add Borders. Add 2px border, Symmetric checked, color #351c48.
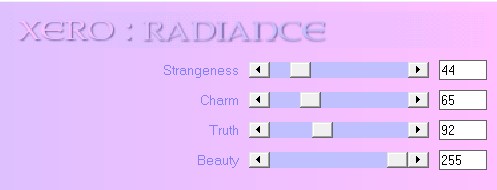
52. Effects/Xero/Radiance.
53. Sign your name or leave your watermark if you wish and save as a .jpg or .png file.
This tutorial was tested by PamelaD and Evatexas. Thanks ladies!
If you are going to use this tutorial for stationery, cards or place the tutorial/tag on another site, I would appreciate you contacting me for permission, giving Arasimages credit for the original tutorial and if possible, a link back to my site. Thank you.
Copyright © Arasimages All Rights Reserved


