
Beautiful You
For Italian, Dutch, Danish and French translation, click on the flags.


For this tutorial you will need the materials in the zip file below.

Unzip the materials into a working folder you have created on your desktop named Beautiful You. Please duplicate and close original tubes. Open the Romantic Heart_Yalana text and Export it to your Brushes. Place the Patterns in the PSP/Paterns folder. Place the ArasimagesVintage Selection in your PSP/Selection folder. Place the Andromeda Preset called Beautiful You.pfp in your Document/My PSP Files/Plugins/andromeda-serie portable/Perspective-Presets/andromeda/02Full Canvas/22Side Walls folder. I have used the plugins Andromeda/Perspective and AAA Frames/Frame Works in this tutorial. It is assumed you have a working knowledge of PSP to follow these directions. I have used PSPX6 for this tutorial but other versions may be used. NOTE: PSPX6 does not have the Corel 6_026 Fading-Foreground Gradient in it by default like PSPX5 does.
Thanks go to JHanna to Cibi to YalanaDesign_WA and the unknown tubers for the great tubes used in this tutorial.
Use the bookmark below to mark your place along the way.

1. In Materials Palette, set Foreground to #838458, Background to #8e9076.
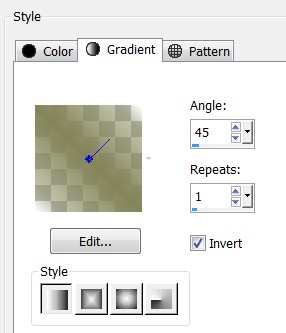
2. In Materials Palette, set to Gradient/fading_foreground, Style Linear, Repeats 45, Angle 1, Invert checked. All other settings grayed out.
3. New/New Image 900px by 650px. Flood fill with Gradient.
4. Open JHanna_789 tube. Copy/Paste as New Layer.
5. Effects/3D Effects/Drop Shadow. Vertical -15, Horizontal 15, Opacity 45, Blur 37, color #000000.
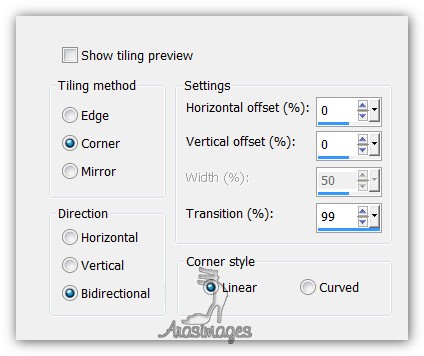
6. Effects/Image Effects/Seamless Tiling.
7. Drop Opacity to 30. Merge/Merge Visible.
8. Paste the flower again as a New Layer. Repeat the Seamless Tiling as in Step #6.
9. Adjust/Blur/Gaussian Blur, Radius set to 30.
10. Merge/Merge All (Flatten). Effects/Edge Effects/Enhance.
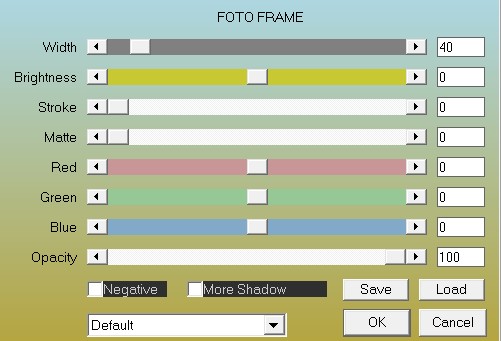
11. Duplicate. Effects/AAA Frames/Foto Frame.
12. Layers/New Raster Layer. Selections/Select All.
13. Open 0_961cf_98e1cfe0_XL.png. Copy/Paste into Selection. CTRL+D.
14. Image/Mirror. Lower Opacity to 70%.
15. Open Vintage2_CibiBijoux.pspimage. Copy/Paste as New Layer.
16. Adjust/Sharpness/Sharpen.
17. Effects/3D Effects/Drop Shadow. Vertical 15, Horizontal 15, Opacity 65, Blur 37, color #000000. Repeat with Vertical -15, Horizontal -15, all others set the same.
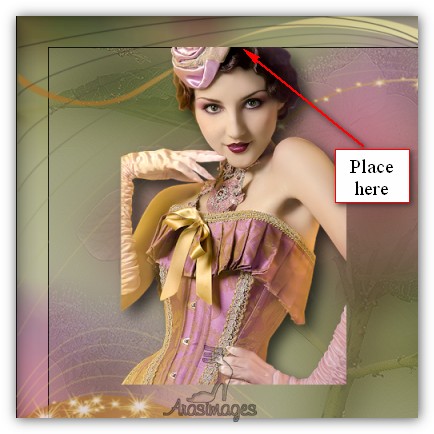
18. Move lady to right side of image.
19. Duplicate. Image/Resize/Resize by 65%, Resize all layers unchecked.
20. Drop Opacity to 37. Luminance (L). Move resized lady to left so her hair is touching inside line and sets about 275px at the top.
21. Layers/New Raster Layer.
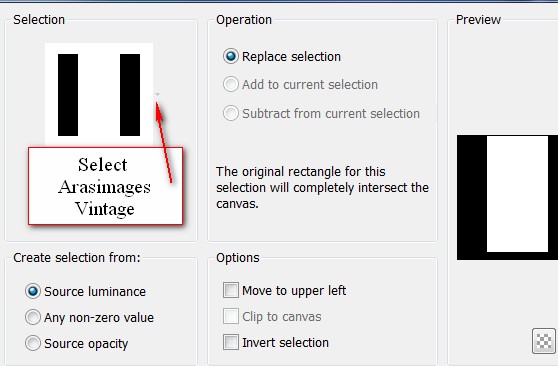
22. Selections/Load/Save Selections/Load Selections from Disk. Selections/ArasimagesVintage. Load.
23. Open JHanna_783_01a tube.pspimage. Select the tuber's watermark and Delete. Copy and close without saving.
24. Paste into Selection. Lower Opacity to 54.
25. Effects/3D Effects/Drop Shadow. Vertical 15, Horizontal 15, Opacity 65, Blur 30, color #000000.
26. Effects/3D Effects/Drop Shadow. Vertical -15, Horizontal -15, Opacity 65, Blur 30, color #000000.
27. Layers/New Raster Layer. Flood fill with #8e9076.
28. Selections/Modify/Contract by 3px. Press Delete key.
29. Flood fill with #d3a7af. Selections/Modify/Contract by 5px. Press Delete key.
30. Flood fill with #8e9076. Selections/Modify/Contract by 3px. Press Delete key.
31. CTRL+D. Using Magic Wand, select the pink 5px border.

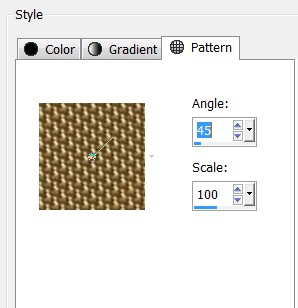
32. In Materials Palette, check the Pattern tab. Choose the GoldBeadsPattern. Angle 45/Scale 100.
33. Flood fill with the GoldBeadsPattern. Effects/Edge Effects/Enhance. CTRL+D.
34. Merge/Merge Down.
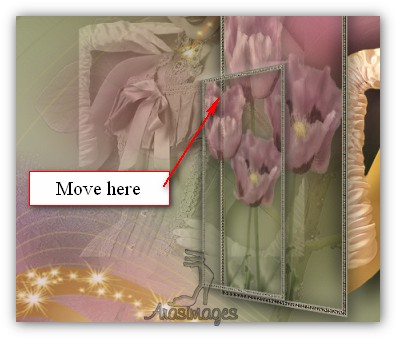
35. Effects/Andromeda/Perspective. Click the Preset in upper right corner. Find your Beautiful You.pfp file. You should see the below.

36. Move Raster 3 to the right a little to meet lady's arm.
37. Duplicate. Image/Resize/Resize by 65%, resize all layers unchecked.
38. Move to bottom left corner of first selection.
39. Highlight larger rectangle. Use Eraser tool or Selection/Delete to erase larger rectangle border from within smaller one.

40. Go back to top layer. Adjust/Sharpness/Sharpen. Merge/Merge Down.
41. Duplicate. Image/Mirror. Move mirrored layer to left side to inner line. Merge/Merge Down.
42. Adjust/Sharpness/Sharpen 2X
43. Layers/New Raster Layer.
44. From Tool bar, select Pen Tool, Style Line Vyp_Point. Have settings as seen below and Foreground still set to GoldBeadsPattern.

45. Draw a line from top of image down to top of each selection rectangle as I have done. Convert to Raster Layer.
46. Effects/Edge Effects/Enhance.
47. Effects/3D Effects/Drop Shadow. Vertical -6, Horizontal 9, Opacity 65, Blur 20, color #000000. Merge/Merge Down.
48. Open JHanna_789 tube.pspimage. Copy/Paste as New Layer.
49. Image/Resize/Resize by 42%/Resize all layers unchecked.
50. Move flower to bottom of rectangles with stem at bottom of image. Adjust/Sharpness/Sharpen.
51. Effects/3D Effects/Drop Shadow. Vertical -6, Horizontal -15, Opacity 45, Blur 30, color #000000.
52. Change Pattern in Materials Palette from GoldBeadsPattern to ABGold2 Pattern.
53. Layers/New Raster Layer.
54. From Tool bar, select Paint Brush tool. Select brush Romantic heart_YalanaDesign.

55. Stamp brush over the rectangles on center left.
56. Effects/Edge Effects/Enhance.
57. Image/Add Borders, add 3px border, Symmetric checked, color #ffffff.
58. Using Magic Wand, select the 3px border. Flood fill with GoldBeadsPattern.
59. Effects/Edge Effects/Enhance. CTRL+D.
60. Place your watermark or name on the image if you wish, Merge/Merge Visible if needed and save as a .jpg file named Beautiful You.
For animation follow the directions below.
61. Duplicate finished image 3 times, having 4 layers in all. Close off all layers except top layer.
62. From Tool bar, select the Tube tool and find the H Sparkle_White star tube. Below is the default settings.

63. Change the Scale to 50, click randomly on larger stars in image. Close off top layer.
64. Open next layer down (copy (2) of Merged. Change Scale to 35 and stamp randomly on smaller stars in image. Close off layer.
65. Open next layer down (copy of Merged). Change Scale to 30 and stamp randomly on smaller stars in image. Close off layer.
66. Open bottom layer. Change Scale to 25 and stamp randomly on smallest stars in image. Open all layers.
67. File/Save As. Save as a PSP Animation Shop (*psp) file named Beautiful You.
68. Open Animation Shop. File/Open. Open the file named Beautiful You from where you saved it.
69. Click on the Animation button in the top tool bar to see if your animation is working as you would like. If you want the sparkles to slow down, click on Edit/Select All with the first frame highlighted.
70. Then go to Animation/Frame Properties. Set the Display time from 10 to 13 and view again. Change the numbers till you get what you want. The higher the number, the slower the animation will run.
71. When it is just as you wish, then File/Save As. A box will come up for you to give it a name, leave it set to save as a .gif file and click Save. As the boxes change, click on Next, Next, Next then Finish. Your file is now complete!
This tutorial was tested by PamelaD and Evatexas. Thanks ladies!
If you are going to use this tutorial for stationery, cards or place the tutorial/tag on another site, I would appreciate you contacting me for permission, giving Arasimages credit for the original tutorial and if possible, a link back to my site. Thank you.
Copyright © Arasimages All Rights Reserved