

Waiting For Our Valentines
For an Italian, French, Dutch, Spanish and Danish translation, click on the flags.


For this tutorial you will need the materials in the zip file below.

Unzip the materials into a working folder you have created on your desktop named Waiting for our Valentines. Please duplicate and close original tubes. Place the Impasto Valentine Ladies.f1s file in your Alien Skin Snap Art/Settings folder. Place the Selection in your PSP/Selections folder. Check your files to see if in Andromeda plugin folder you have the 2202lt open .pfp file. If not, then Place the 2202lt open.pfp in your Andromeda -serie portable/Perspective-Presets/andromeda/02Full Canvas/22Side Walls folder. I have used the plugins Alien Skin Snap Art/Impasto, Andromeda/Perspective, and PSP effects in this tutorial. It is assumed you have a working knowledge of PSP to follow these directions.
Thanks go to tubers Charliegraph and LoriRhae for the lovely tubes used, and to B Conchi for the scrap kit items tube used in this tutorial.
This tutorial was written using PSPX7 but other versions may be used. To work this tutorial, it is assumed you have some working knowledge of Paint Shop Pro.
Use the heart below to mark your place along the way.

1. In Materials Palette, set Foreground to #e8ddcd, Background to #e0ab8c.
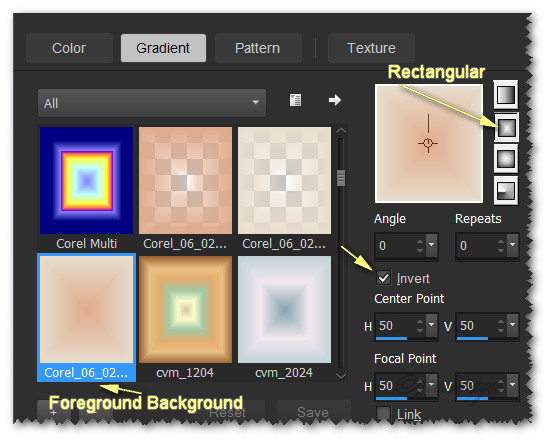
2. In Materials Palette, set to Gradient, Style Rectangular, Repeats 0, Angle 0, Invert checked. Center points: Horizontal 50/Vertical 50; Focal Points: Horizontal 50/Vertical 50. Link center and focal points unchecked.
3. New/New Image 950px by 600px. Flood fill with Gradient.
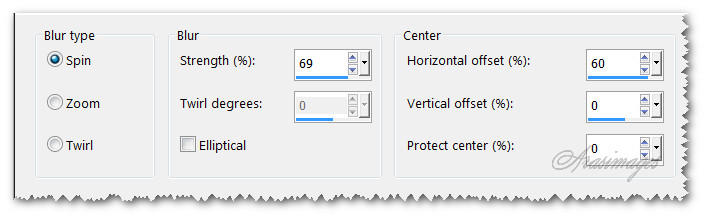
4. Adjust/Blur/Radial Blur.
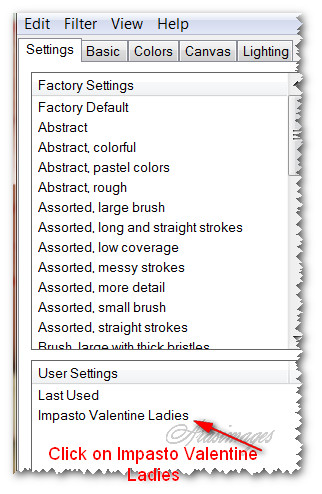
5. Effects/Alien Skin Snap Art/Impasto.
6. Open the scraprojo.pspimage. Copy the Trama 1 layer.
7. Layers/New Raster Layer.
8. Selections/Select All. Paste into Selection. Deselect.
9. Drop Opacity down to 72.
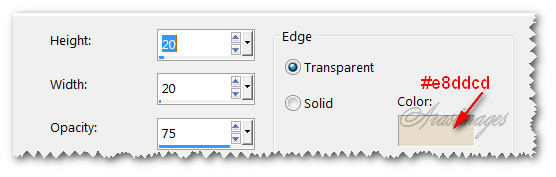
10. Effects/3D Effects/Buttonize.
11. Image/Resize/Resize by 86%/Resize all layers unchecked.
12. Effects/Edge Effects/Enhance.
13. Effects/3D Effects/Drop Shadow. Vertical -10, Horizontal -10, Opacity 50, Blur 32, color #000000.
14. Effects/3D Effects/Drop Shadow. Vertical 10, Horizontal 10, Opacity 50, Blur 32, color #000000.
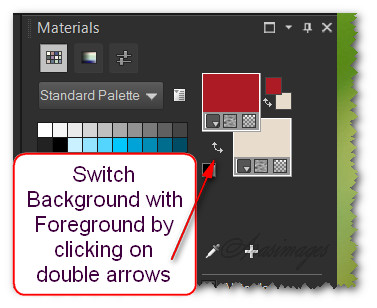
15. Change Background color to #ad1d24. Switch Foreground color with Background color using small double arrows.
16. Use the Pen tool, Line style set to Dotted_4, Width set to 2.00, color #ad1d24, left click/Apply around the valentine background layer top and down sides to create a border. Convert to Raster Layer. Merge/Merge Down.


17. Open Deco coeurs noel_@el.psp. Copy Raster 1/Paste as New Layer.
18. Move hearts to top of image and to the left a little.
19. Change Background color in Materials Palette to #e32028.
20. Using Color Changer, right click on hearts to change their color to deeper red.
21. Adjust/Sharpeness/Sharpen.
22. Effects/3D Effects/Drop Shadow. Vertical -10, Horizontal -10, Opacity 50, Blur 32, color #000000.
23. Layers/New Raster Layer.
24. Change the Foreground/Background colors and settings to original Gradient.
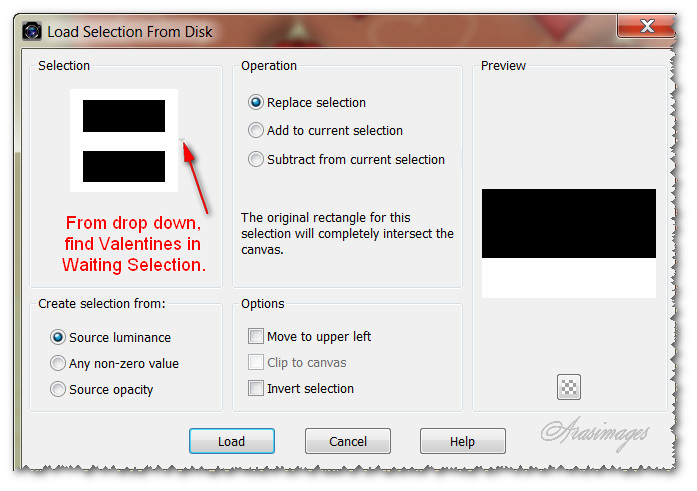
25. Selections/Load/Save Selection/Load Selection from Disk. Load.
26. Flood fill Selection with Gradient. Repeat Steps #4 and #5.
27. Effects/3D Effects/Buttonize. Use settings as in Step #10. Selections/Select None.
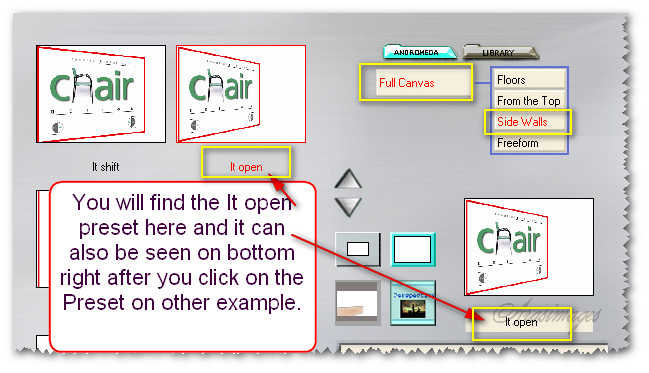
28. Effects/Andromeda/Preset. Click on the Preset at the top right to find your It open preset. Follow the instructions in the example below.

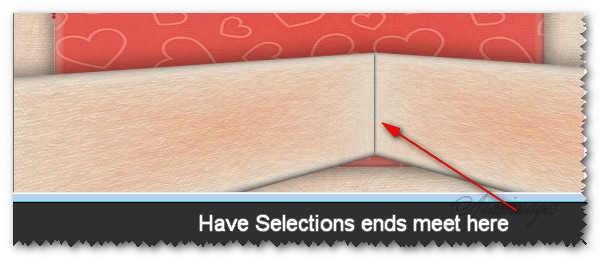
29. Duplicate. Image/Mirror (Mirror Horizontal in X7). Your selections are now crossing each other and you will have to move them. Move the Selecion on the right to the right a bit. Move Selection on the left to meet other Selection at their centers. See my finished image for placement and adjust accordingly. Merge/Merge Down.
30. Effects/3D Effects/Drop Shadow. Vertical -6, Horizontal 0, Opacity 50, Blur 53, color #000000.
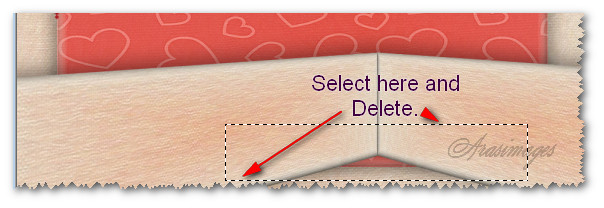
31. Highlight Raster 2 layer. Select the red heart background which is showing at the bottom where the selections meet. Delete. Deselect. Go back to the top layer to continue working.
32. Open ch-goldred-hearts2.pspimage. Copy the double hearts Raster 11. Paste as New Layer.
33. Place the double hearts to the right on the Selection in bottom right corner.
34. Effects/3D Effects/Drop Shadow. Vertical -10, Horizontal -10, Opacity 50, Blur 32, color #000000.
35. Adjust/Sharpness/Sharpen.
36. Again Copy Raster 11 double hearts/Paste as New Layer. Image/Mirror. Move to left side of image in bottom left corner, mirroring the double hearts on the right.
37. Repeat the drop shadow and sharpen as in Steps #34 and #35.
38. Open Dreaming of Love_LR_01_17_10.pspimage. Copy/Paste as New Layer.
39. Move the ladies so their arms are resting at the top of the Merged Selections layer.
40. Adjust/Sharpeness/Sharpen.
41. Change the Background color to #e32400. Right click on the ladies lips and nails with the Color Changer to make them more red.
42. Effects/3D Effects/Drop Shadow. Vertical -10, Horizontal -10, Opacity 50, Blur 40, color #000000.
43. Effects/3D Effects/Drop Shadow. Vertical 10, Horizontal 10, Opacity 50, Blur 40, color #000000.
44. Open scraprojo.pspimage. Copy Raster Layer 24. Paste as New Layer.
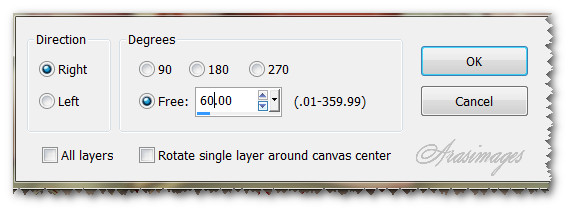
45. Image/Free Rotate. Rotate 60 degrees Right.
46. Place long red ribbon at the top of the image, about half way into the left upper corner. Duplicate and place it to the right matching the ribbon ends. Merge/Merge Down.
47. Duplicate. Image/Flip. Move to bottom of image.
48. Duplicate. Image/Free Rotate by 90 degrees Right. Place at the left side of image.
49. Duplicate. Image/Mirror. Place at right side of image.
50. Image/Add Borders/Add 3px border, Symmetric checked. Color #e8ddcd.
51. Switch Background and Foreground colors again using the small double arrows. Close off the top layer.
52. From the Tool bar, select the Text tool. Find the font Riesling, set at Bold. Set the Size to 200 for the letter "V". Type it out using Background color #ad1d24. Convert to Raster Layer.

53. Using the same font and color and other settings, change the size to 100. Type out "alentines". Convert to Raster Layer.
54. Using the same font, color and other settings, change the size to 48. Type out the words "Waiting for our". Convert to Raster Layer.
55. Using the move tool, move the words into place as I have done in my finished image.
56. Sign your name or leave your watermark if you wish and save as a .jpg or .png file.
This tutorial was tested by PamelaD and Evatexas. Thanks ladies!
If you are going to use this tutorial for stationery, cards or place the tutorial/tag on another site, I would appreciate you contacting me for permission, giving Arasimages credit for the original tutorial and if possible, a link back to my site. Thank you.
Copyright © Arasimages All Rights Reserved