
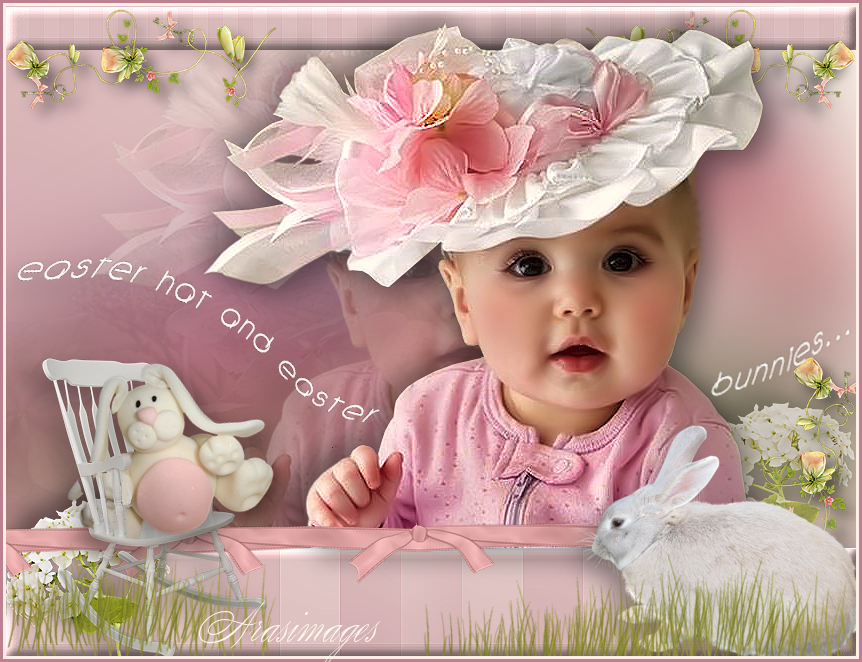
Easter Bonnet
For a Spanish, Italian, Dutch, Danish, Russian and German translation, click on the flags.


For this tutorial you will need the materials in the zip file below.

Unzip the materials into a working folder you have created on your desktop named Easter Bonnet. Please duplicate and close original tubes. I have used the plugin AP_02 [Distorts/Blurs]/Blur-Bars in this tutorial. It is assumed you have a working knowledge of PSP to follow these directions. I have used PSPX6 for this tutorial but other versions may be used.
Thanks go to JHanna and to the unknown tubers for their lovely tubes used in this tutorial.
Use the bunny to mark your place along the way.

1. In Materials Palette, set Foreground to #fffcef, Background to #bc808c.
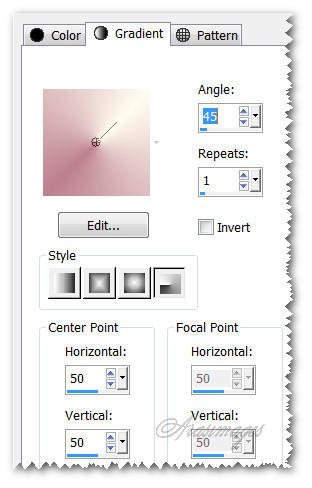
2. In Materials Palette, set to Gradient, Foreground/Background, Style Radial, Repeats 1, Angle 45, Invert unchecked. Center points: Horizontal 50/Vertical 50; Focal Points: Horizontal 50/Vertical 50. Link center and focal points unchecked.
3. New/New Image 850px by 650px. Flood fill with Gradient.
4. Adjust/Blur/Gaussian Blur. Radius set to 53.
5. Open JHanna_789 tube.png. Eliminate watermark. Copy/Paste as New Layer.
6. Move to upper right side of image.
7. Paste again as New Layer. Move to lower left side of image.
8. Merge/Merge Down.
9. Adjust/Blur/Gaussian Blur. Radius set to 53.
10. Paste again as New Layer. Move to lower left side of image.
11. Drop Opacity down to 9. Merge/Merge Down.
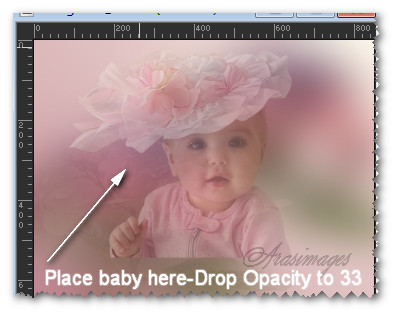
12. Open JHanna_750 tube.pspimage. Copy/Paste as New Layer.
13. Move baby to left center of image. Drop Opacity down to 33.
14. Layers/New Raster Layer. Using Selections tool set to Rectangle, Add (Shift), Feather 0, draw out rectangle below baby to bottom and sides. Start at about 550px at left side and draw across and pull down to create the selection.
15. Flood fill with Gradient. Adjust/Blur/Gaussian Blur. Radial set to 53.
16. Effects/AP 02 [Distorts-Blurs]/Blurs-Bars.

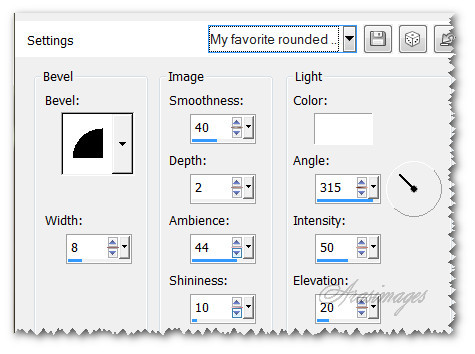
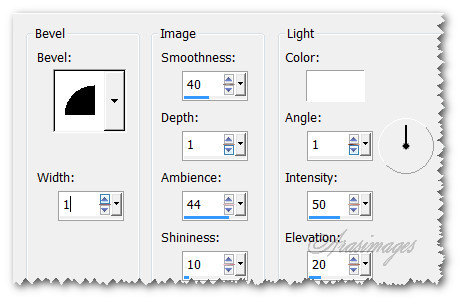
17. Effects/3D Effects/Inner Bevel.
18. Effects/Edge Effects/Enhance. Selections/Select None.
19. Effects/3D Effects/Drop Shadow. Vertical -6, Horizontal 0, Opacity 35, Blur 35, color #000000.
20. Layers/New Raster Layer.
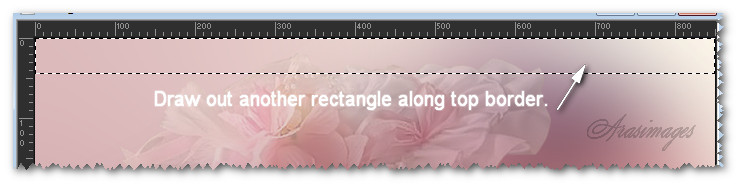
21. Using same settings for Selections tool as in Step #14, draw a narrow rectangle at the top of image.
22. Flood fill with Gradient. Adjust/Blur/Gaussian Blur. Radial set to 53.
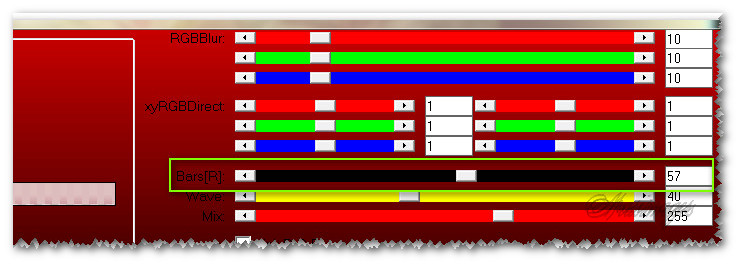
23. Effects/AP 02 [Distorts-Blurs]/Blurs-Bars. Change the number of bars to 57.
24. Effects/3D Effects/Inner Bevel.
25. Effects/Edge Effects/Enhance. Selections/Select None.
26. Open 0_9ac60_71aa921f_M.png of vines. Copy/Paste as New Layer.
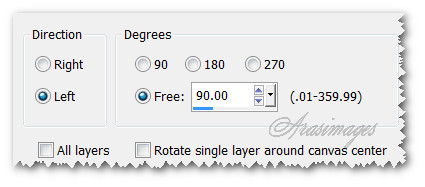
27. Image/Free Rotate Left by 90 degrees.
28. Place at top right corner.
29. Effects/3D Effects/Drop Shadow. Vertical 9, Horizontal -9, Opacity 50, Blur 20, color #000000.
30. Adjust/Sharpeness/Sharpen.
31. Duplicate. Image/Mirror.
32. Duplicate. Image/Free Rotate Left by 90 degrees. Image/Flip. Place in bottom right corner.
33. Open 0_9ac59_7279da0f_M.png hydrangea flower. Copy/Paste as New Layer.
34. Effects/3D Effects/Drop Shadow. Vertical -11, Horizontal -11, Opacity 40, Blur 30, color #000000.
35. Adjust/Sharpness/Sharpen. Lower Opacity to 60.36. Move into bottom right corner over the bottom rectangle. Pull below floral vine layer.
37. Duplicate. Set to 100 Opacity. Move to left corner a little lower than the first one is placed. Return to top layer to continue.
38. Open JHanna_750 tube.pspimage of baby. Copy/Paste as New Layer.
39. Move baby to the right and to rest at the top of bottom rectangle.
40. Effects/3D Effects/Drop Shadow. Vertical -11, Horizontal -11, Opacity 40, Blur 30, color #000000.
41. Effects/3D Effects/Drop Shadow. Vertical 11, Horizontal 11, Opacity 35, Blur 35, color #000000.
42. Adjust/Sharpness/Sharpen.
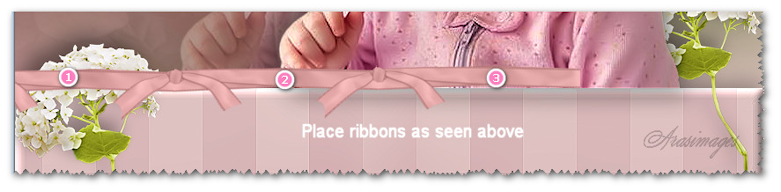
43. Open 0_bab41_e0303f48_M.png of ribbon. Copy/Paste as New Layer.
44. Duplicate twice. Place ribbons in a row starting with left side first, then middle, then right side. Match up ribbon ends using up/down arrows for accuracy.
45. Merge/Merge Down twice.
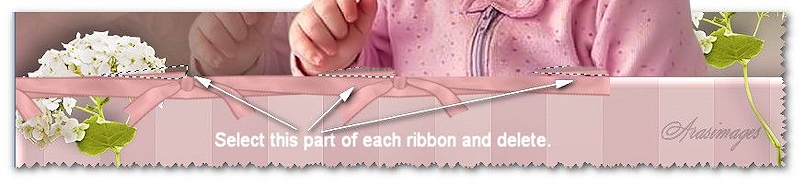
46. Using Selections tool set as seen below, select and delete. Selections/Select None.

47. Adjust/Sharpness/Sharpen.
48. Open 0_bcea9_c909f00_L.png of rabbit. Copy/Paste as New Layer. Image/Mirror.
49. Image/Resize/Resize by 65%/Resize all layers unchecked.
50. Effects/3D Effects/Drop Shadow. Vertical 11, Horizontal -11, Opacity 35, Blur 35, color #000000.
51. Place in bottom right corner.
52. Open 0_bab55_dfb58aba_M.png of rocking chair. Copy/Paste as New Layer.
53. Adjust/Sharpness/Sharpen.
54. Effects/3D Effects/Drop Shadow. Vertical -11, Horizontal 11, Opacity 35, Blur 35, color #000000. Place in bottom left corner.
55. Open 0_be31d_3e57a342_M.png of grass. Copy/Paste as New Layer.
56. Move grass into bottom left corner.
57. Duplicate. Move grass to bottom right corner over rabbit.
58. Duplicate. Move grass toward center along the bottom right border, lower than the other grass.
59. Open 0_bab4f_5c38beec_M.png of bunny. Copy/Paste as New Layer.
60. Image/Resize/Resize by 70%/Resize all layers unchecked.
61. Adjust/Sharpness/Sharpen. Place bunny inside the rocking chair.
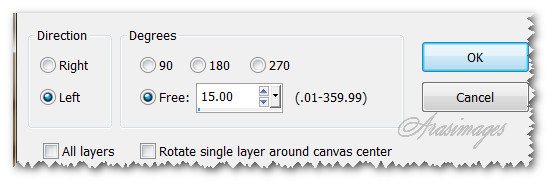
62. Image/Free Rotate/Rotate 15 degrees to Left, turning the bunny in the rocking chair.
63. Using the Eraser tool, bunny layer highlighted, lower the Opacity down to about 56. Carefully erase the bunny from the chair's vertical posts and arm. Set the Opacity back to 100 to check if you have all erasing done as you wish. Leave it at 100 when finished erasing.

64. Effects/3D Effects/Drop Shadow. Vertical 11, Horizontal 11, Opacity 35, Blur 35, color #000000.
65. Open EasterHatAndEasterBuniesText.png. Copy/Paste as New Layer.
66. Place across center of image.
67. Effects/3D Effects/Drop Shadow. Vertical -11, Horizontal 11, Opacity 35, Blur 35, color #000000.
68. Image/Add Borders/Add 3px border, Symmetric checked, color #fffcef.
69. Image/Add Borders/Add 3px border, Symmetric checked, color #bc808c.
70. Sign your name or leave your watermark if you wish and save as a .jpg or .png file.This tutorial was tested by PamelaD and Evatexas. Thanks ladies!
If you are going to use this tutorial for stationery, cards or place the tutorial/tag on another site, I would appreciate you contacting me for permission, giving Arasimages credit for the original tutorial and if possible, a link back to my site. Thank you.
Copyright © Arasimages All Rights Reserved